Picked myself up after yesterdays annoyance with the wheels, and thought i'd get a few things done off the list. Got the 2 handlebar switches threaded in to the bars (not as easy as it looks) and grub screwed both the inverted levers in place. I think the bung for the levers is some mega strong stainless stuff -buggered up 3 drills and took ages to thread! 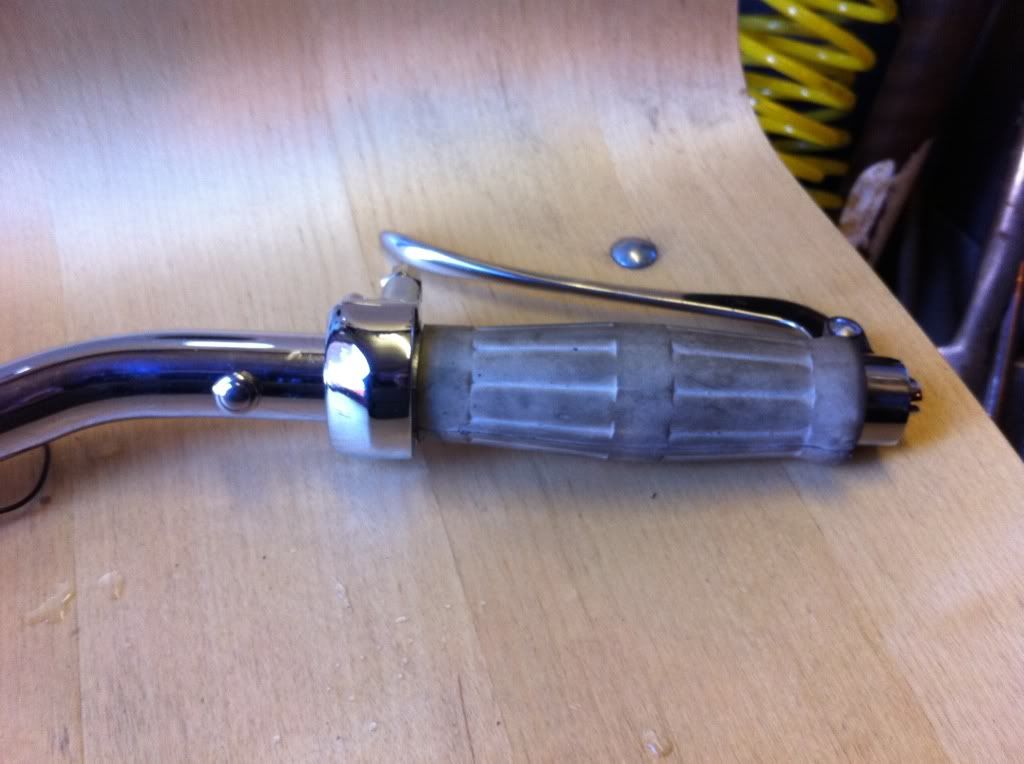 picked up a different pop riveter in Newark last time - so got the holders for the thermic breakers in place. also had to mount a switch for the speedo (i think it it the trip switch) in the fakey oil tank. 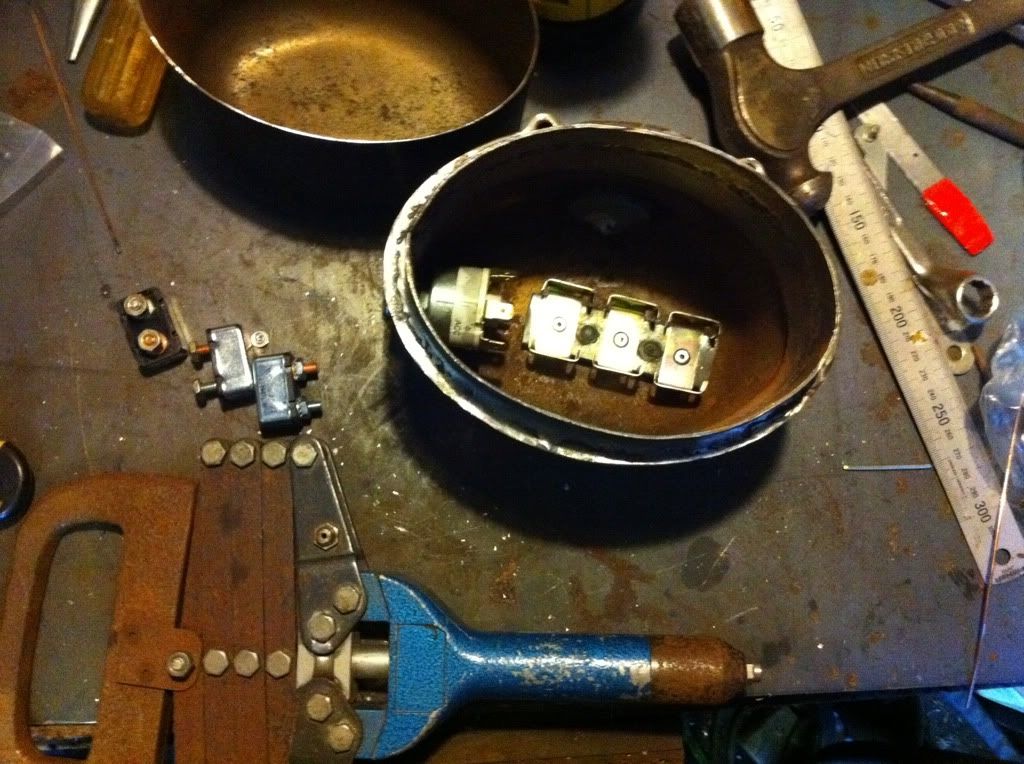 the list is getting smaller thank god! i'll be using a 21 front wheel now - and it will be a drum - so no faffing about with the cable operated hydraulic master cylinder nonsence! |
Saturday, 26 February 2011
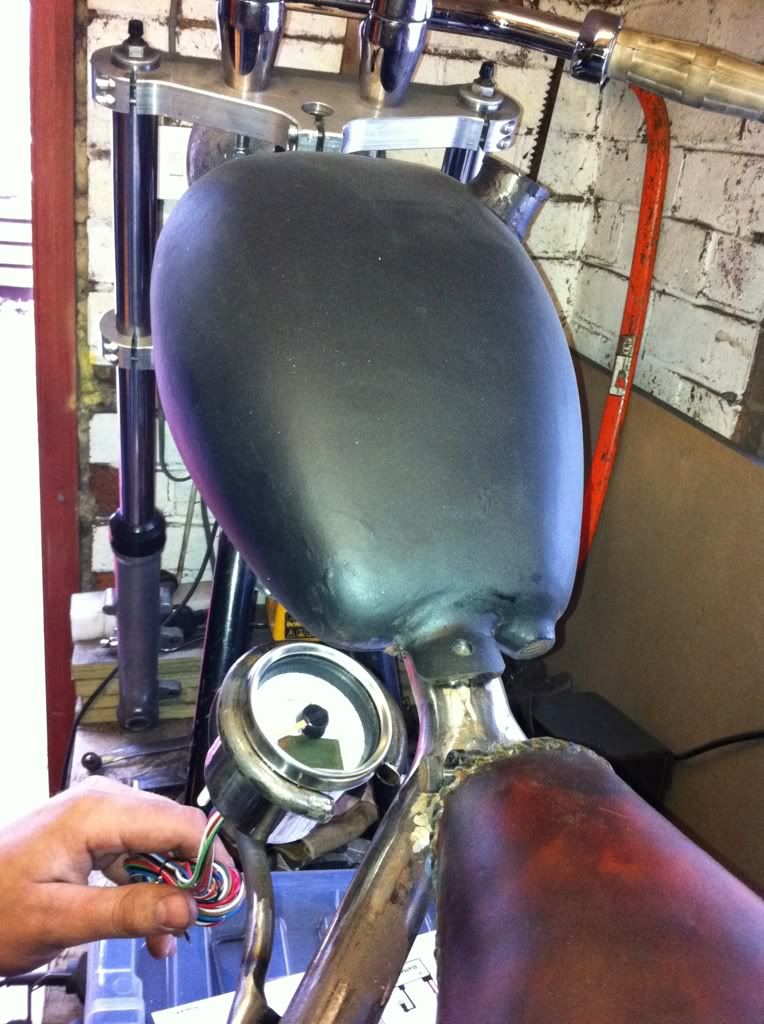
Bars and Tank
Friday, 25 February 2011
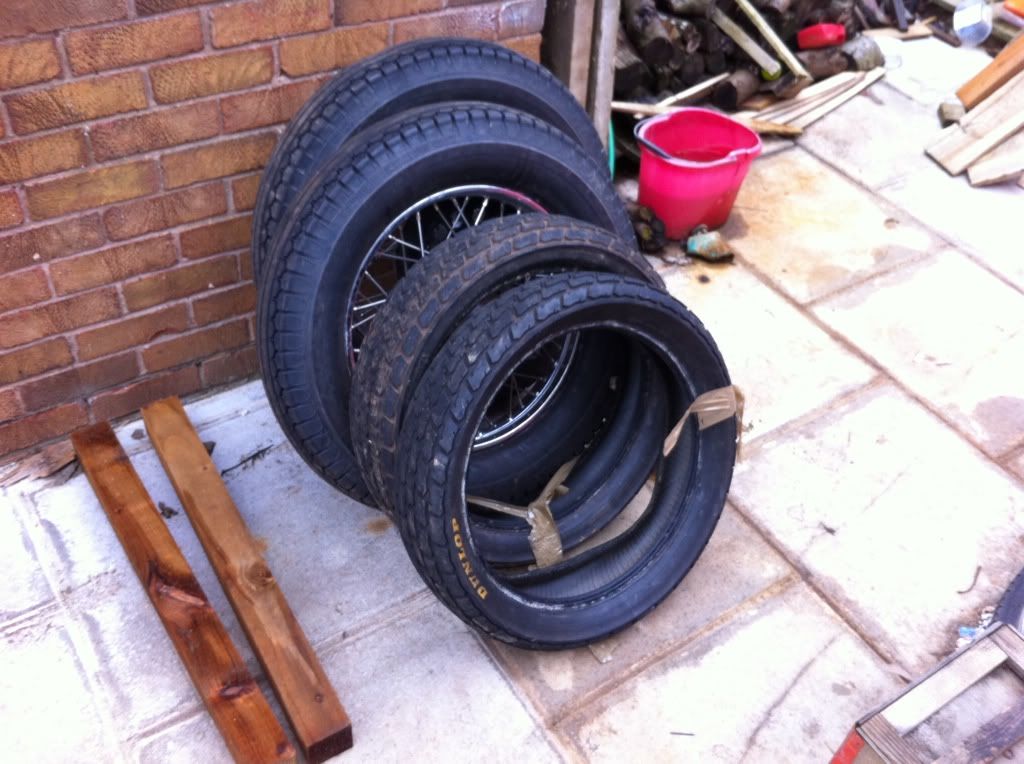
Mock Up - New Tyres
Couldn't resist trying out the new tyres on the bike to see how its looking:-
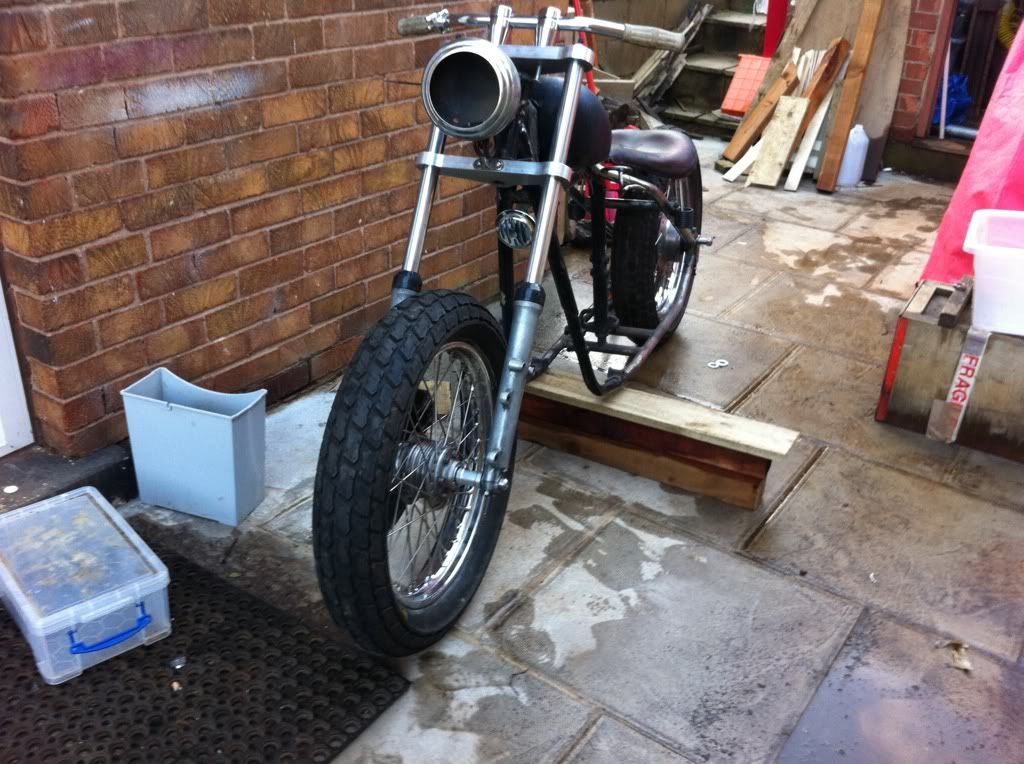
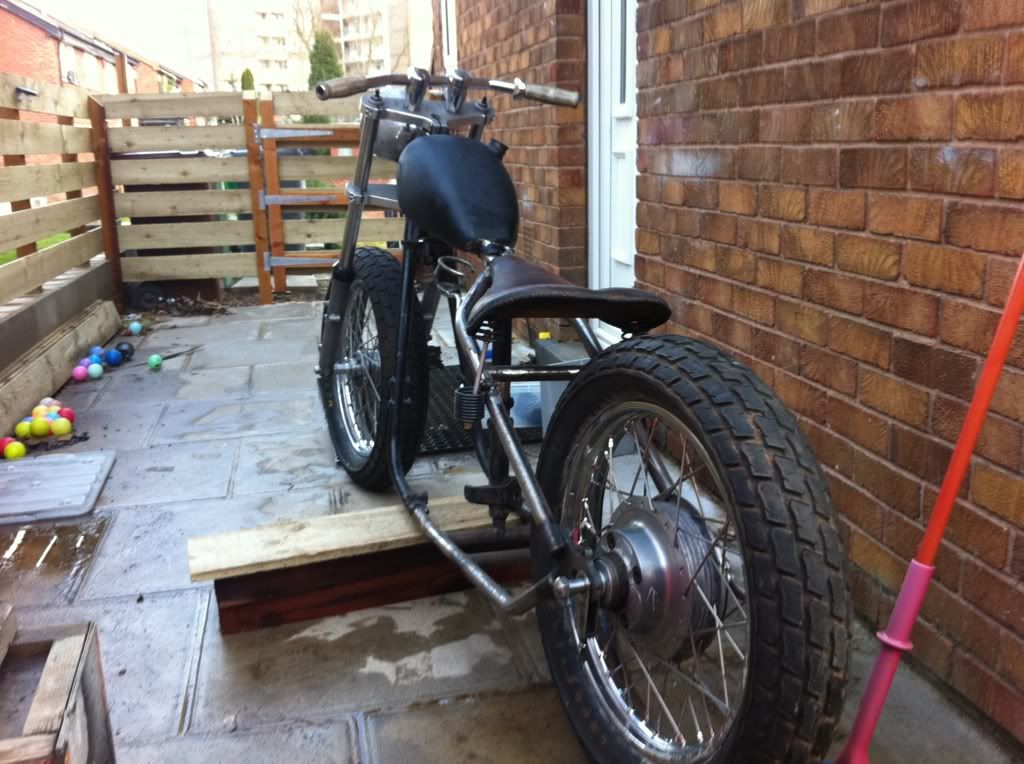

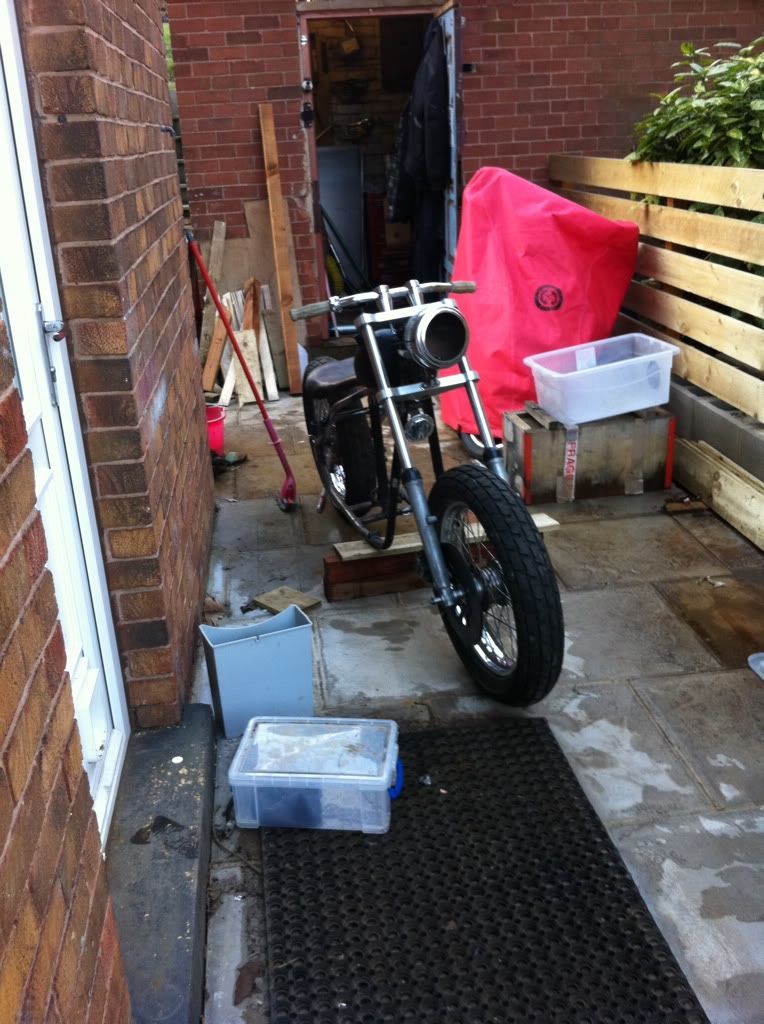
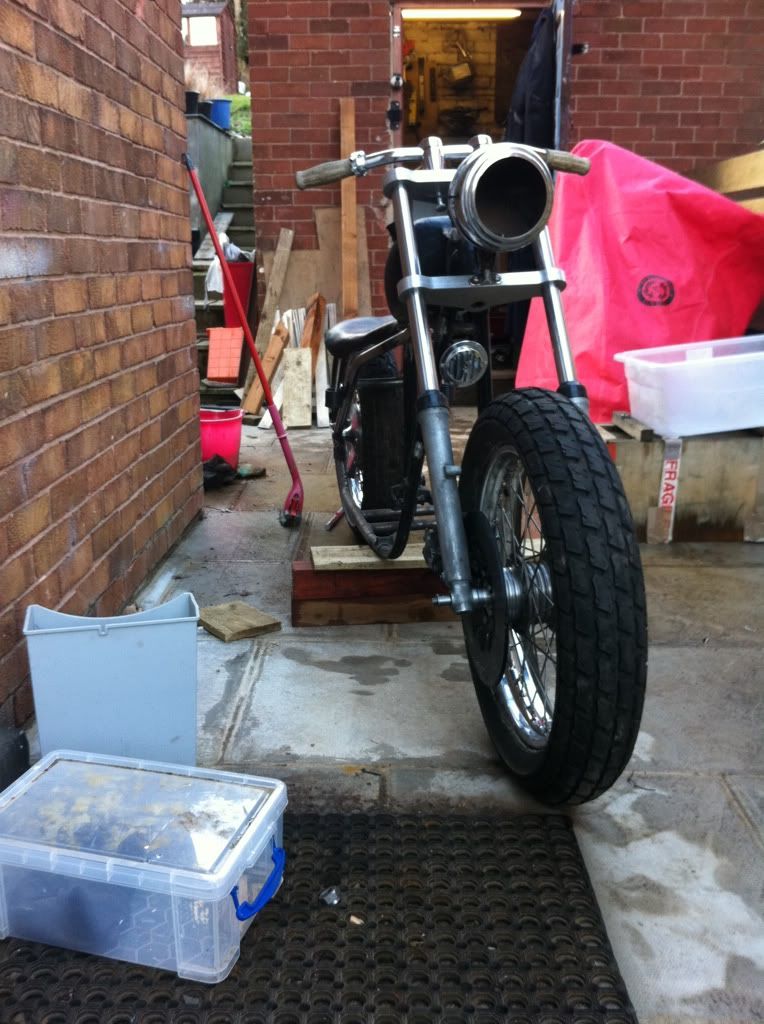
mixed emotions about it - the front end is all gangly looking now - the problem being if I lower the forks the bottom frame rail is gonna look wrong. as it sits the forks look too wide and the fork legs too skinny.....
I guess ive gotta stick with it for now and get her on the road
mixed emotions about it - the front end is all gangly looking now - the problem being if I lower the forks the bottom frame rail is gonna look wrong. as it sits the forks look too wide and the fork legs too skinny.....
I guess ive gotta stick with it for now and get her on the road
Thursday, 24 February 2011
Wednesday, 23 February 2011
New XS650 forum - www.customxs650.com
There is a new forum on the block - www.customxs650.com
As the XS650 grows in status as will its following - we have put together a new dedicated custom xs650 forum to discuss all things XS650!
feel free to come and join us!
As the XS650 grows in status as will its following - we have put together a new dedicated custom xs650 forum to discuss all things XS650!
feel free to come and join us!
Monday, 21 February 2011
Bushes
Done a bit of a parts swap for machining and little bob has offered to machine me up some bushes and a holder for my forward controls 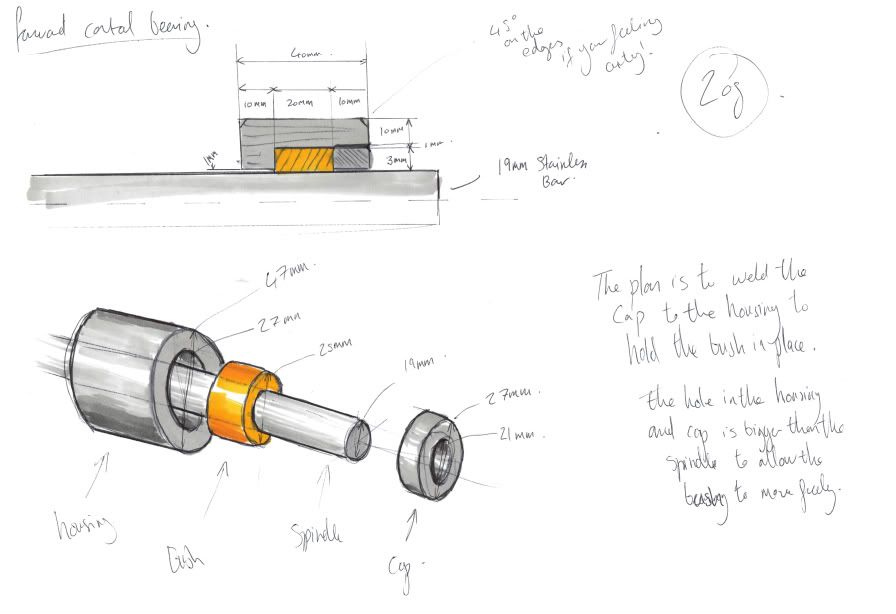 |
Sunday, 20 February 2011
Shift Pedal
Only had a couple of hours on the bike today - and it was bloody cold out there too!
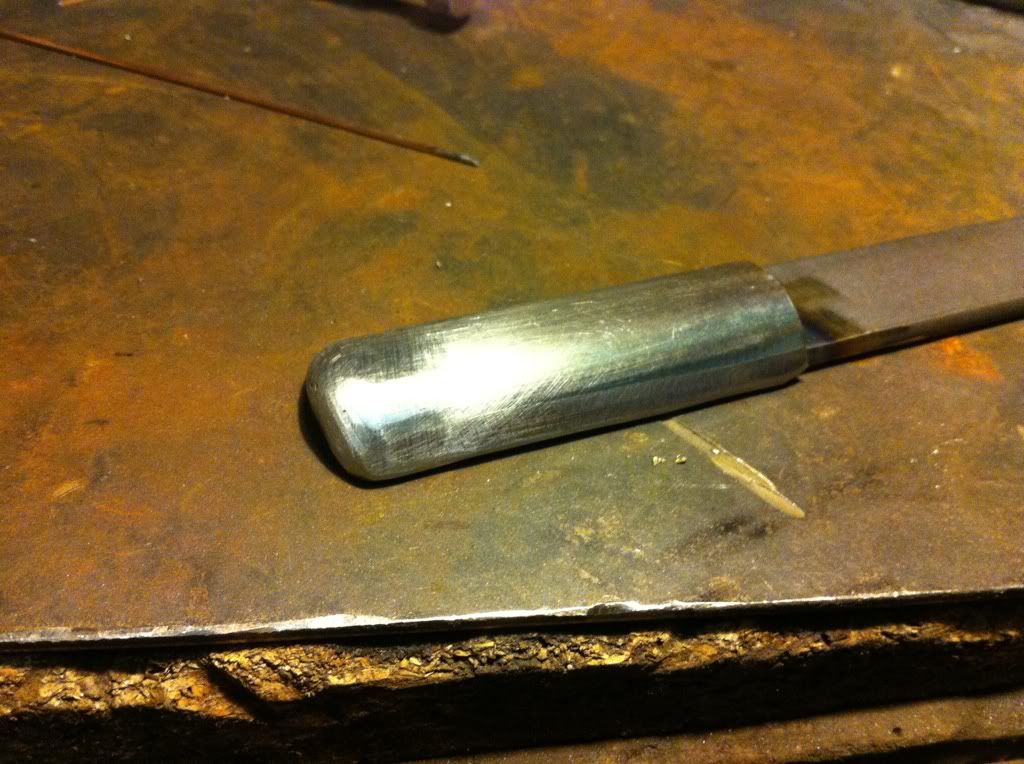
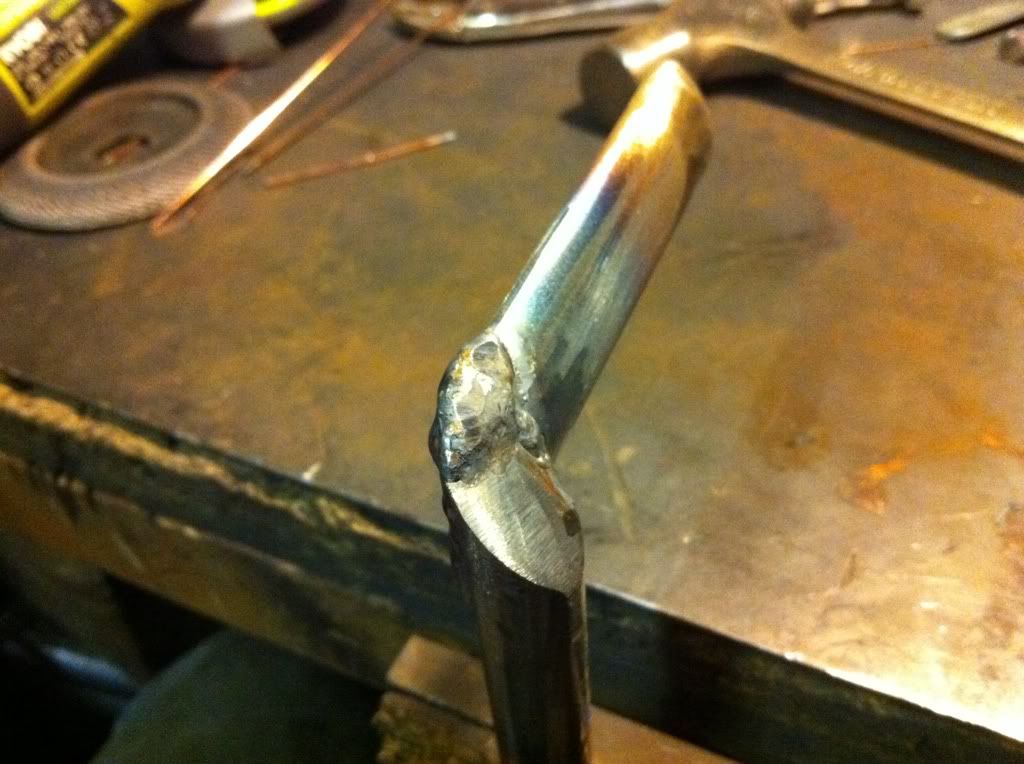
Needed to make the shifter side of the forward controls so set to work on some bits of scrap I had lying around...
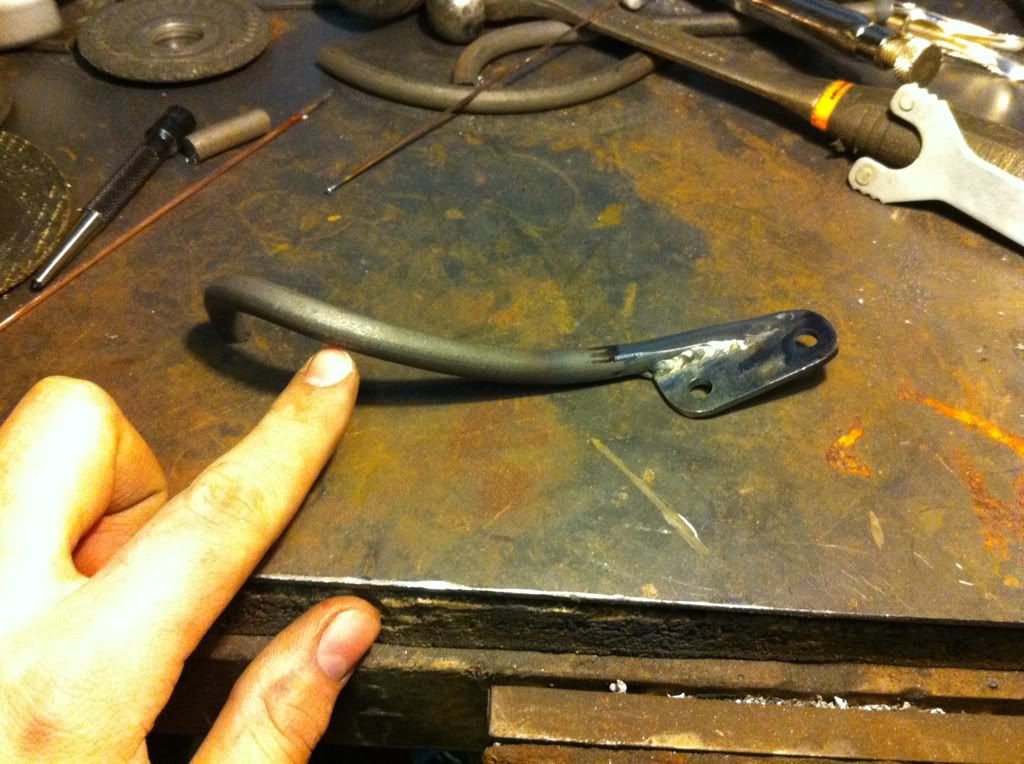
Wanted a bit of depth to the lever - and intend to do a bit more etching on the top face..
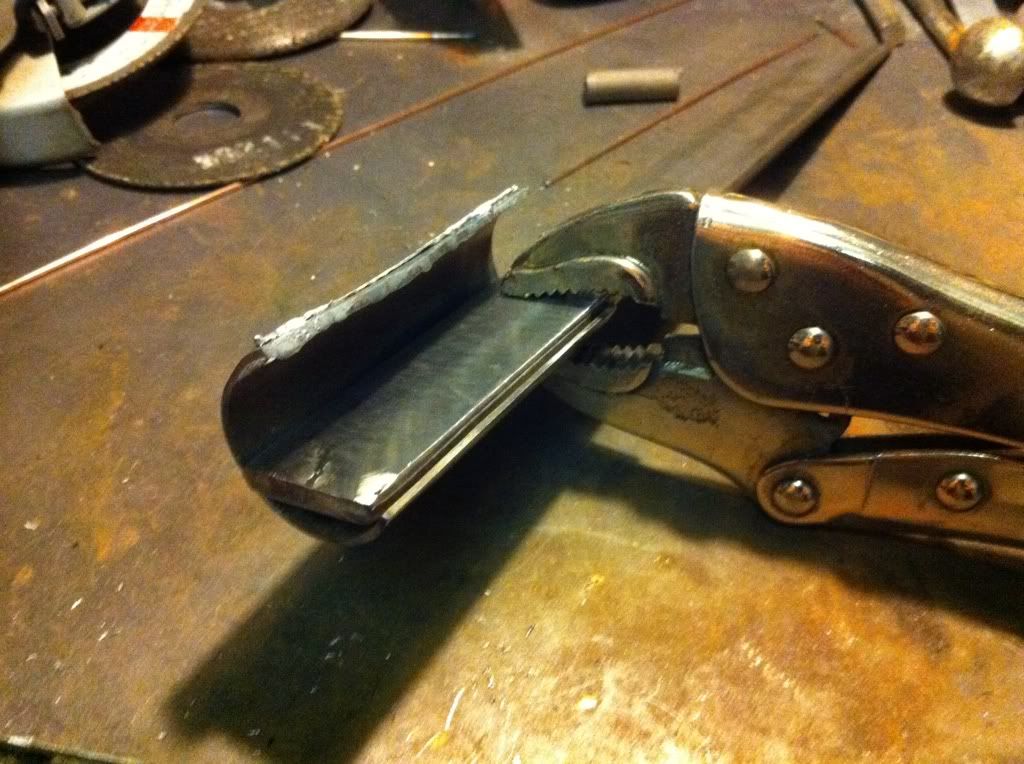
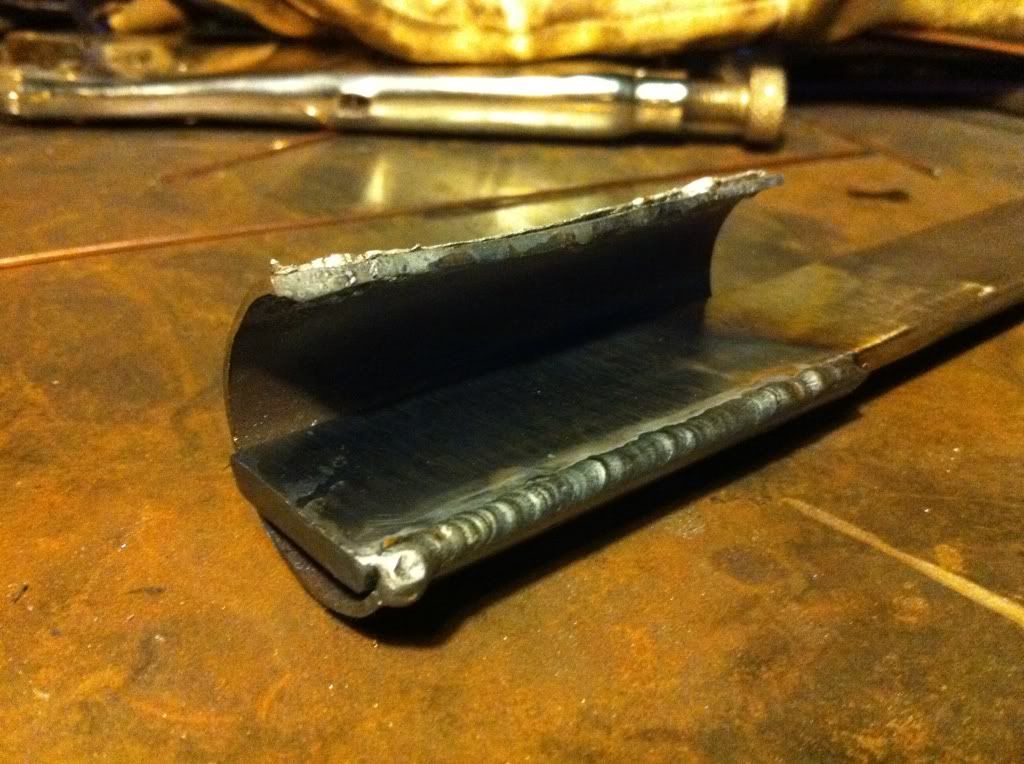
good bit of welding practice!
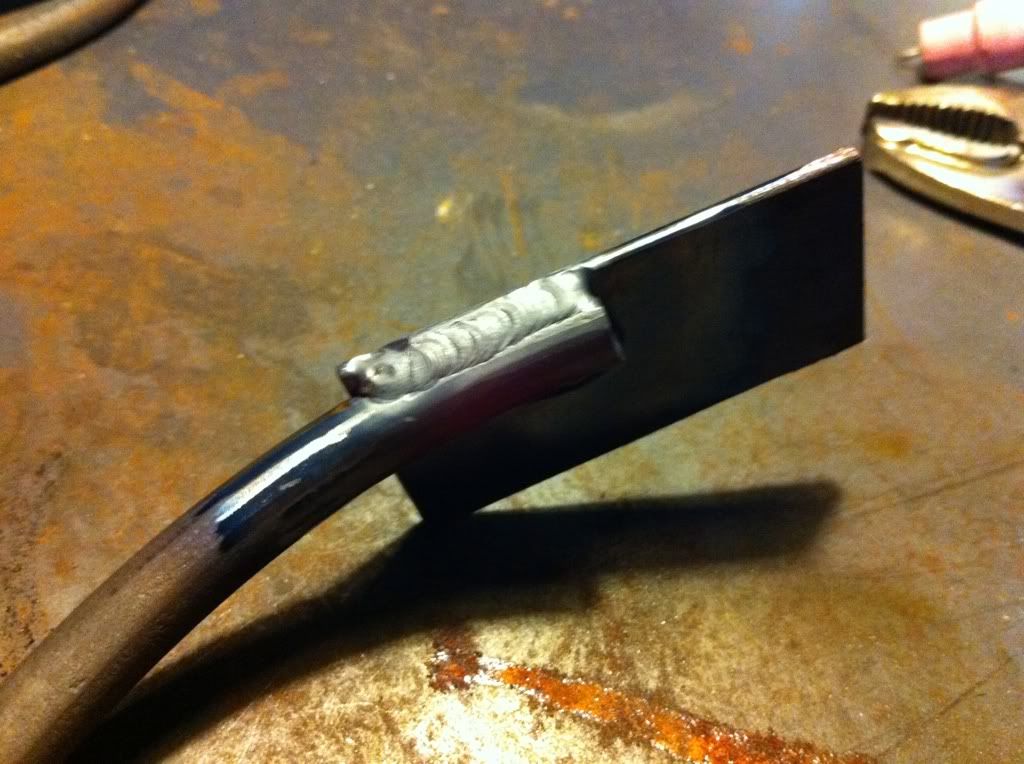
could be a bit rough and ready with cutting it all out as the edges are to be welded
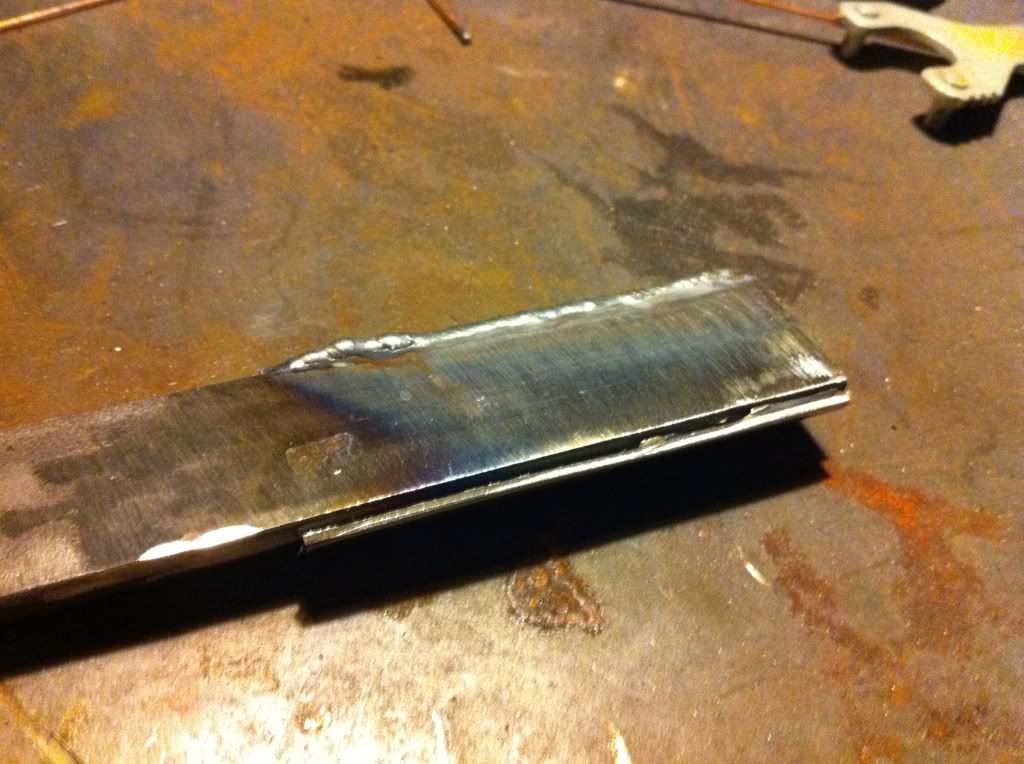

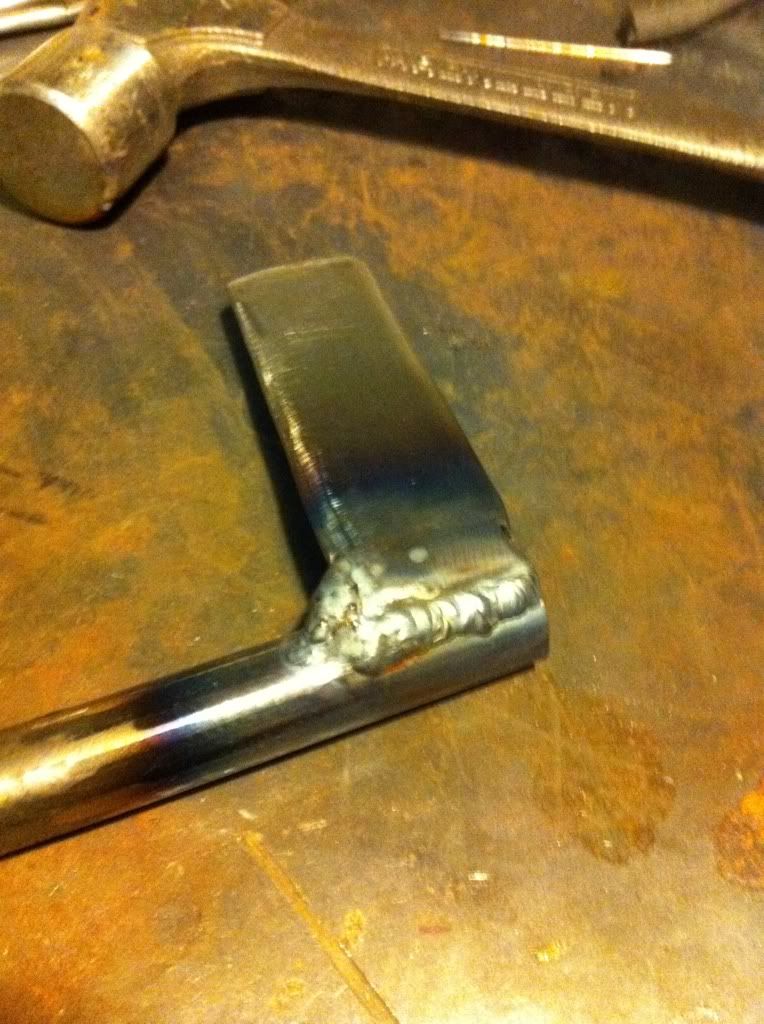
then I capped off the end with some filler rod
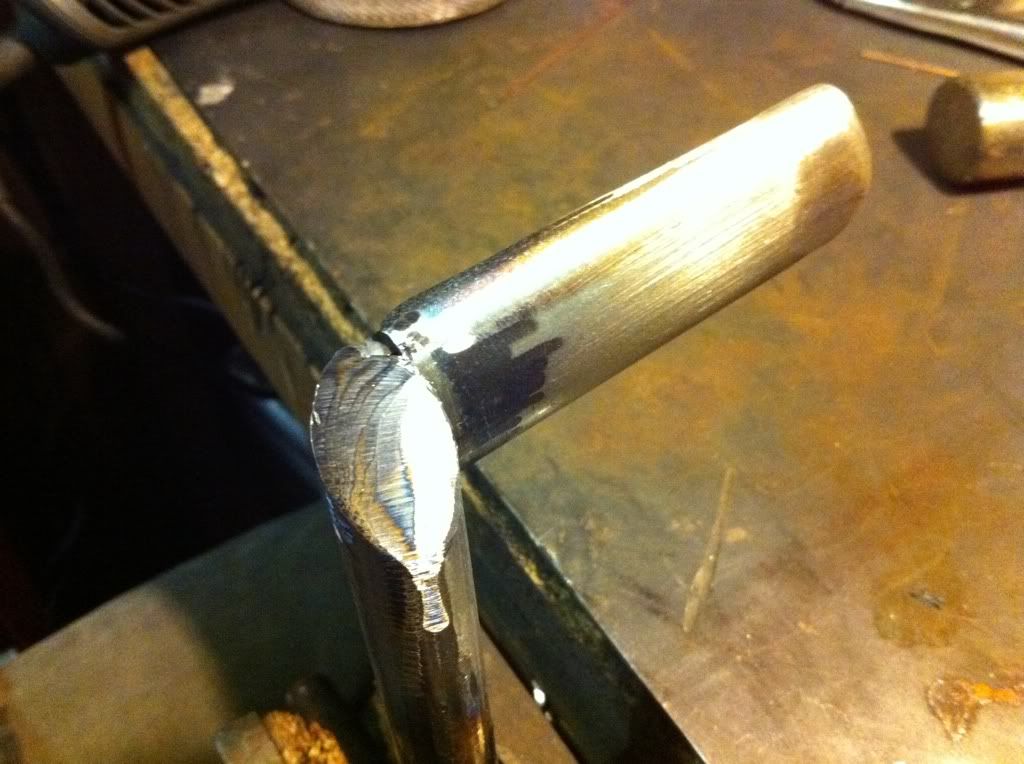
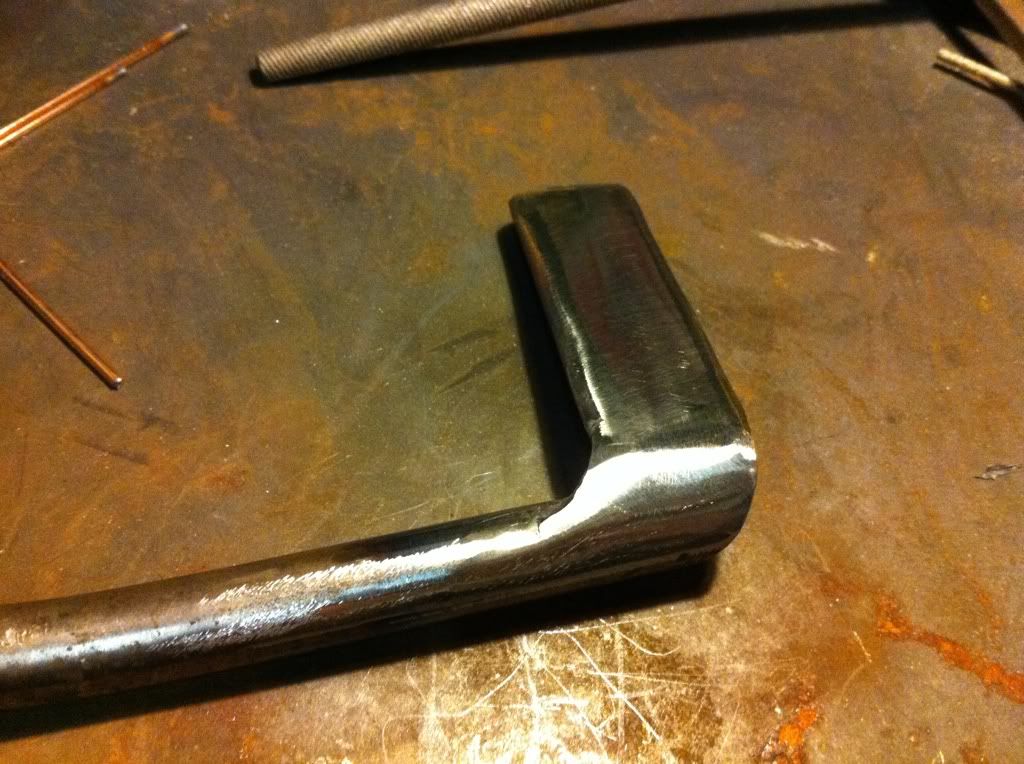
and tidied it all up with a flapper disc
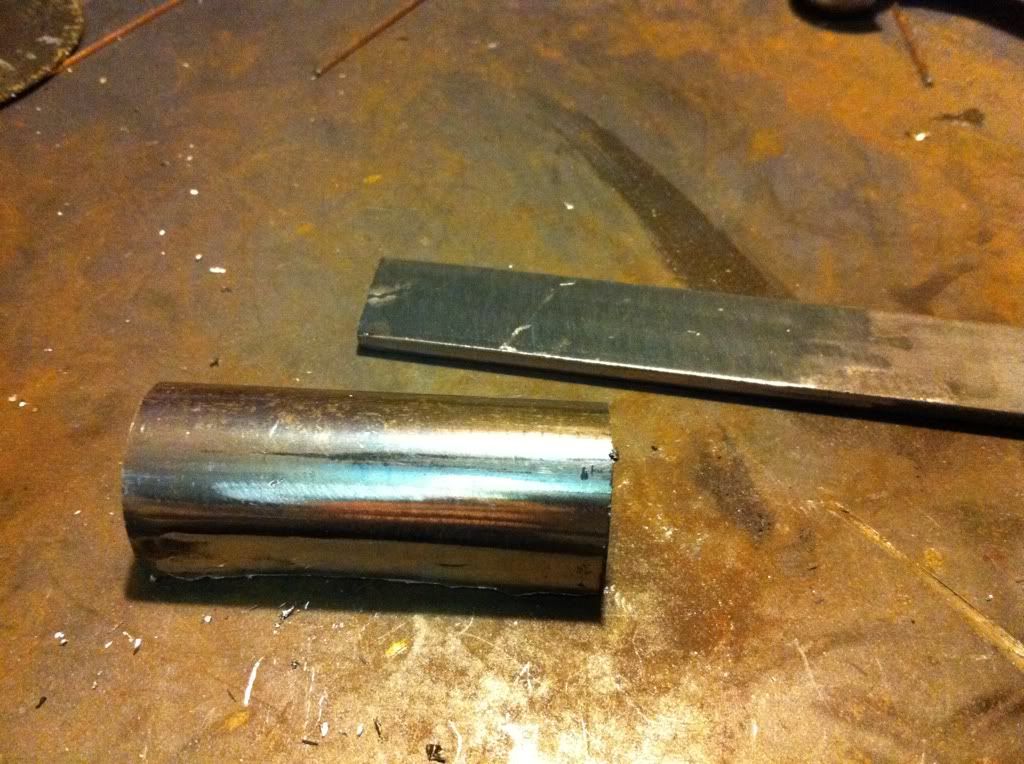
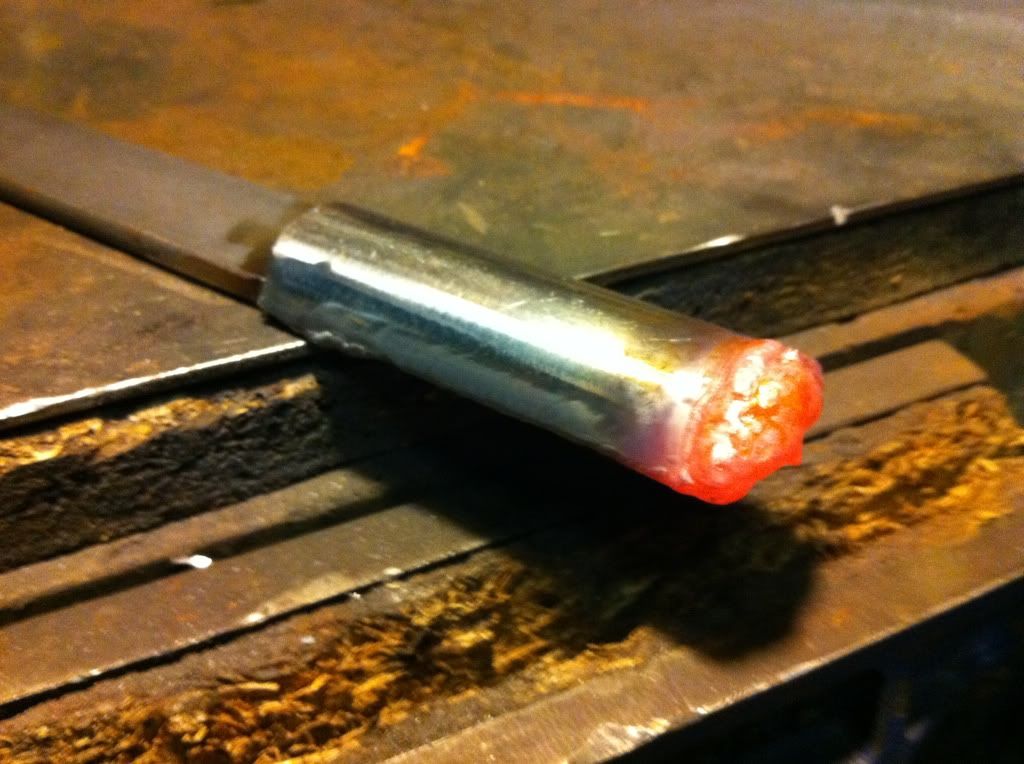
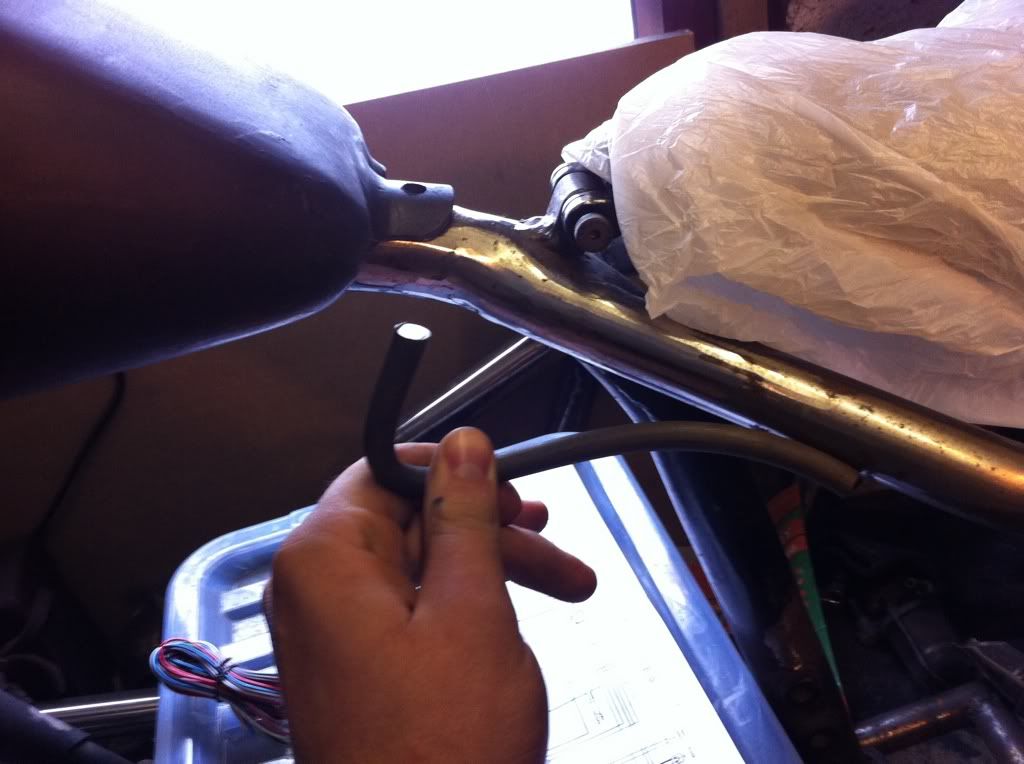
I got some bar and bent it in the street by sticking it down a manhole cover and using a bit of brute force (nicked that idea from Toddy!)
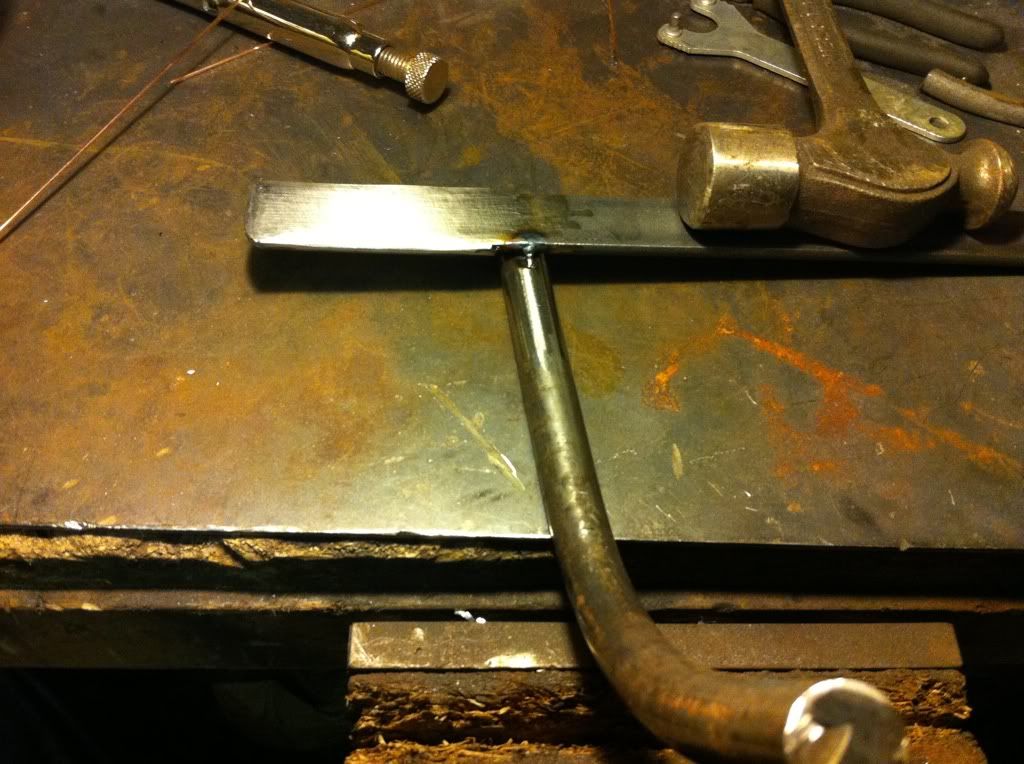
the rest was just filling and shaping with a flapper disc and a round file. I could really do with a more powerful compressor so I can use a grinding burr
I'll let the pictures do the talking...

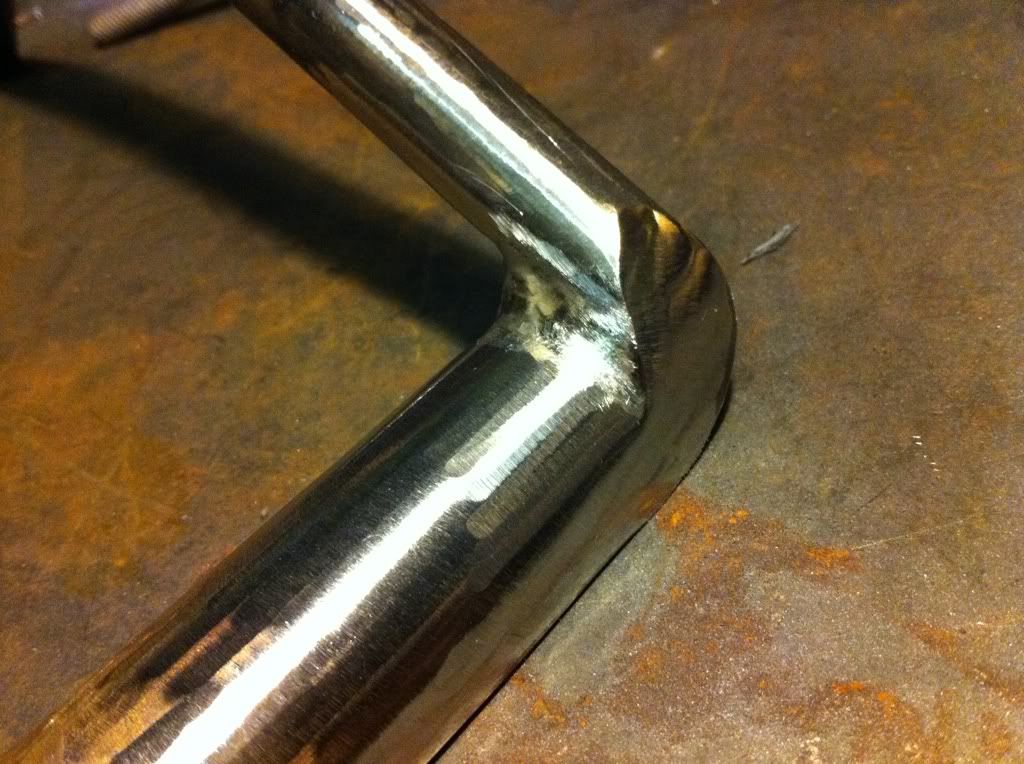
as for etching the face, haven't got round to that yet, but I'm thinking of putting the gear set-up on there rather than just shift....
i.e. 1-N-2-3-4-5
Thoughts?
Needed to make the shifter side of the forward controls so set to work on some bits of scrap I had lying around...
Wanted a bit of depth to the lever - and intend to do a bit more etching on the top face..
good bit of welding practice!
could be a bit rough and ready with cutting it all out as the edges are to be welded
then I capped off the end with some filler rod
and tidied it all up with a flapper disc
I got some bar and bent it in the street by sticking it down a manhole cover and using a bit of brute force (nicked that idea from Toddy!)
the rest was just filling and shaping with a flapper disc and a round file. I could really do with a more powerful compressor so I can use a grinding burr
I'll let the pictures do the talking...
as for etching the face, haven't got round to that yet, but I'm thinking of putting the gear set-up on there rather than just shift....
i.e. 1-N-2-3-4-5
Thoughts?
Saturday, 19 February 2011
Speedo Mount
Today's task - Speedo Mount.
Decided to drop the ammeter, and go for a "crotch mount"
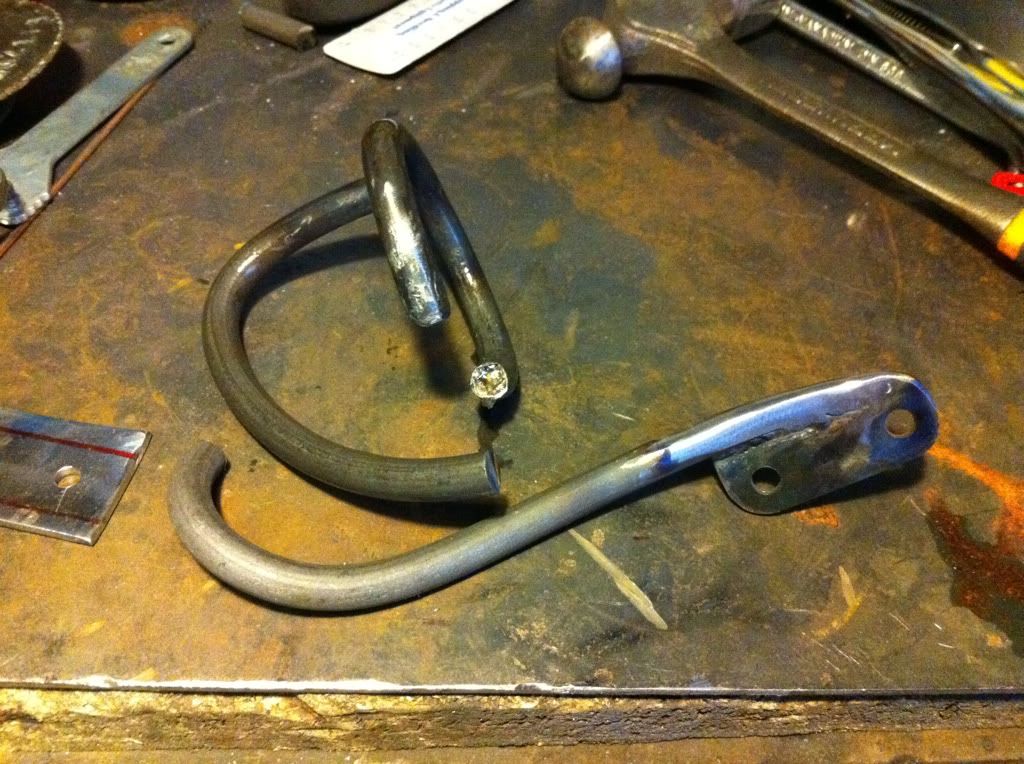
Bent up some 10mm bar to make an arm to hold it in place
Welded on a plate to allow it to be bolted to the frame:-
Then a bit of extra weld to allow for some shape to be added - you can see the different directions of the curves in this shot:-
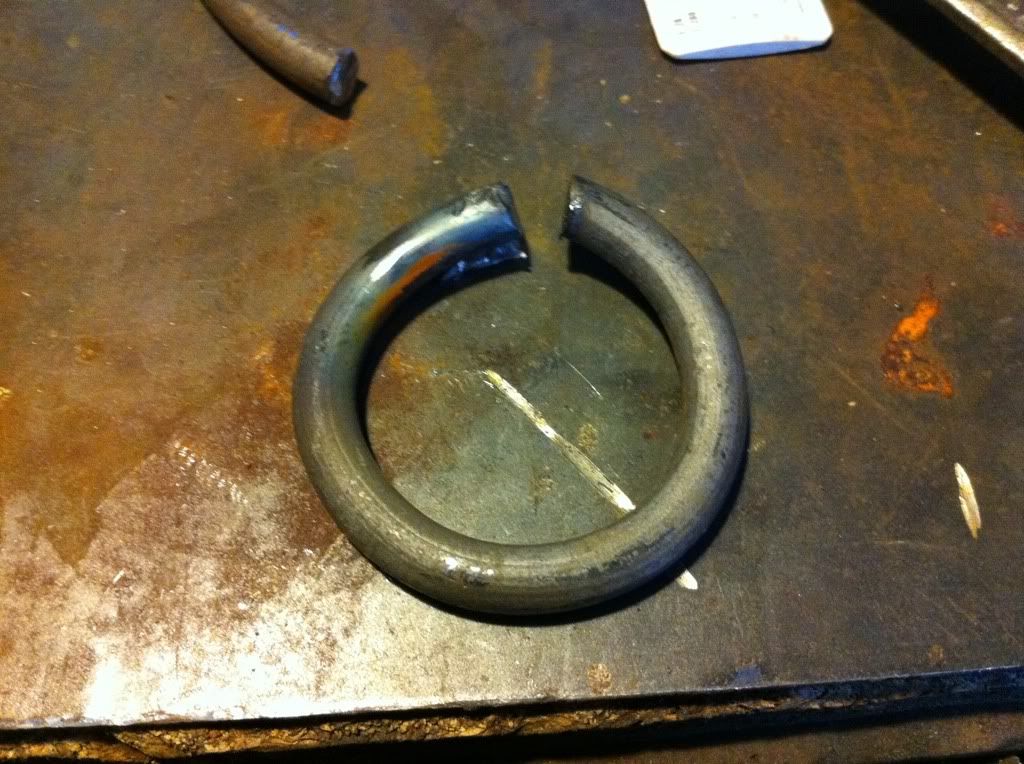
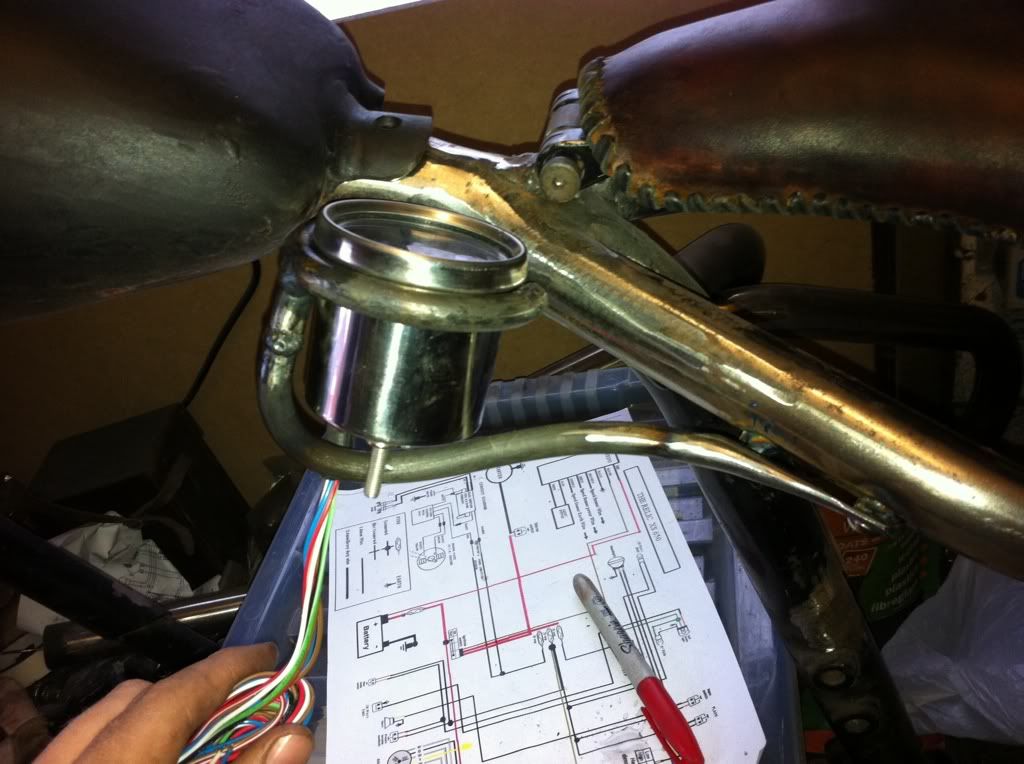
I decided that i wanted a ring around the rim of the speedo, not having a roller that does round, I had to improvise by welding the bar to some tube to bend it round...
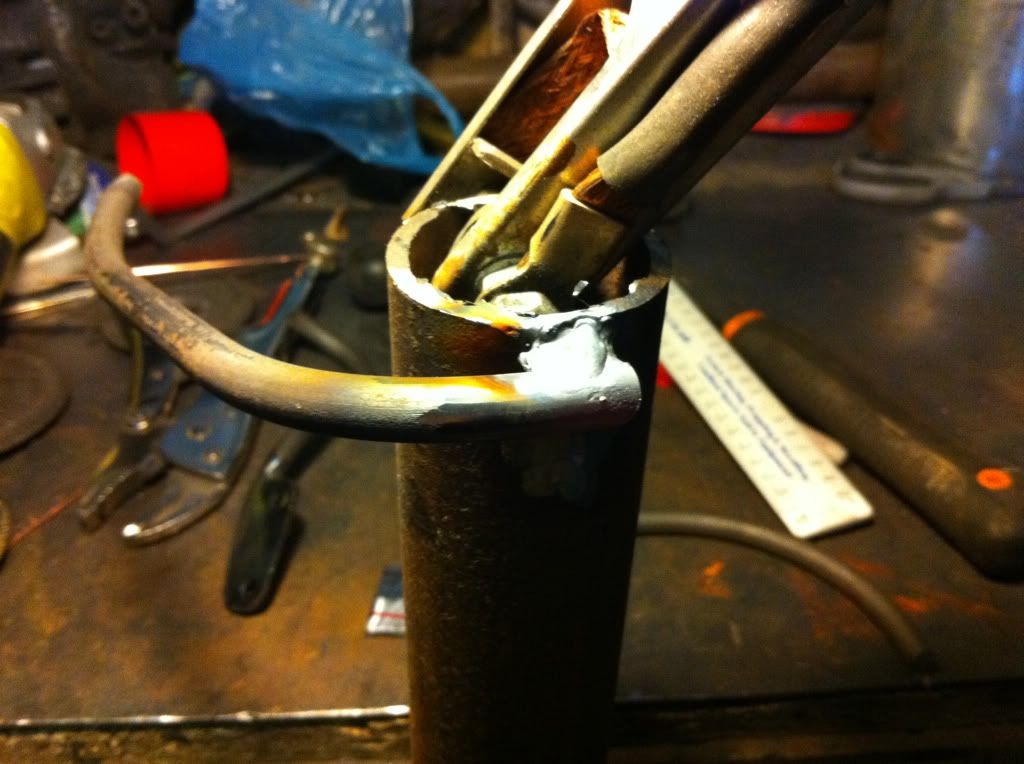
This is as close as I could get it by bending it - the metal wanted to spring back

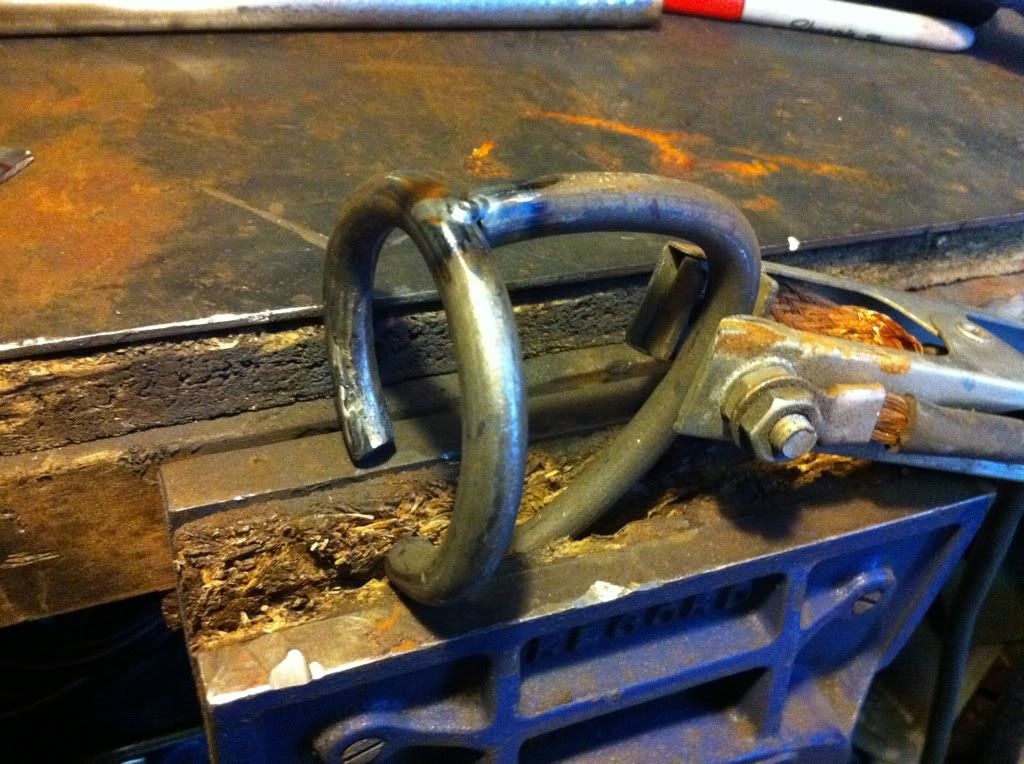
I just resorted to tightening it in the bar in the vice...

Got it somewhere near round
Then made an arm for the back
There would need to be some trimming to get the 2 elements to match
Bolted the arm on to the frame (after welding in some threaded lugs
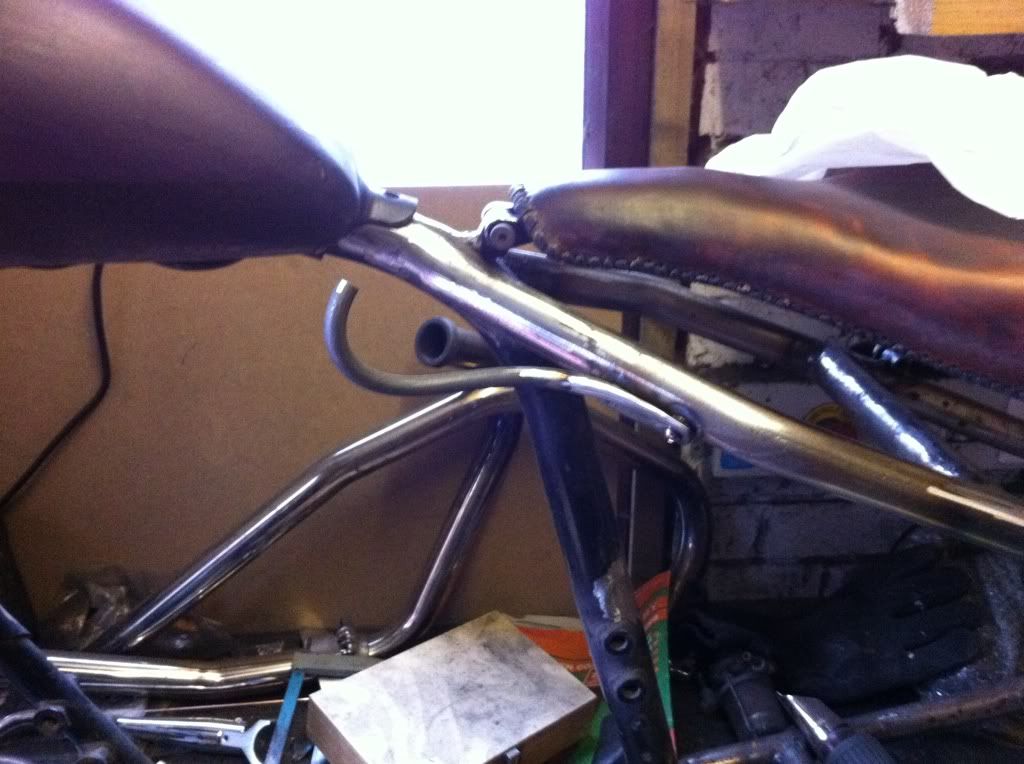
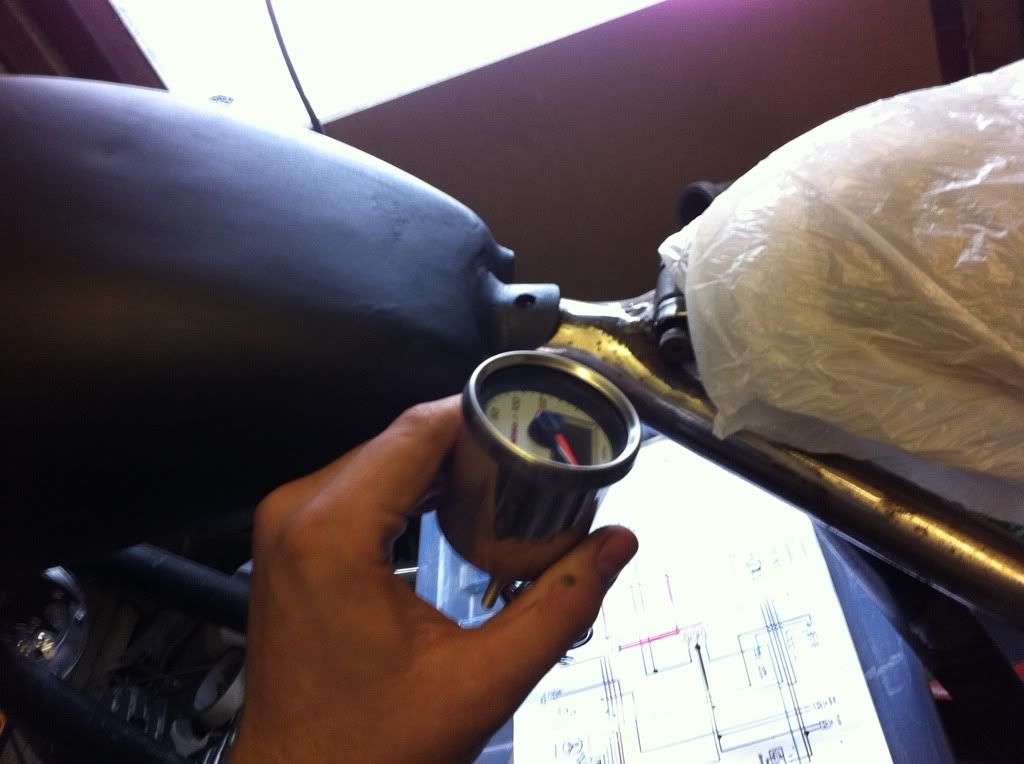
Then cut and welded on the top section...
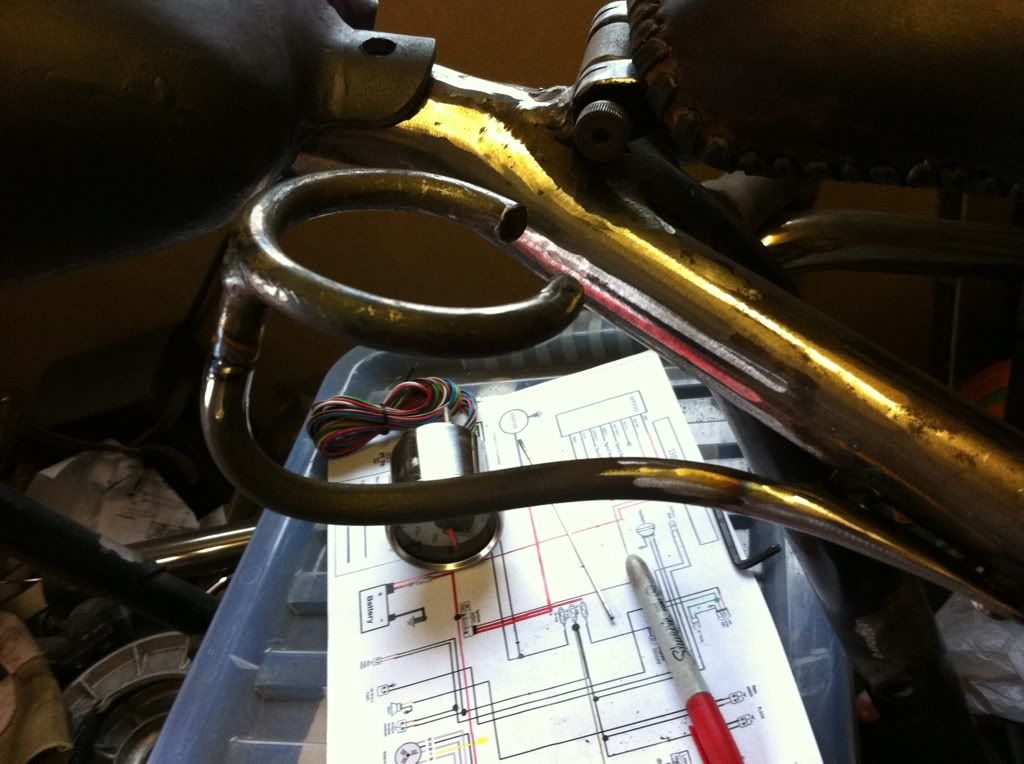
And with the Speedo in situ...
I need to make a small plate for the back to allow it to be screwed in place, but pleased with the outcome!
Decided to drop the ammeter, and go for a "crotch mount"
Bent up some 10mm bar to make an arm to hold it in place
Welded on a plate to allow it to be bolted to the frame:-
Then a bit of extra weld to allow for some shape to be added - you can see the different directions of the curves in this shot:-
I decided that i wanted a ring around the rim of the speedo, not having a roller that does round, I had to improvise by welding the bar to some tube to bend it round...
This is as close as I could get it by bending it - the metal wanted to spring back
I just resorted to tightening it in the bar in the vice...
Got it somewhere near round
Then made an arm for the back
There would need to be some trimming to get the 2 elements to match
Bolted the arm on to the frame (after welding in some threaded lugs
Then cut and welded on the top section...
And with the Speedo in situ...
I need to make a small plate for the back to allow it to be screwed in place, but pleased with the outcome!
Friday, 18 February 2011
Not so Big Wheeler
| ||||
The Pasty Test
One of the lads over on Dirty Bobbers has recently reset his account, to which I launched an investigation to see if it was an imposter....
Well Jib just past the Pasty test! Postie just arrived with a parcel for me - the nicest steak pasty every in the world!
HAHAHAHAHAHAHAHAHAHAHAHAHAHAHA!
that's class Jib - your an absolute star mate!

and so you all know - it most definitely was the nicest pasty ever in the world! (I'd be such a fat fooker if I lived near you guys!)
Cheers mate!
Well Jib just past the Pasty test! Postie just arrived with a parcel for me - the nicest steak pasty every in the world!
HAHAHAHAHAHAHAHAHAHAHAHAHAHAHA!
that's class Jib - your an absolute star mate!
and so you all know - it most definitely was the nicest pasty ever in the world! (I'd be such a fat fooker if I lived near you guys!)
Cheers mate!
Thursday, 17 February 2011
Let There Be Light!!!!
Been away the past couple of days, and nothing done on the bike - so when I got back from Brizzol this evening I set myself the task of doing the numberplate lights.
The first effort was a bit slap dash - I know that its not gonna be seen, but it looked a right dogs dinner.
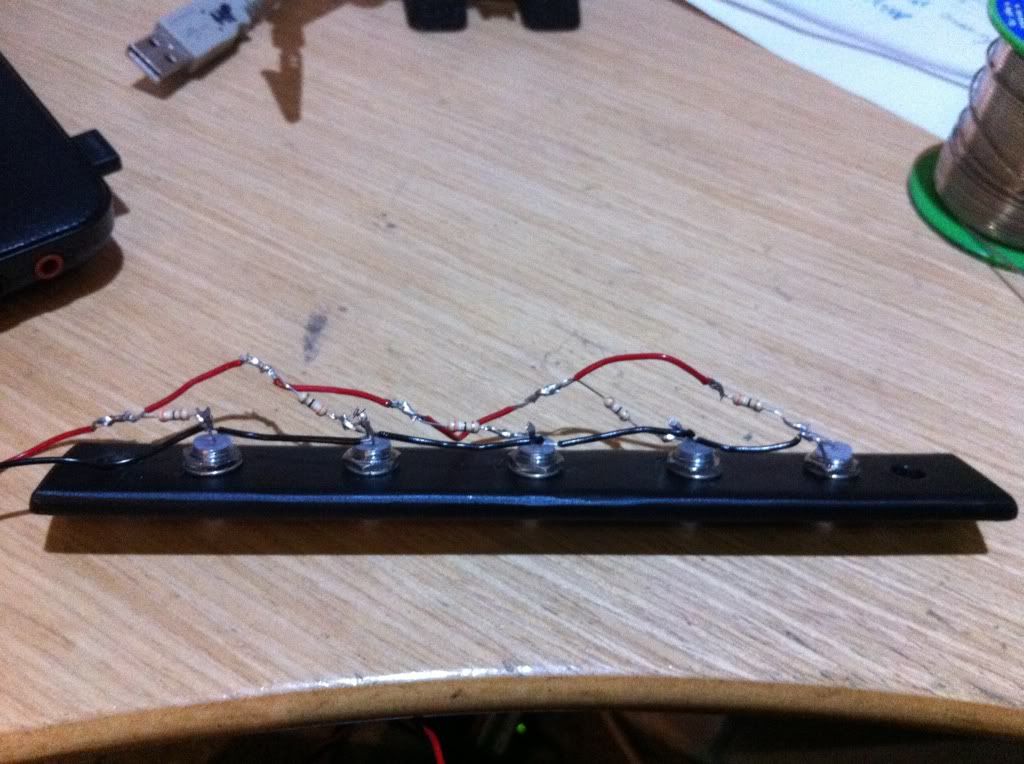
It worked really well - although as if by fate my cat rubbed up against the power pack and knocked it up to 20 Volts (cheers Freya!) which fried the LED's!
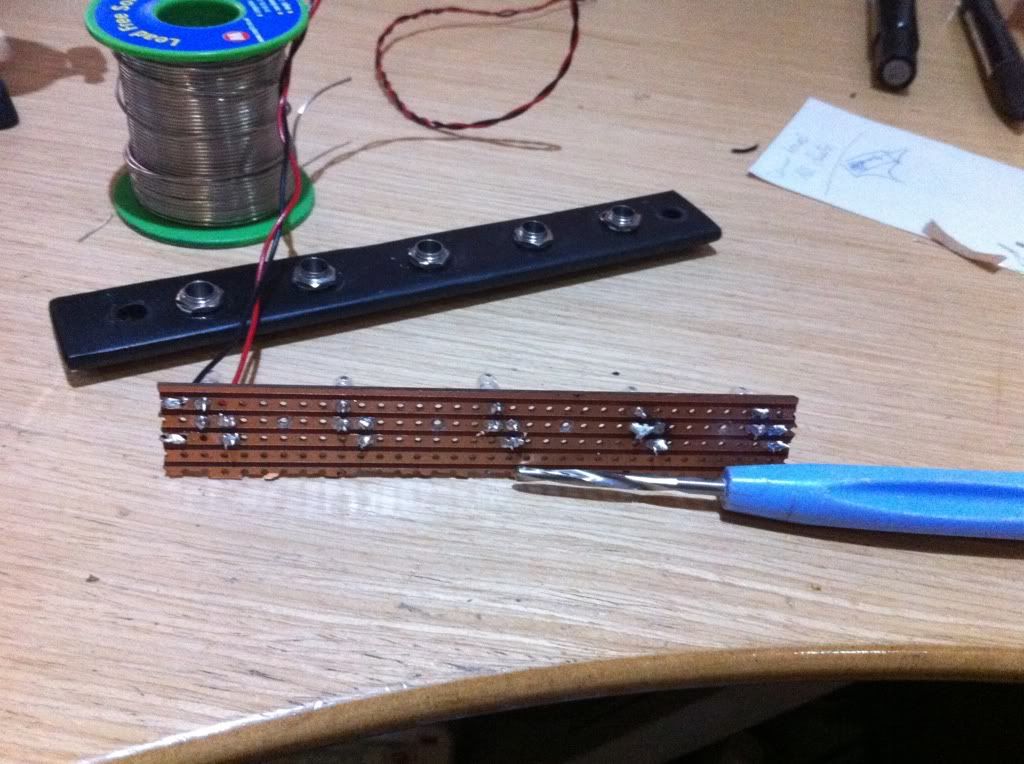
Then it dawned on me that i had some wiring strip board stuff that I bought a couple of years ago, so i cut it all up and started again:-
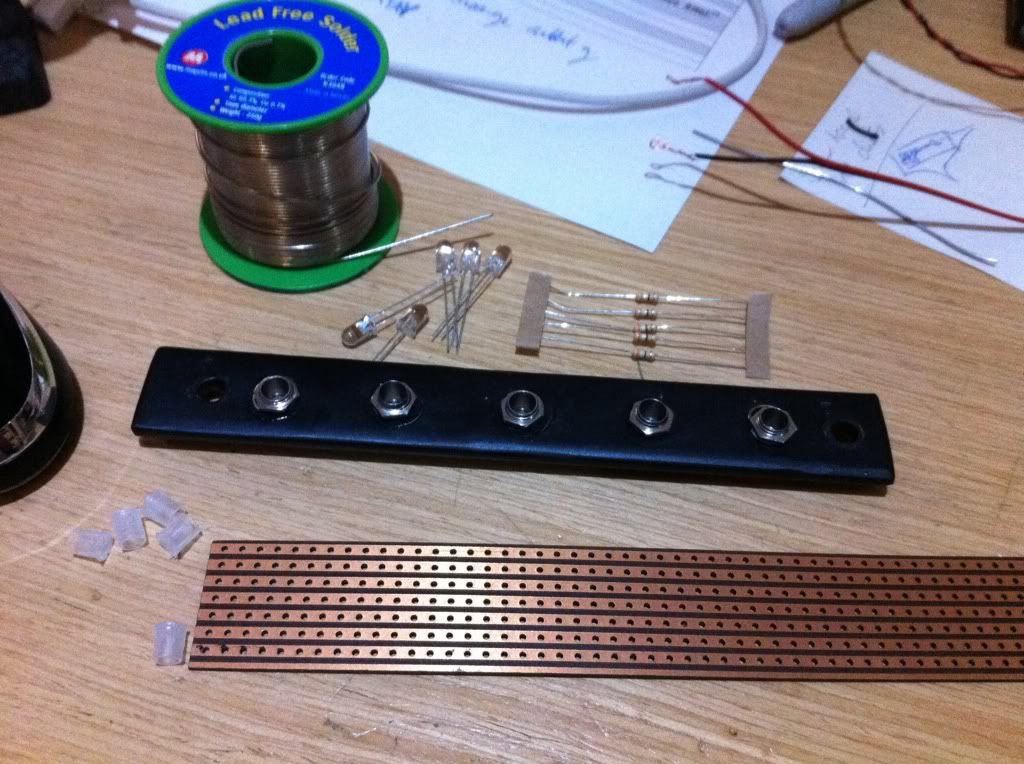
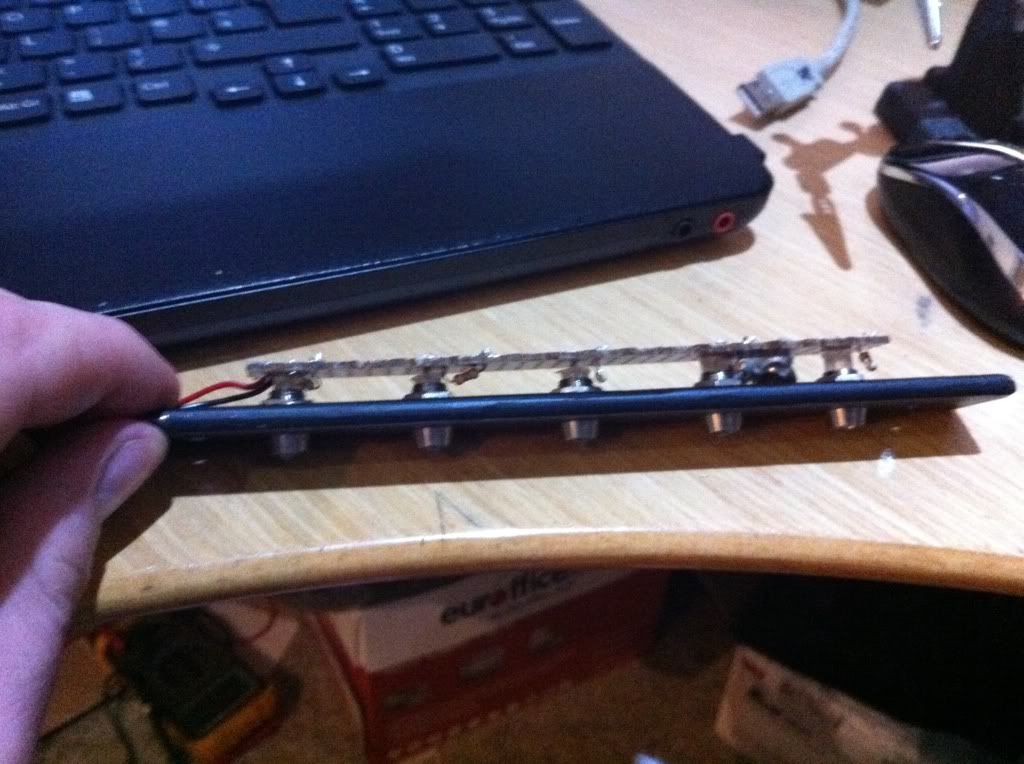
laid the LED's and resistors out, with the positive leg of the bulb sharing a strip with one of the resistor ones (effectively using 3 strips) and with the LED's able to fit in their holders.
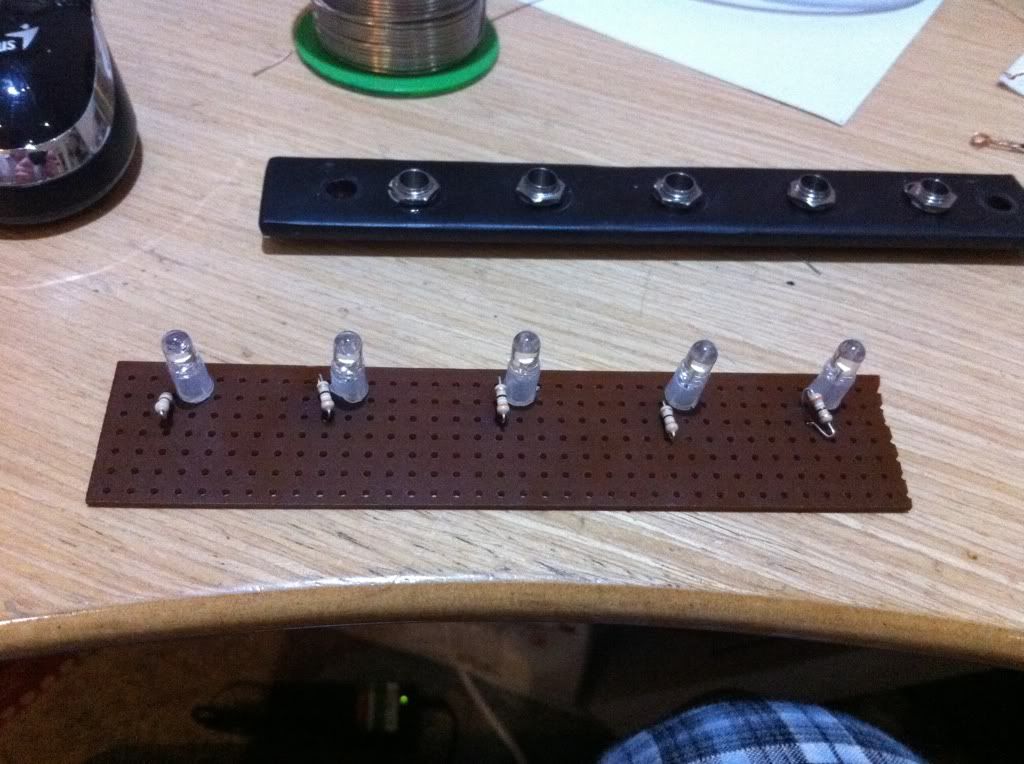
Soldered it up.
Now as I wanted the resistors to only act to one LED, you use one of these bradawl thinks to split the copper links by cutting the copper off as you can see in this:-
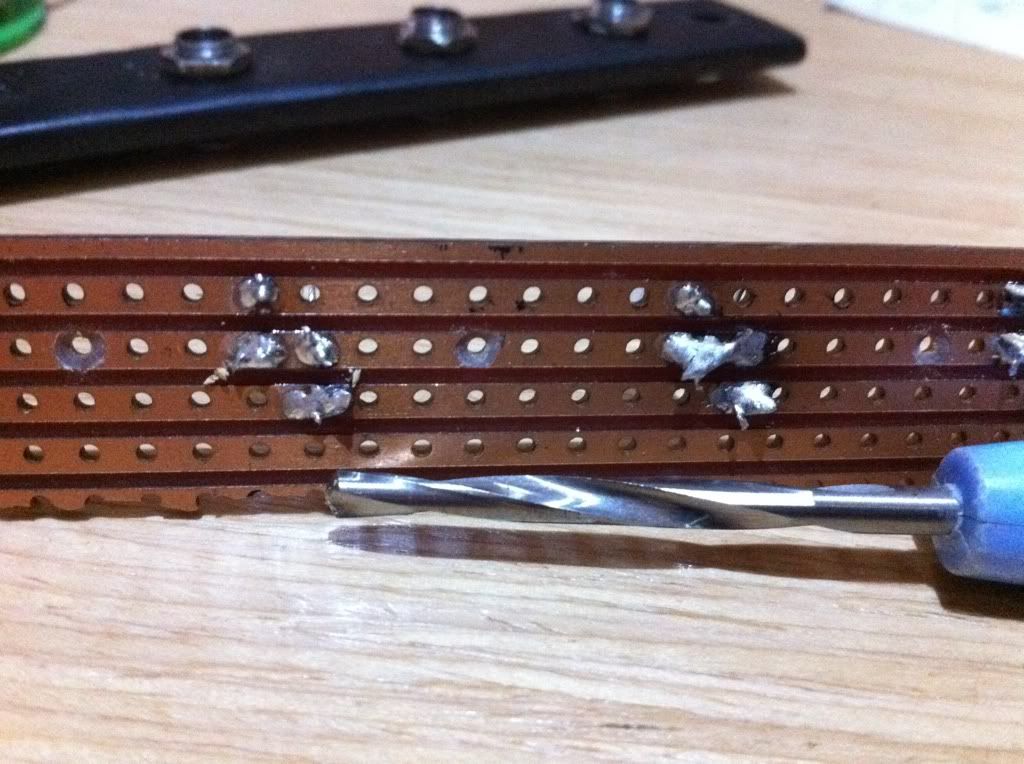
A hell of a lot neater I'm sure you'll agree!
And for the grand unveiling of the lights:-
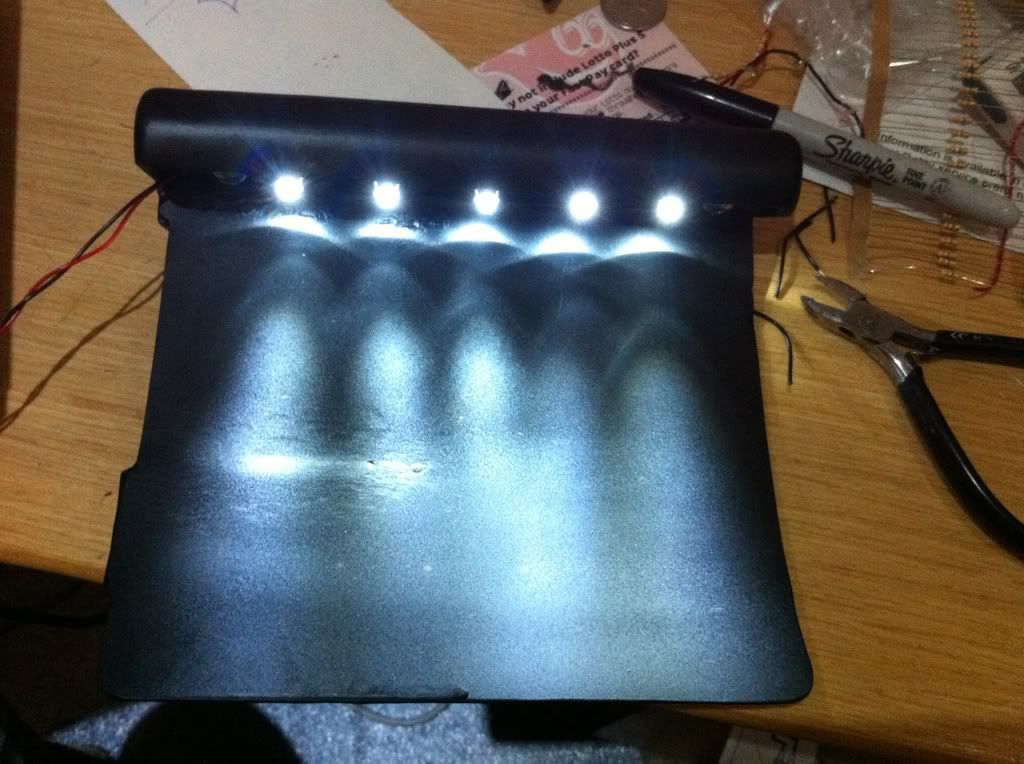
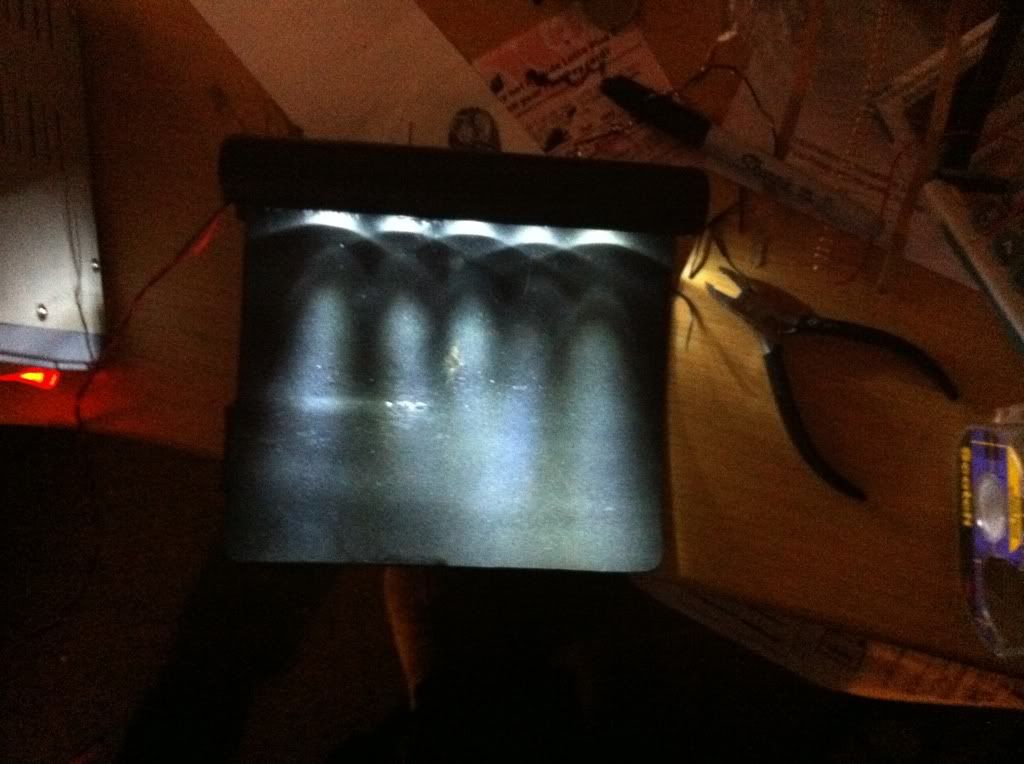
Pukker Job!
The first effort was a bit slap dash - I know that its not gonna be seen, but it looked a right dogs dinner.
It worked really well - although as if by fate my cat rubbed up against the power pack and knocked it up to 20 Volts (cheers Freya!) which fried the LED's!
Then it dawned on me that i had some wiring strip board stuff that I bought a couple of years ago, so i cut it all up and started again:-
laid the LED's and resistors out, with the positive leg of the bulb sharing a strip with one of the resistor ones (effectively using 3 strips) and with the LED's able to fit in their holders.
Soldered it up.
Now as I wanted the resistors to only act to one LED, you use one of these bradawl thinks to split the copper links by cutting the copper off as you can see in this:-
A hell of a lot neater I'm sure you'll agree!
And for the grand unveiling of the lights:-
Pukker Job!
Tuesday, 15 February 2011
LED Wiring.......
I've been trying to look up the best way to wire up the LED's for my numberplate. I have them all resistored up and held in holders ready to go at 12v. They will need to be run in parallel, but I cant seem to find out a way to wire them properly. All the projects I've seen online have used boards to mount the LED's but I haven't the space for that, and it would be a bit of a waste.
here are the LED's sitting in their holders:-

I've sketched up what i think are the 2 ways of doing it,

1. wire a red wire to each leg and then cover with heat shrink to protect
2. wire the legs of the LED's together then put a single wire at the end
1 seems to be logical, but what would i put at the end where all the wires connect? I remember something about not having a mass of cables and solder together as it may act as a capacitor or get warm.......
comments greatly appreciated as ever........
here are the LED's sitting in their holders:-
I've sketched up what i think are the 2 ways of doing it,
1. wire a red wire to each leg and then cover with heat shrink to protect
2. wire the legs of the LED's together then put a single wire at the end
1 seems to be logical, but what would i put at the end where all the wires connect? I remember something about not having a mass of cables and solder together as it may act as a capacitor or get warm.......
comments greatly appreciated as ever........
Subscribe to:
Posts (Atom)