Friday 31 December 2010

Scaled Down!


Ive been harping on for ages about scale - and how the bike wouldnt look too bad with me on it, well here you go - dragged Miss TC out to take a few pics for me - invaluable as I dont have the bike together when it goes back in the shed, so I can use these as a point of referance.

Rollin rolling rollin.....

Had an end of year mockup today now I've got my axles spindles from toddy.

Still a mountain of things to do, but good to get it off the bench!


Friday 24 December 2010

Number plate mount

Almost finished the number plate mount yesterday, just need to tart up the gussets on the back of the mount and cap the ends off, then i'll be working out the LED lighting...


Wednesday 22 December 2010

Sunday 19 December 2010

Seat Stitching

 Finally got my leather to sticth the saddle. not quite finished in these pictures, but looking good!


Friday 17 December 2010

Fakey oil tank spacer

Started to work on the band and mount for the fakey oil tank. The plan is to have a centre piece hard mounted to the frame, and the 2 halves of the jap tankbolted to it. Ive never tried anything like this before!!!


Cut out a 50mm wide strip the same length as the circumferance of the tank, and then used the roller to make it nice and round:-


I cut some sheet to the shape of the outside of the Jap tanks, and then bent the strip to match the curve of the end caps (roughly!)


 I started tacking the end cap on, each section I formed around the outside of the oval to get it to take the shape. this is it all tacked up on one side...


Same on the other side, and then it was a case of welding it all up. I feel like i'm really getting to grips with my welder now, and an pretty impressed with how it has come out!


Here it is between the 2 halves of the JAP tank. i'm pretty happy with it. stopped there for the night - some christmas drinkies are in order (a week to go, but any excuse!!!)

Sunday 12 December 2010

Axles and Spacers

A massive thank you to Toddy over at chopperdrome who has been making me some axles and spacers for the bike. Just posted pics of the fron wheel for me, and i'm absolutely made up!


How to cover a solo saddle

I wanted to crack on with the seat. had a hold up with the kangaroo leather lace. With the stitch I'm gonna attempt you need 9 times the lace compared to the circumferance - which equates to about 12-13 meters of lace. Ordered it last week, but got an email saying they didnt have enough dark brown in stock, so I've just asked for black instead...

no point in hanging about, thought I'd get it all ready to stitch when the lace appears...

As has been said before the top leather is pretty thick, some people use whats called an Awl to pierce through the leather (basically like an americal ice pick - not the one for climbing with), however on the last seat I punched the holes through with a hand punch which seemed to work well. I will use an awl to punch through to the bottom layer.

This is where I started:-


What I did was to punch, a hole, then mark a circle, then punch a hole ....... and on and on!
Like this:-


 a good while and a cramped hand later and it looks a little something like this:-


trimmed close to the holes with a scalpel:-


then the underneath. I've some 1.2 mm leather to use for the bottom. I made a really high tech template to mark the hole locations:-


 marked onto the leather then cut out the holes.....

then damped the leather, and contact adhesived both the bottom of the pan and the back of the leather. carefully I placed the leather onto the front holes, got the to line up, then the back ones, and gently smothed the leather into the right shape...


trimmed the bottom layer to match


and then dyed the top and bottom with russett coloured dye.


cat that got the milk right here! its not perfectly symetrical, but its been made with my fair hands!

probably need some more dye to make it less streaky, but i'll deal with that at a later point....

Saturday 11 December 2010

JAP Tank

Picked this up from the post office today, I was worried as I was told it had extra ribs on it, but they were steel mounting straps that had been painted on!
This is where it will sit on the bike to house some of the electrics...
 
 Set to work on the Tank, carefully cut the 2 halves apart with the angle grinder
 The tanks were in pretty good order inside...
 Cleaned the edges up with a flapper disc ready to weld it to some sheet steel, once clean I put the tank half on the steel, and tacked it in place (had a small heavy vice on top to weigh it down.)
 Its not the cleanest welding I’ve done to date, but the metal was fairly thin. Its was nicely held, and as its not holding actual oil it doesn’t matter if there are a few pinholes....
 I then cut the waste out from the back of the plate – it wasn’t as easy as I thought, but with plenty of perseverance I got there....
To give it a bit more strength I ran a quick weld on the inside of the new lip

 So I now have 2 halves that meet fairly well. I’m going to have a thing about the best way to get the 2 to join, but still allow me to access the electrics if I need to.....

Thursday 9 December 2010

shaping leather

Cheers to the guys on Dirty Bobbers - the told me that I could hand shape the leather on the seat.

Wrapped the seat in a bin bag to make it waterproof, then put the leather in the shower to get it nice and wet and warm. after a bit of massaging it was looking like this:-

I'll get it finer when I get the bottom leather and closer to stitching it!

Cushy job!

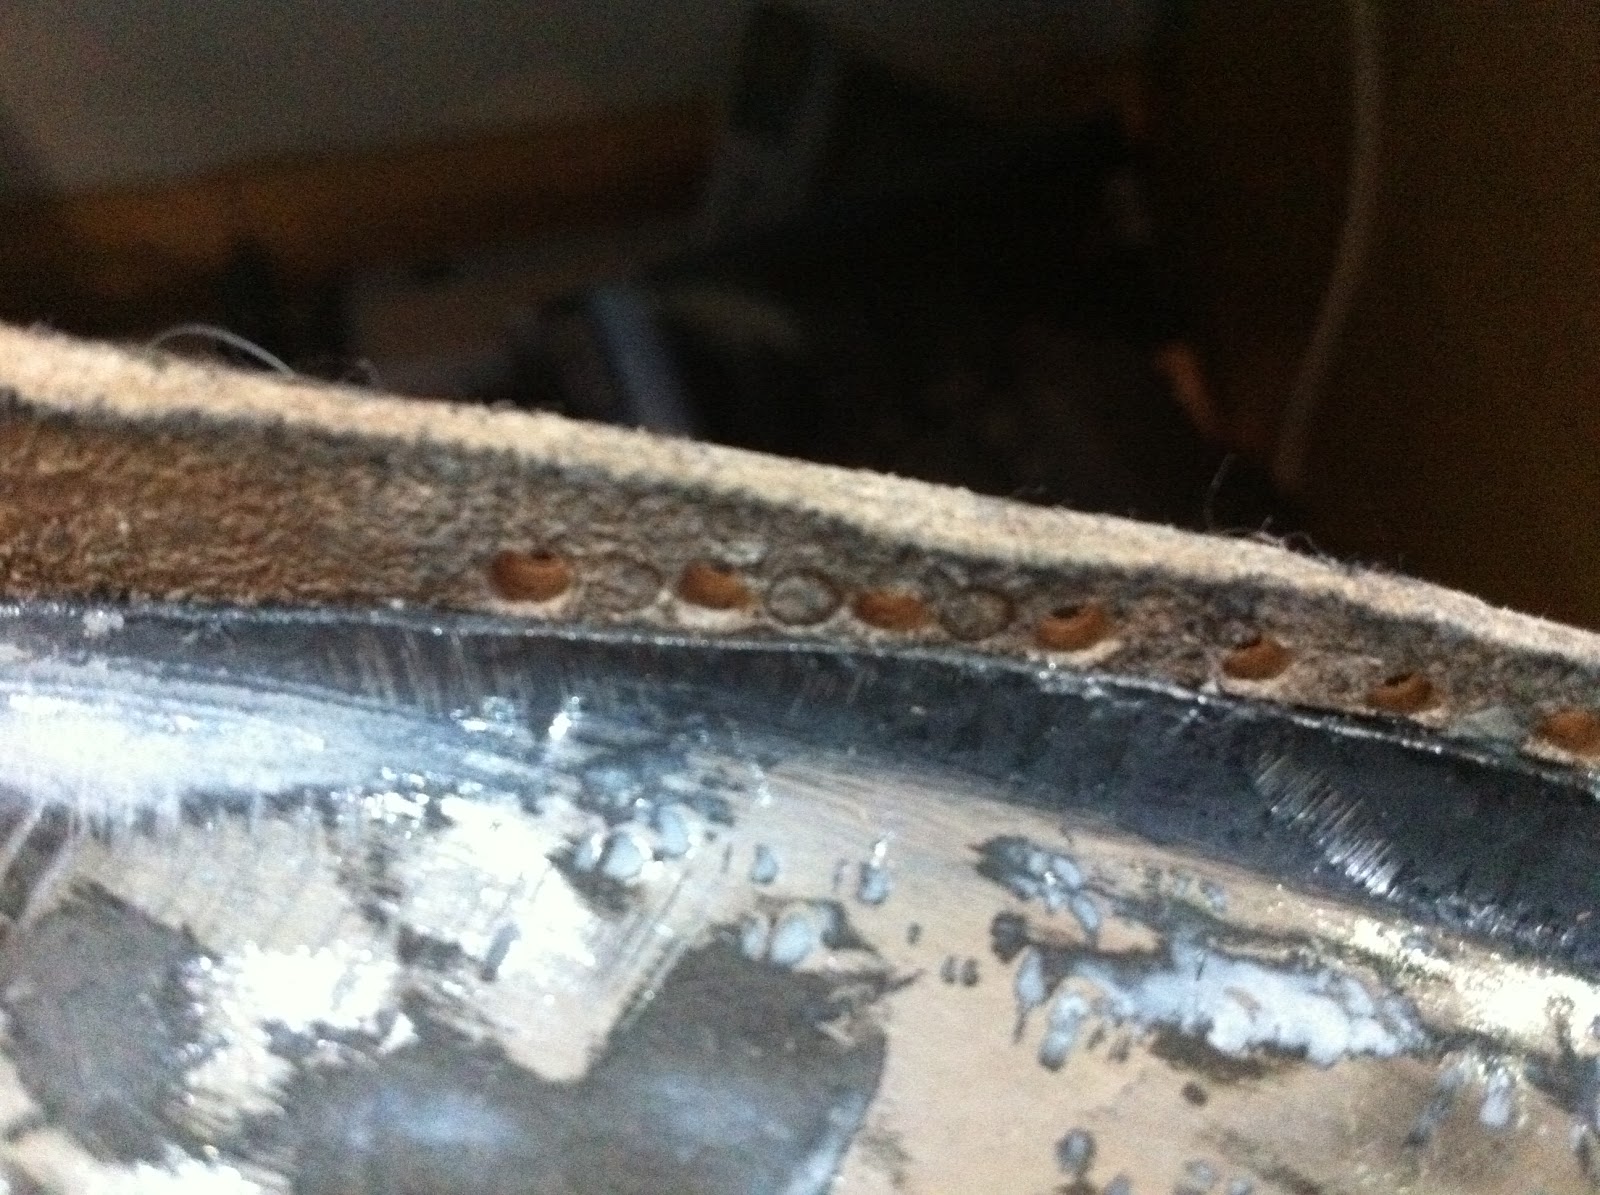
Made a start on covering seat #2 today. Cheers to Matt for the foam once again, your a star!

I had popped over to Toddys with a few bits today (migh – what big wheels you have TC!), and used his press to put the embossing into the actual seat leather. With the foam in hand it was off to the shed!


I’ll not waffle on as i have done this once already, but i’ll put a few pics up of what i did:-
Plenty of spray adhesive (half a can actually – need to get some more before i stick the top leather on!) and a 20 min dry on the radiator.


A little tip – i super glued around all the edges to get it to hold. The contact adhesive will hold it, but unless you want to try and hold it in place for about 20 mins use my lazy option!


I got my flapper discs through today – perfect for doing the foam cutting – don’t be too over eager though cos it can dig in!


Then i wanted a bit of extra detail in a reverse bum crack in the cushioning...


And here it is back inside. I’ll need some spray adhesive and i’m waiting for some leather for the bottom before i can move on to the top and importantly the stitching!

Monday 6 December 2010

Leather Embossing

Couldn’t resist a crack with the leather stamp this morning – I cut the stamp out of the block, and cut down the edges to make sure they were well clear:-

I gave the leather scrap a quick 30 second soak in some warm water, then sandwiched up the block, leather and a flat steel sheet in the back to make sure it has a good surface to bite onto.


Tightened it up in the vice and left it for a bit while I had brekkie and sorted out the Monday morning emails!

It probably had about 45 mins in there before I got bored, and I went back out to the shed, un tightened, and I was delighted to see this:-


The dark colour seems to be a mixture of the sharpie pen and the leather taking on a bit of a darker colour.

I dried it out with Miss TC’s hair drier, then thought the best way to see the design is to whack some dye on it to see what it’ll be like.

Shall I say I’m more than slightly impressed with the results!


I’ve put another in there to see what the results are like if I leave it in all day! I’ll be using Toddy’s press on Thursday to do the leather for my seat with any luck!