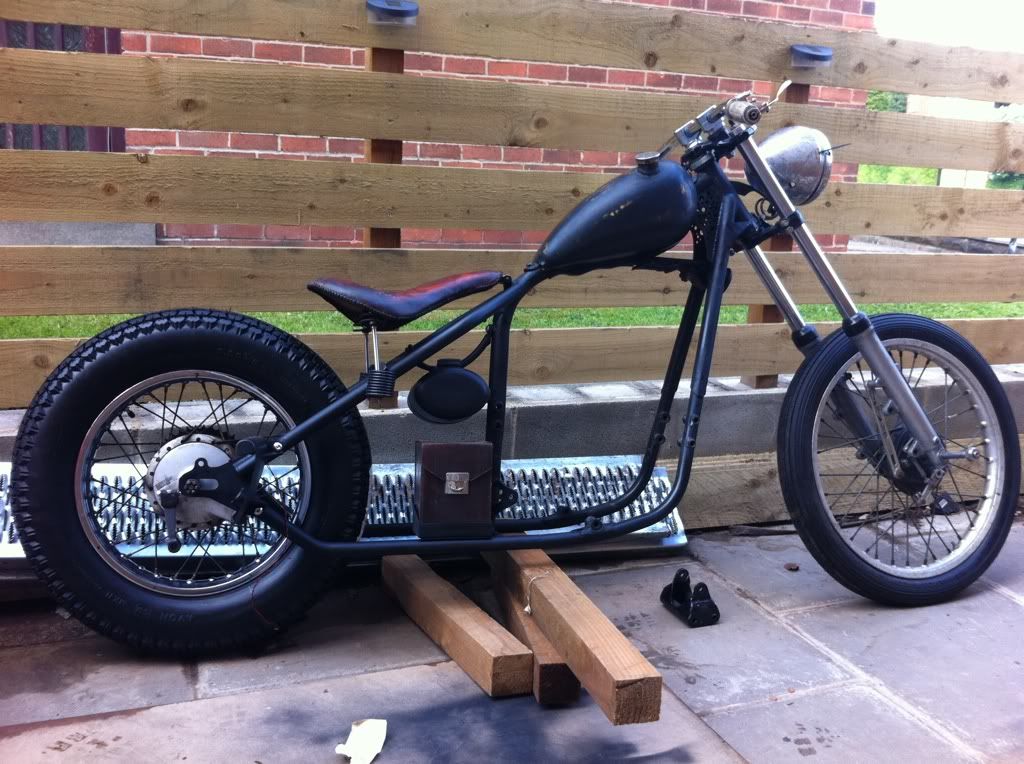
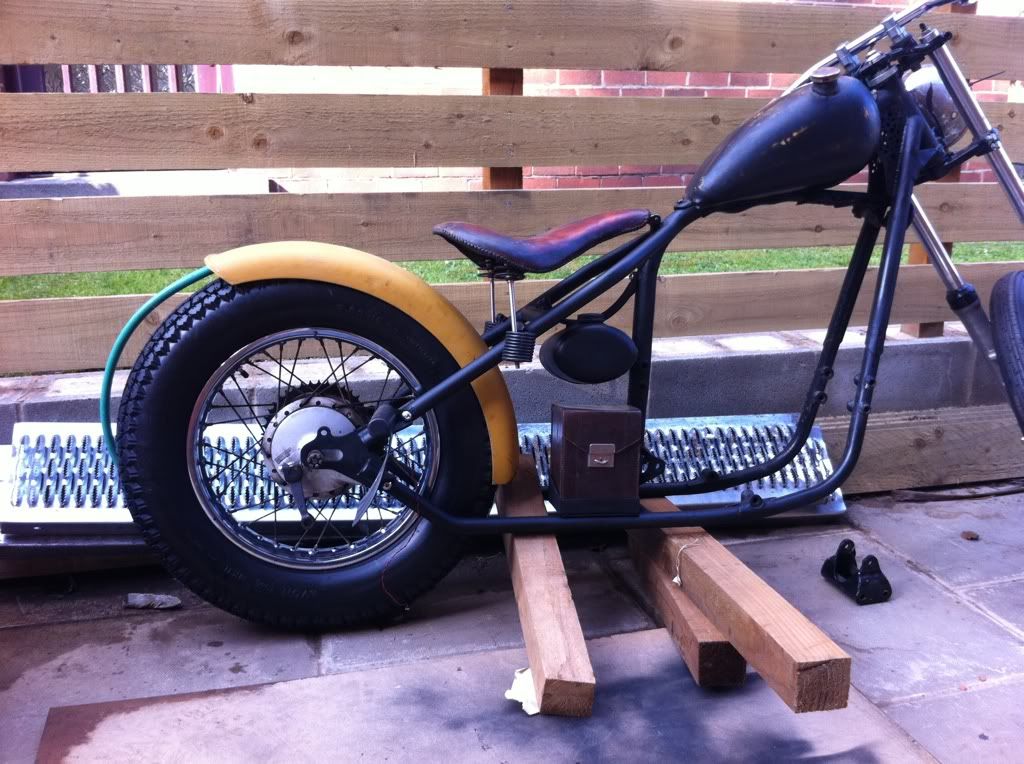
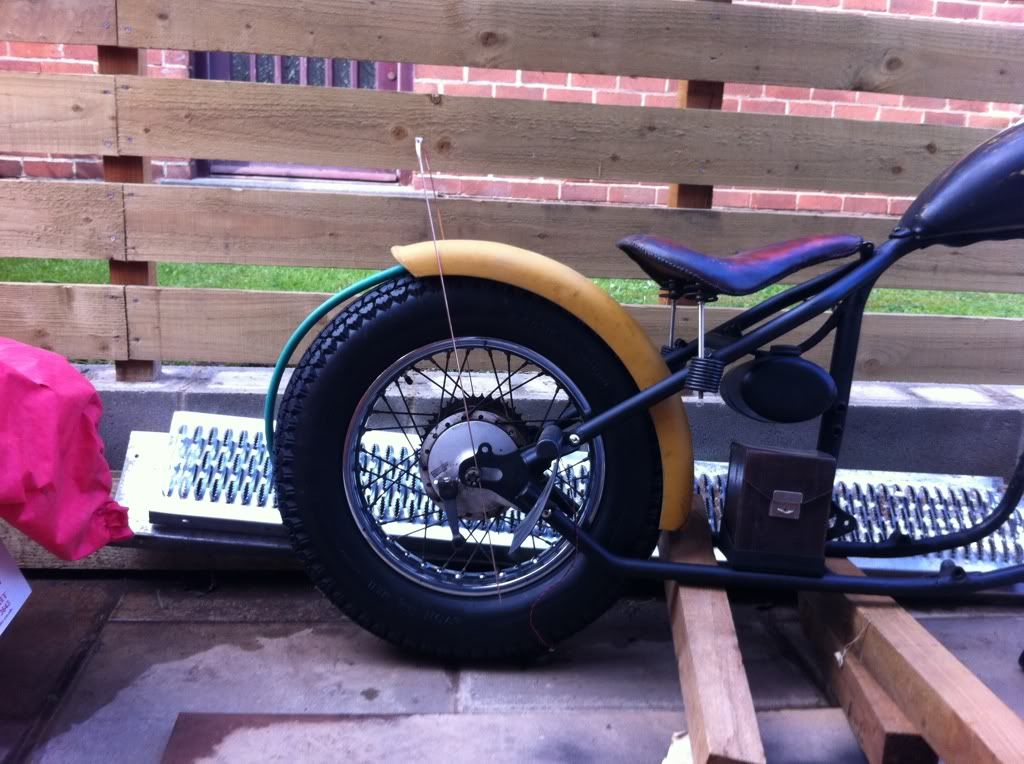
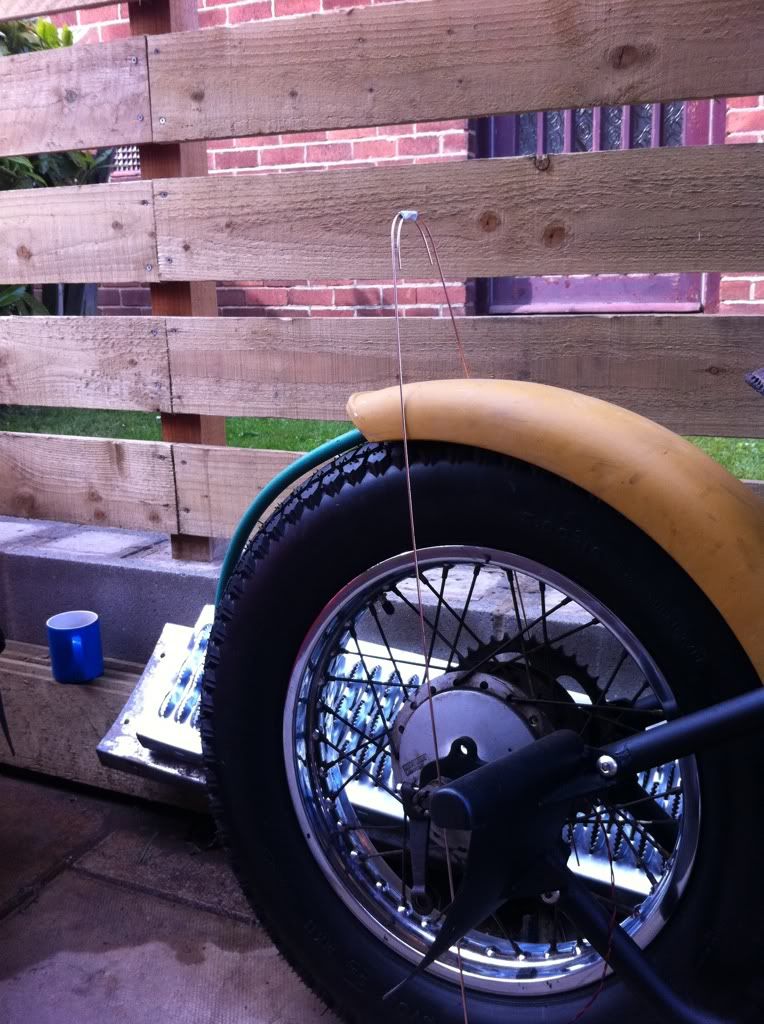
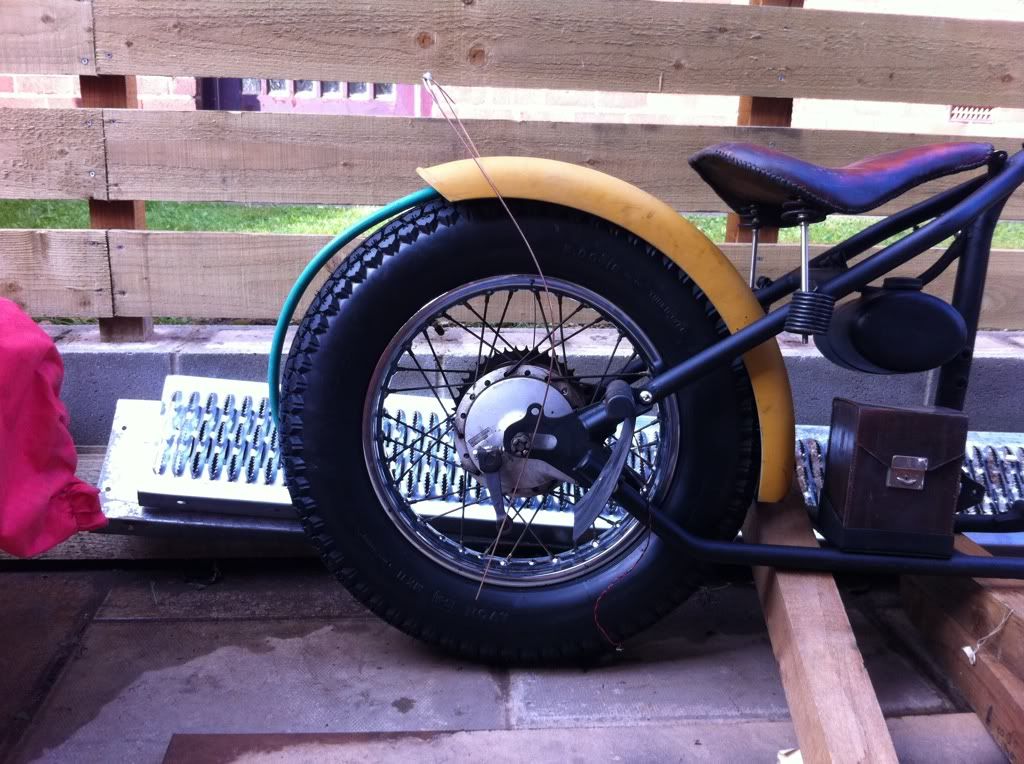
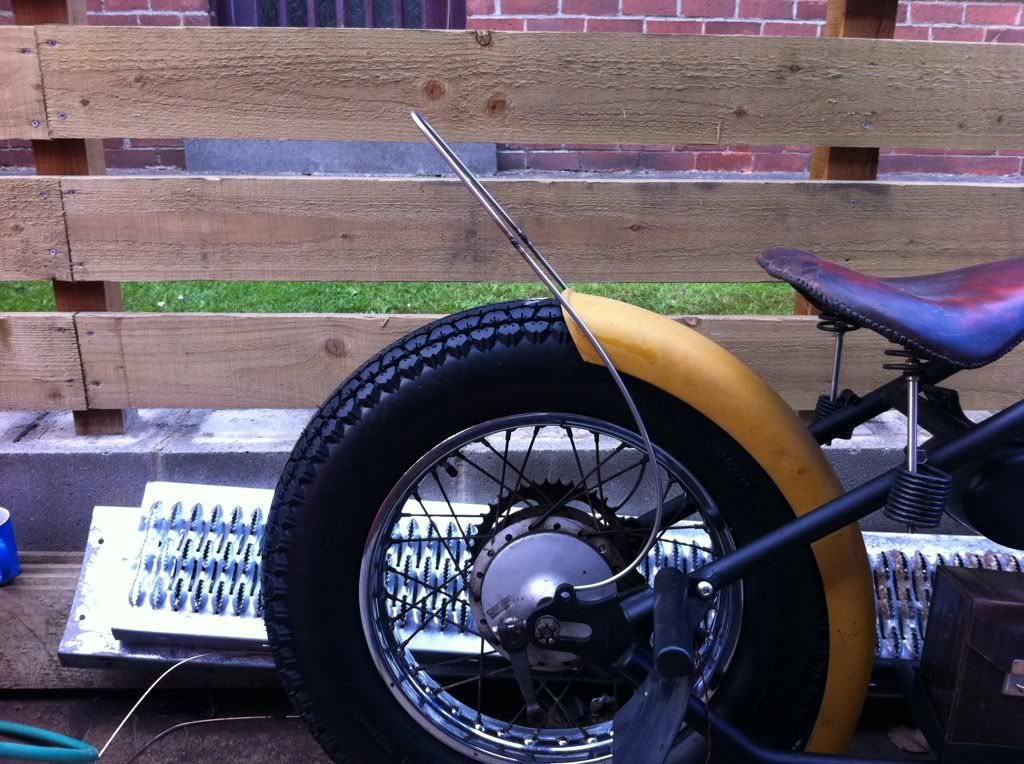
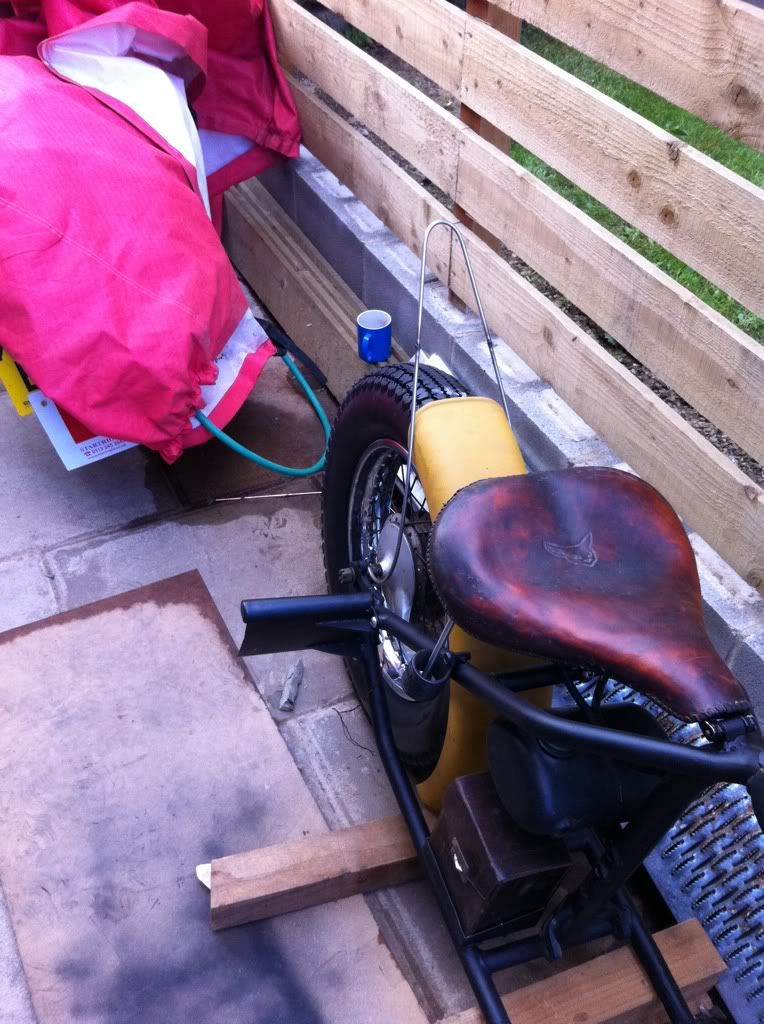
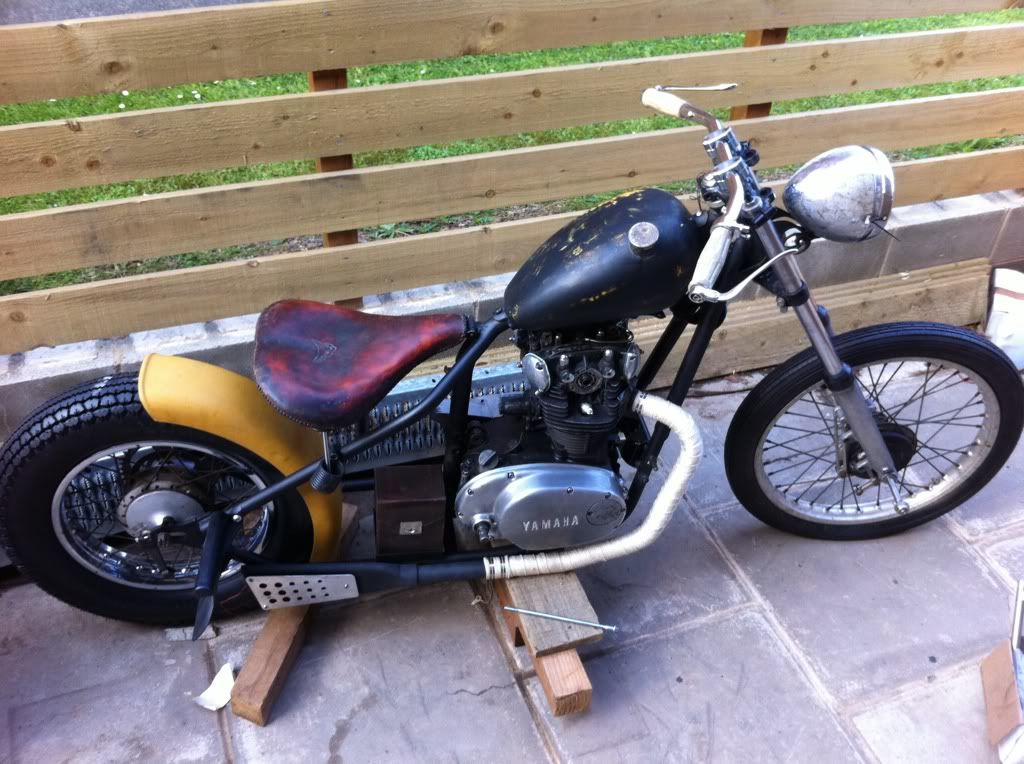
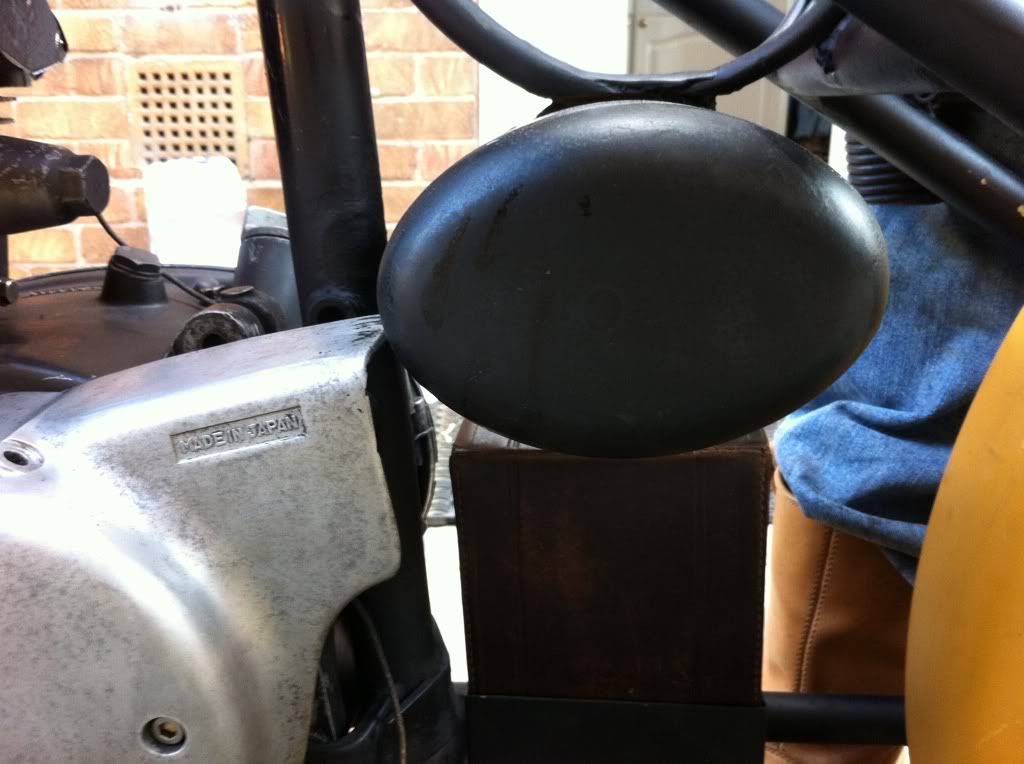
New rear mudguard arrived today. bought it from the guys at http://skeletonchopshop.blogspot.com it needs to be cut down the the appropriate size, as its a bit long at the moment, but I'm well pleased with it! 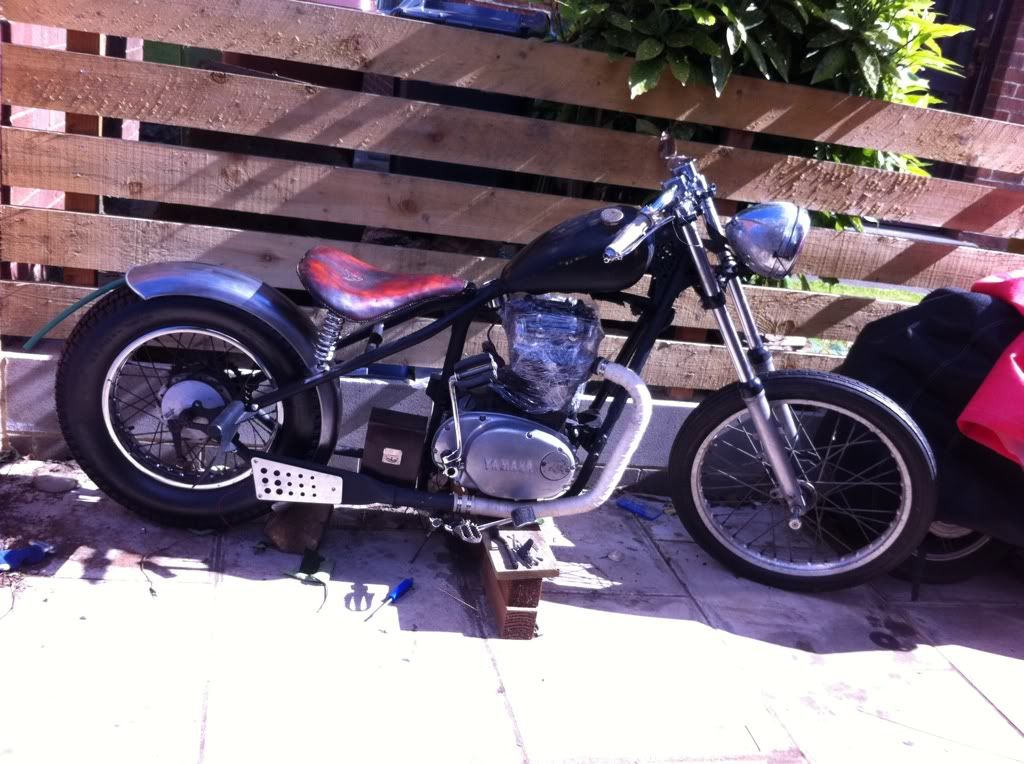 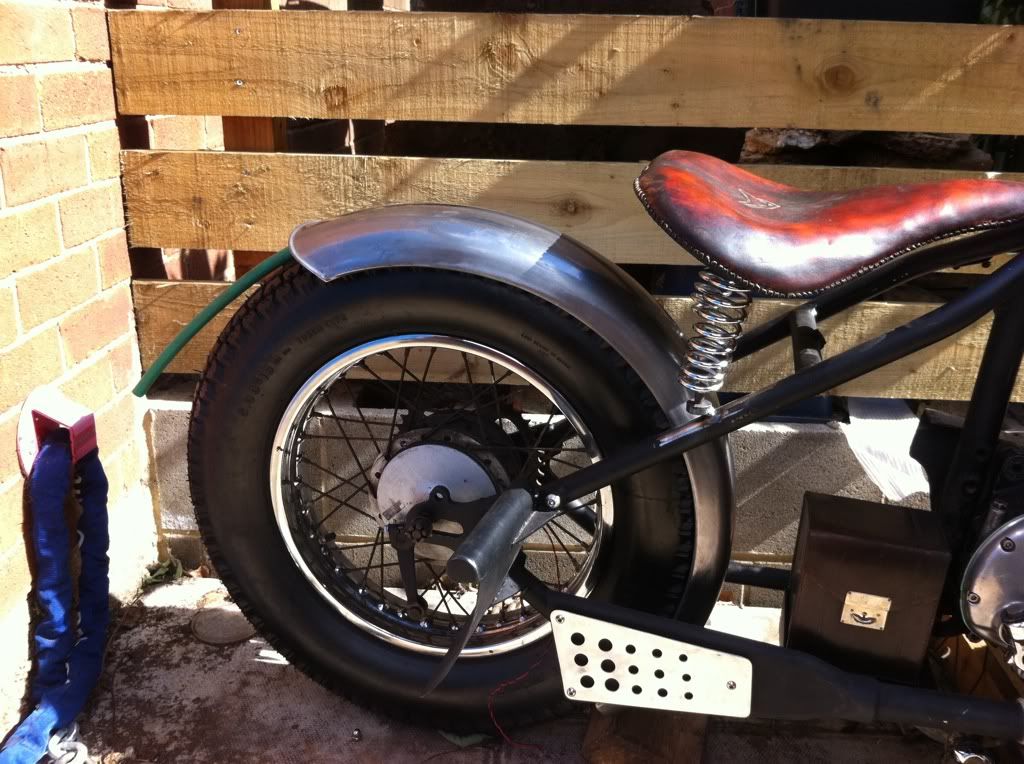 |
Tuesday, 24 May 2011
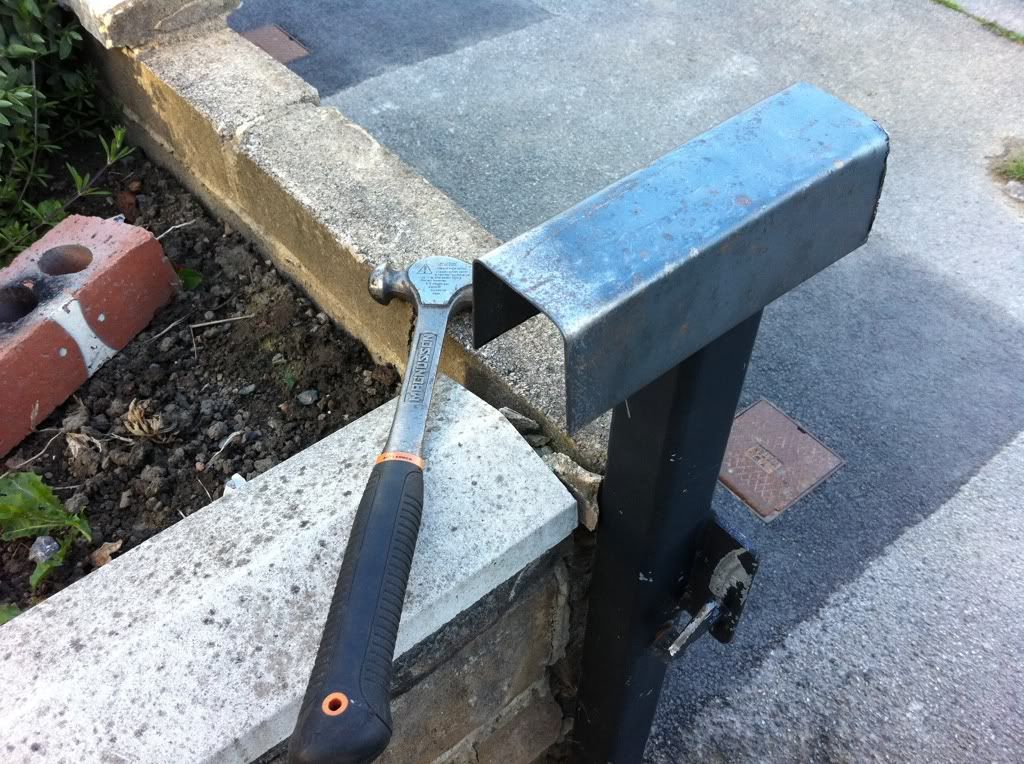
Mudguard
Monday, 23 May 2011
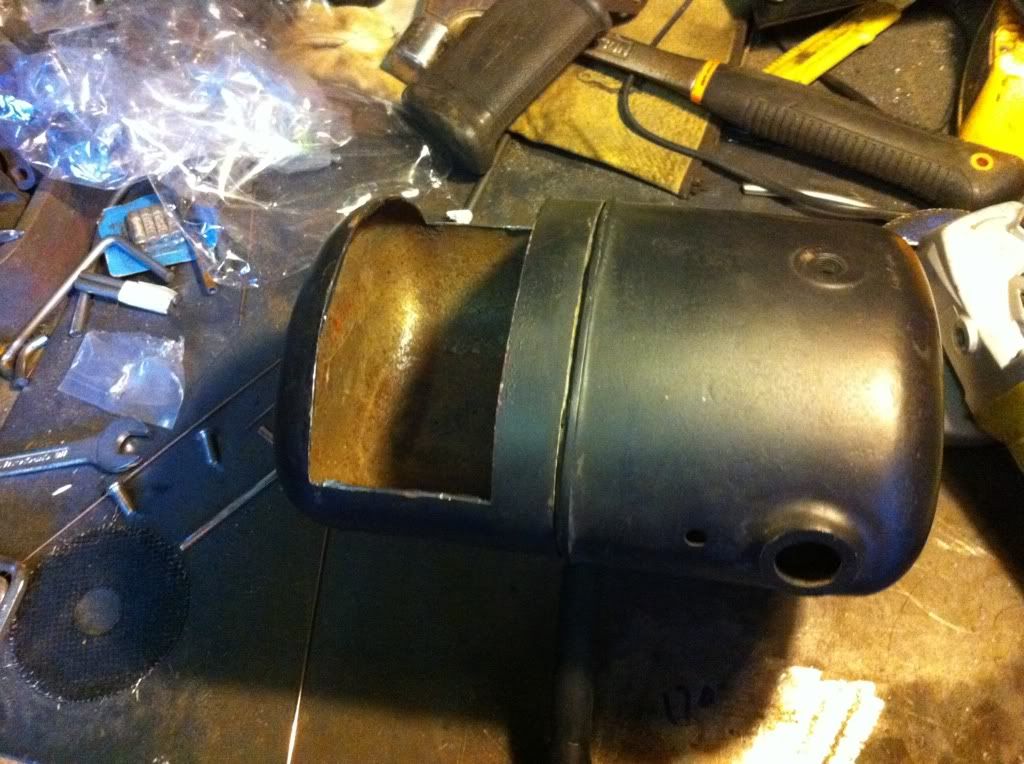
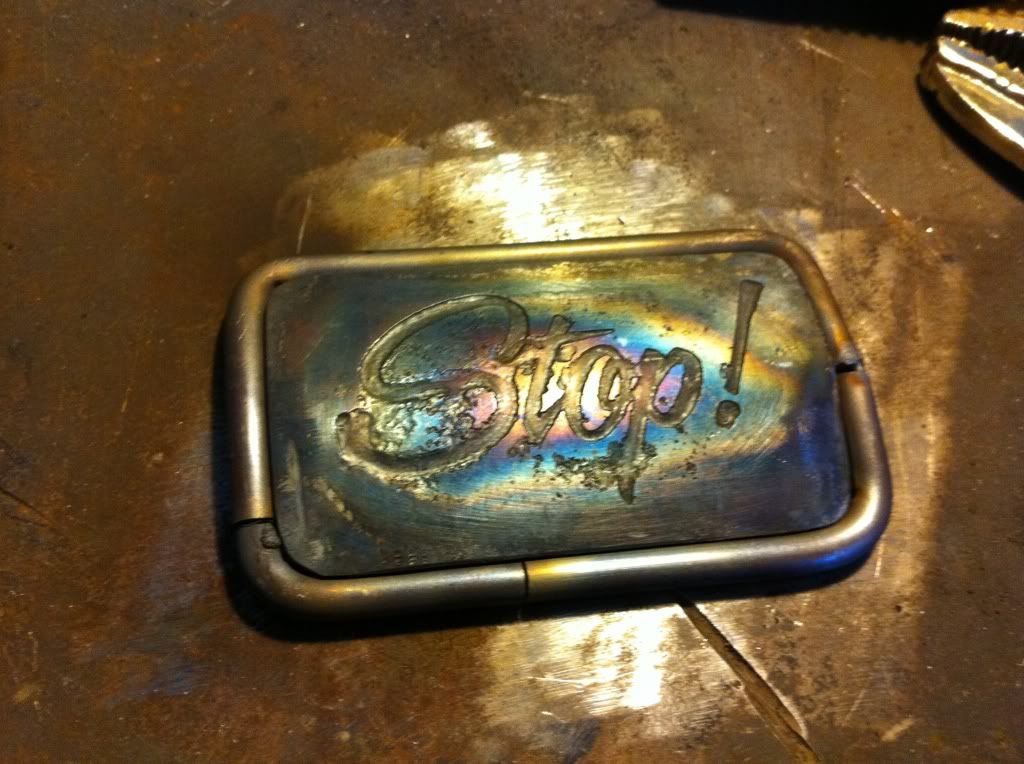
Leccy box
Had another couple of hours out there tonight while the missis
was off dancing...
I hadnt thought about the interferance between the chain and the
electric box, as I had made up the box without the engine in (yet
another schoolboy error!)
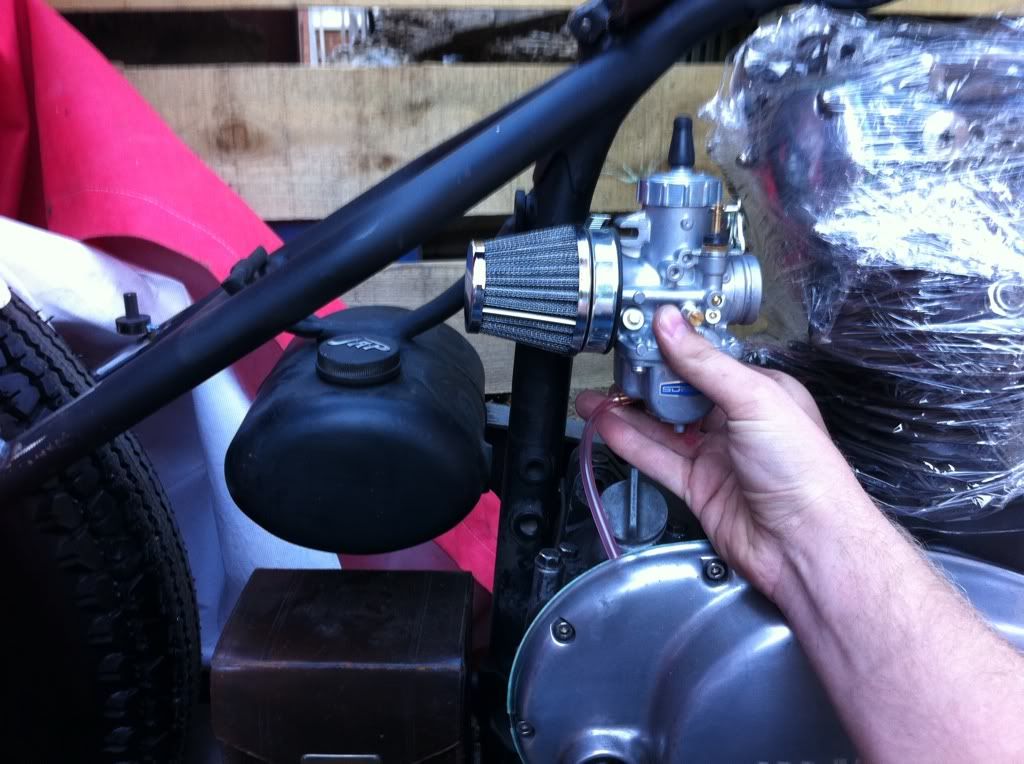
I was aware that I also had to make room for the Carbs and air
filter to fit in easily - so I had to do a bit of a mock up...
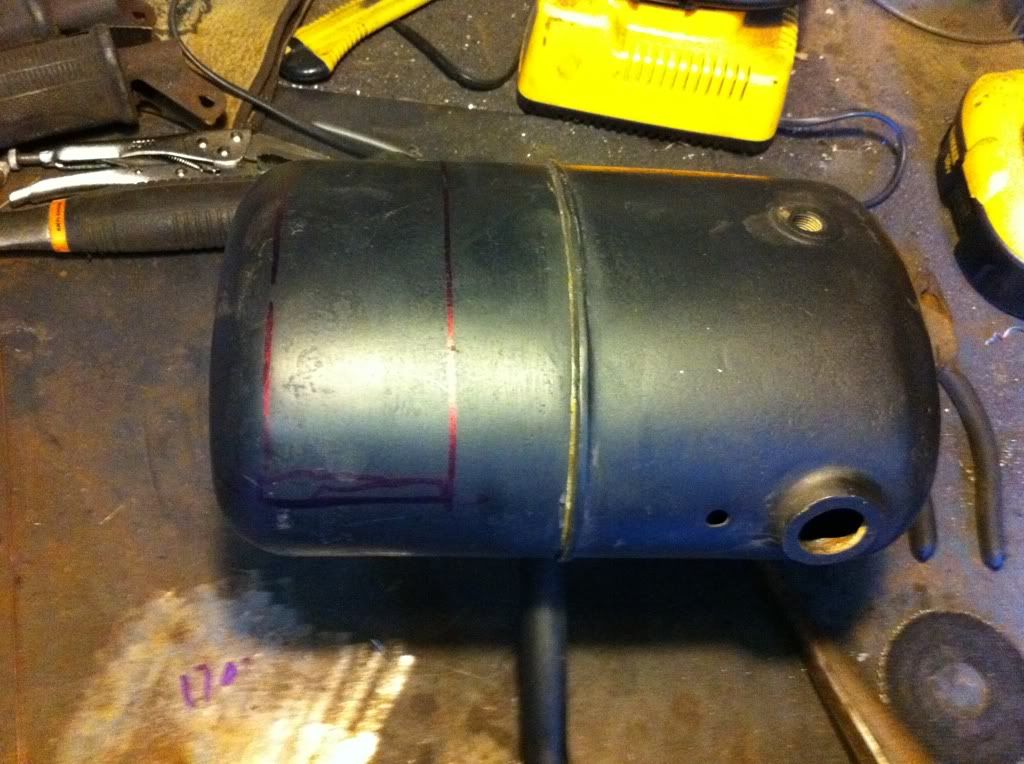
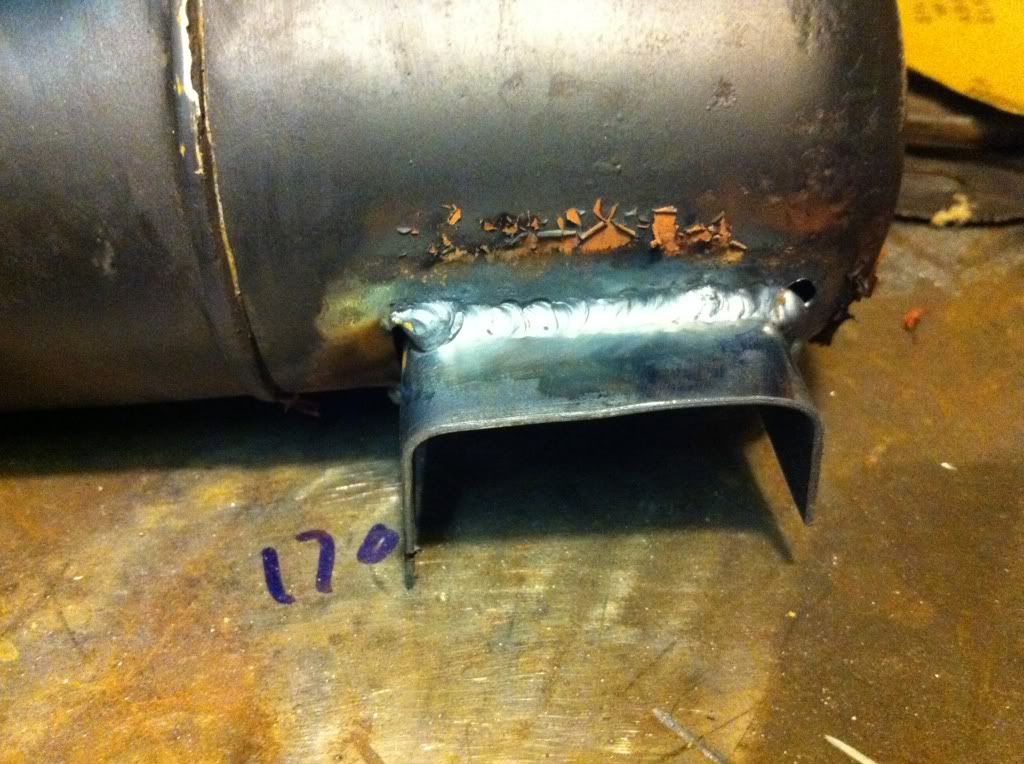
I couldn't really move the tank up, so I had to make chain clearance
in another - more drastic way! Inspired by Toddy's bike - a cut-out
was needed in my lovely tank...
I bent up a tunnel in the vice, and was able to tighten the bends up
and flatten the bottom on the gate post!
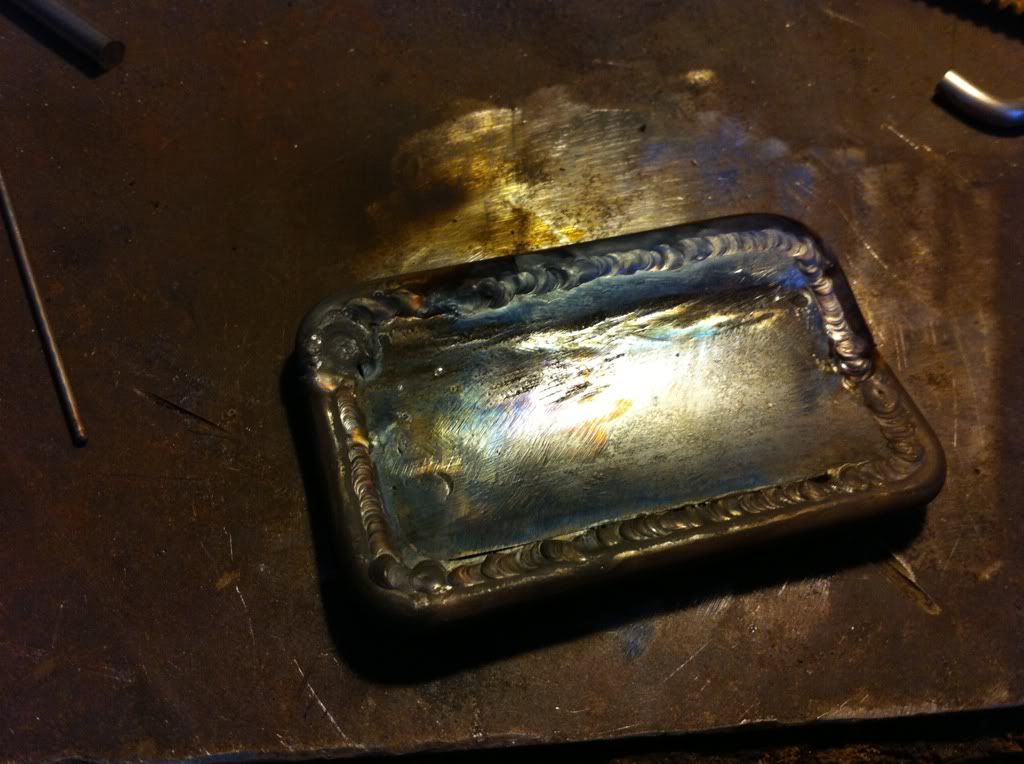
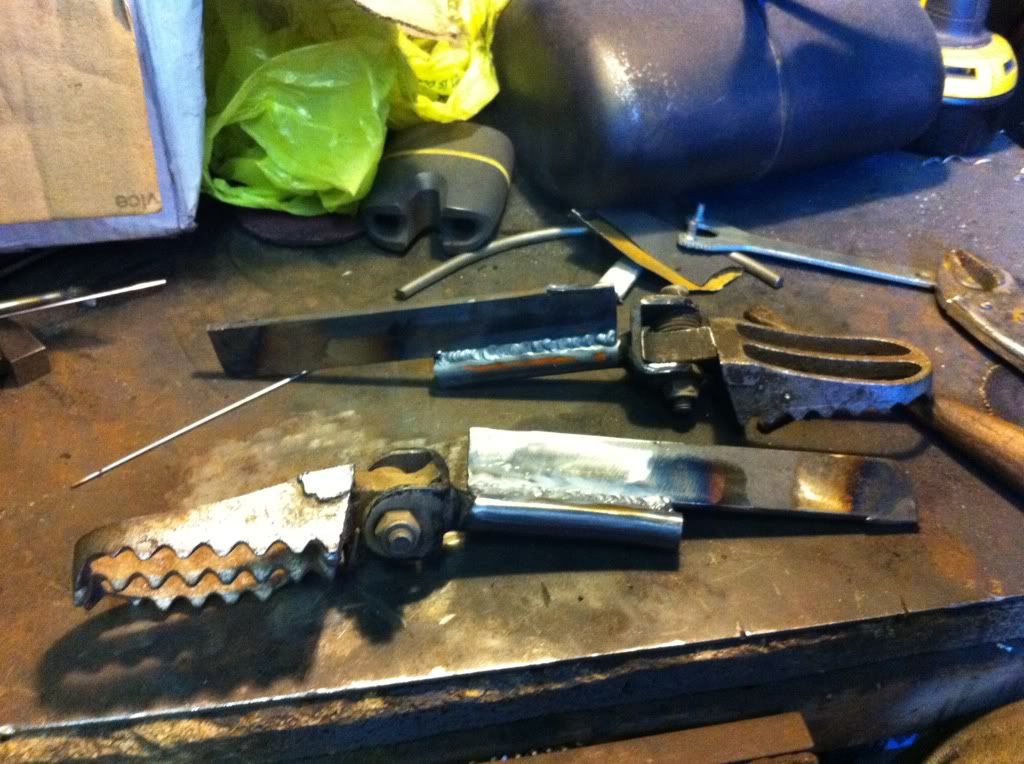
With them both ready, it was time for MR Grinder once more!

The tunnel fitted in pretty nicely, just a slight over cut on the corners...
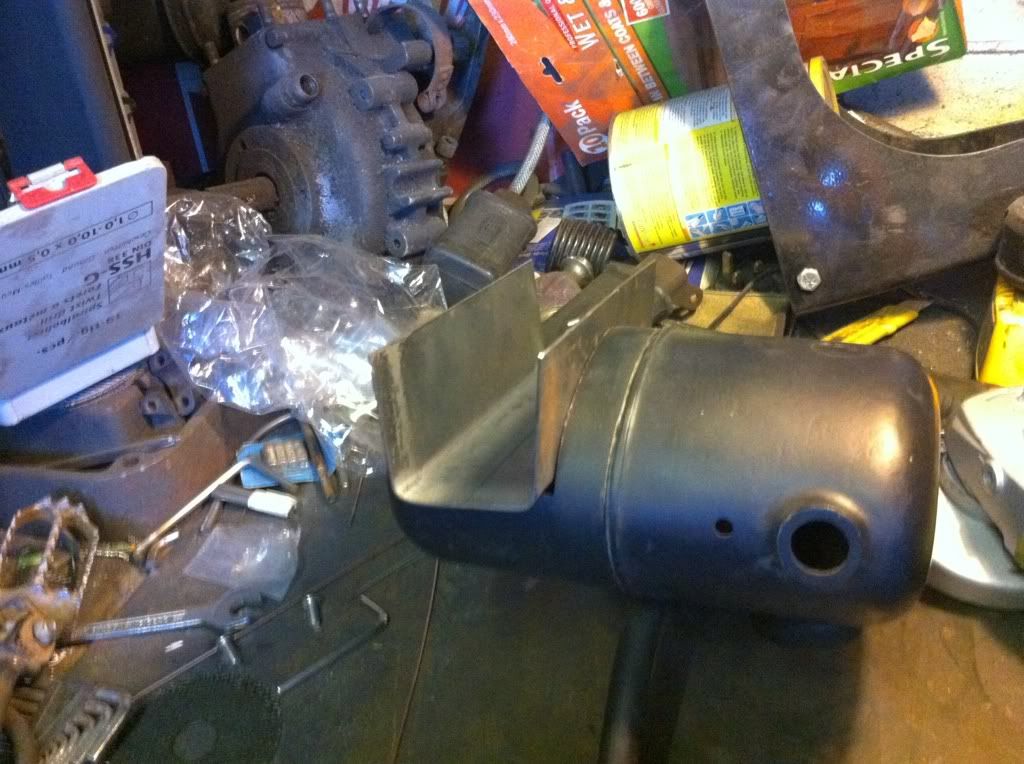
I cut down the tunnel to size
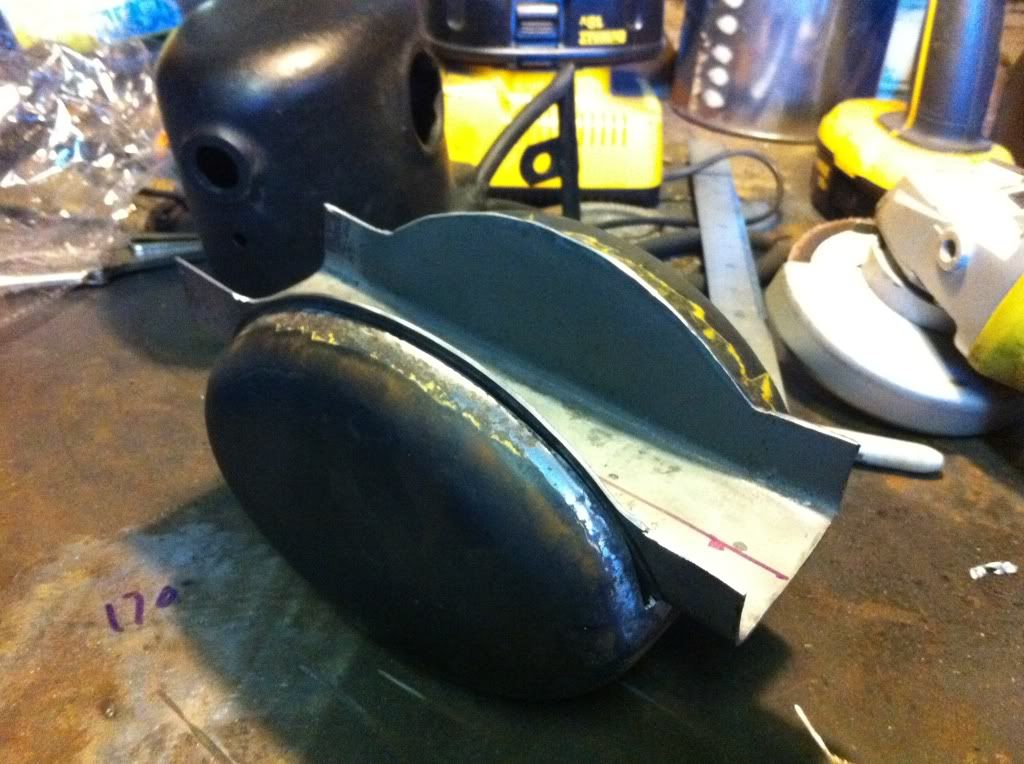
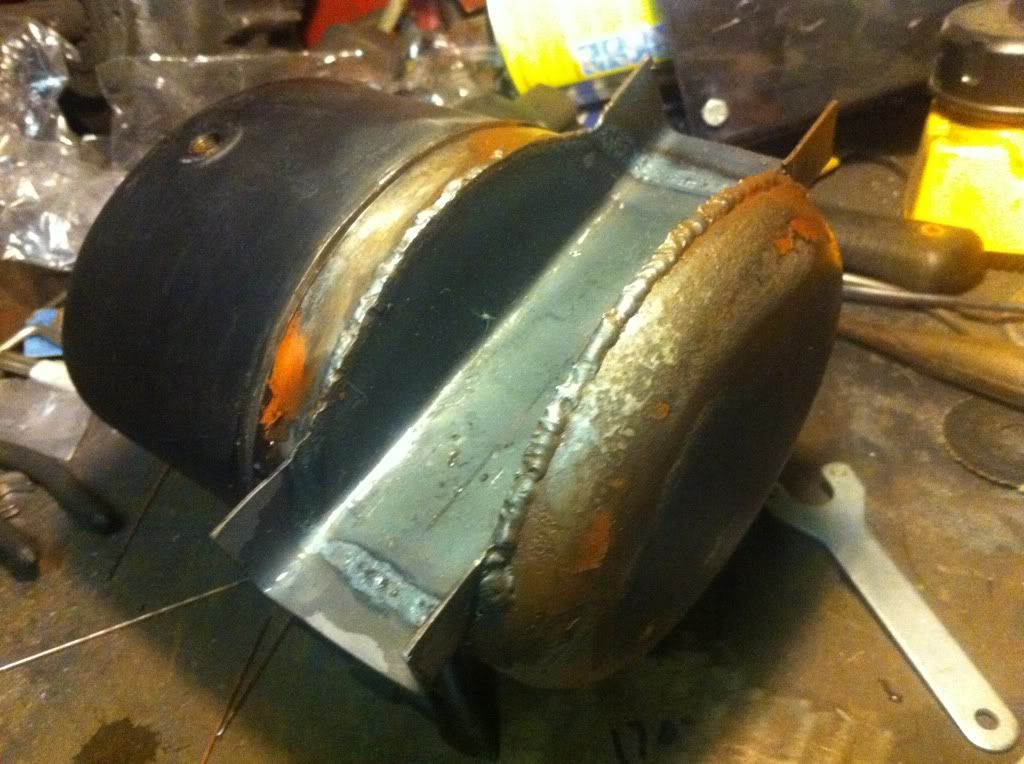
tacked it in place, also cleaned up the paint and crap around the
weld areas. I did it attached, so it held the shape during welding.
I didn't want the heat affecting it and warping all out of shape.
The tank was pretty thin and made from crap rusty metal - but I
managed to do a half decent job on the welding:-
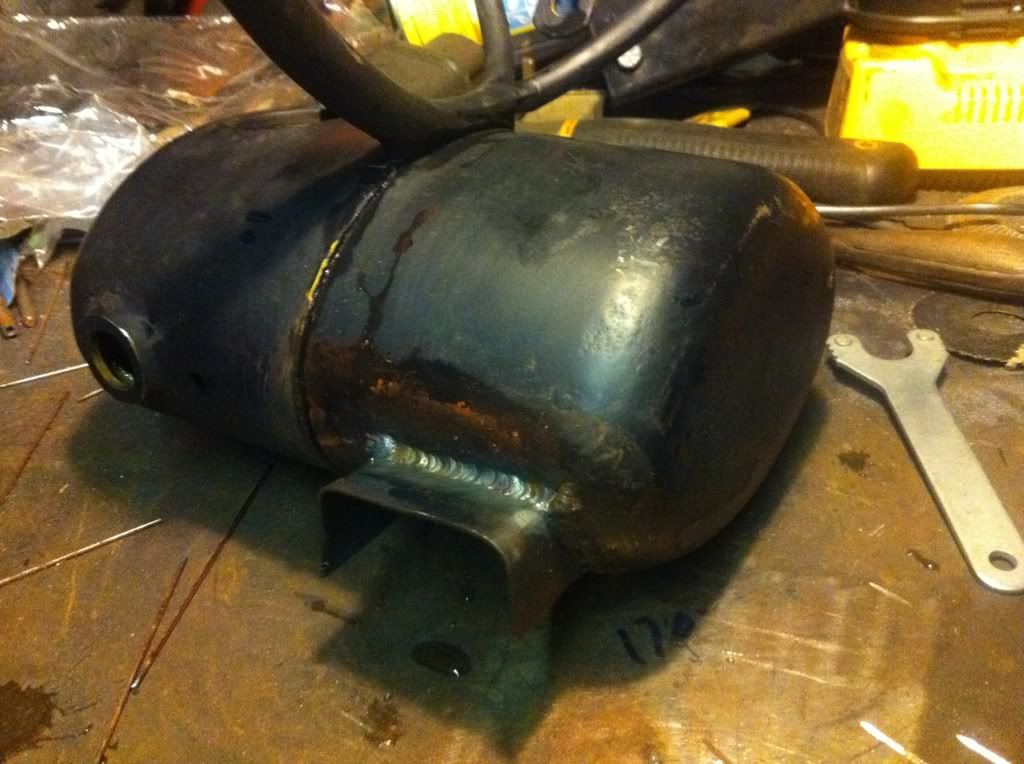
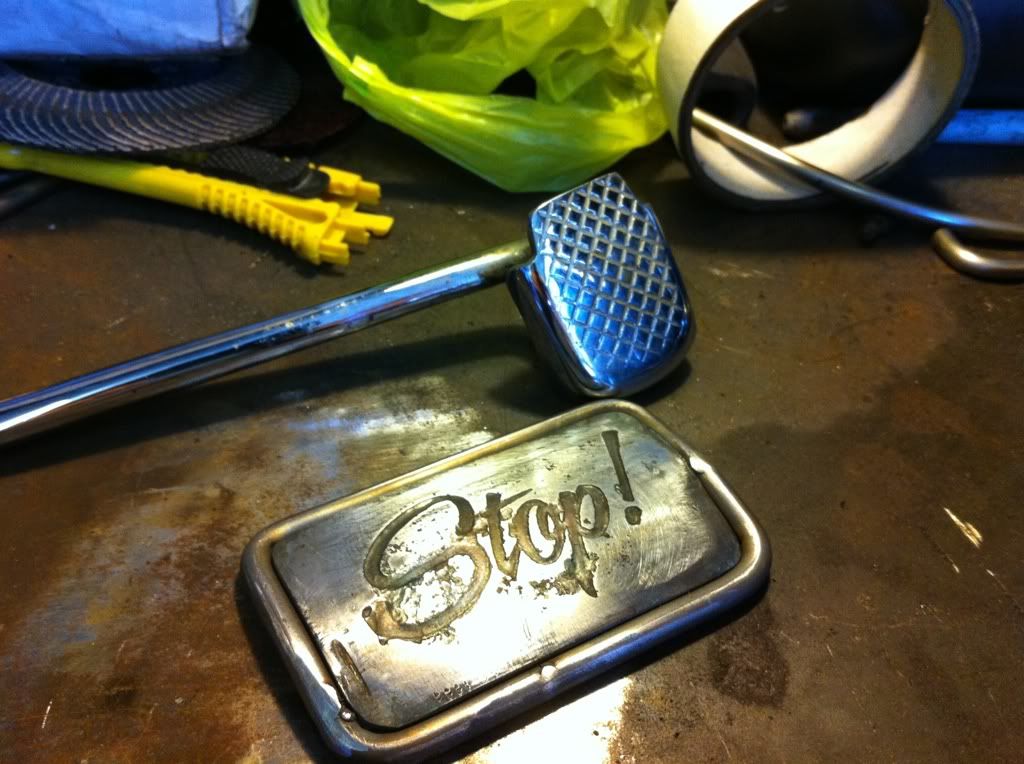
I'll clean it all up tomorrow. I'm thinking of leaving the lip on the top
edge as in the last picture, only cleaned up a fair bit. There is still
enough room to put the blue micro processor box on the top section.
was off dancing...
I hadnt thought about the interferance between the chain and the
electric box, as I had made up the box without the engine in (yet
another schoolboy error!)
I was aware that I also had to make room for the Carbs and air
filter to fit in easily - so I had to do a bit of a mock up...
I couldn't really move the tank up, so I had to make chain clearance
in another - more drastic way! Inspired by Toddy's bike - a cut-out
was needed in my lovely tank...
I bent up a tunnel in the vice, and was able to tighten the bends up
and flatten the bottom on the gate post!
With them both ready, it was time for MR Grinder once more!
The tunnel fitted in pretty nicely, just a slight over cut on the corners...
I cut down the tunnel to size
tacked it in place, also cleaned up the paint and crap around the
weld areas. I did it attached, so it held the shape during welding.
I didn't want the heat affecting it and warping all out of shape.
The tank was pretty thin and made from crap rusty metal - but I
managed to do a half decent job on the welding:-
I'll clean it all up tomorrow. I'm thinking of leaving the lip on the top
edge as in the last picture, only cleaned up a fair bit. There is still
enough room to put the blue micro processor box on the top section.
RIP Macho Man
As any of you that you know me and Miss TC, there is a love for wrestling in Tinslecat Towers!
Sad news to hear that the Macho Man is no more!
The guy was clean off it as this interview proves!
Pipes
woke up early this morning with my head whizzing about like a maniac
- I forgot to think about the bloody exhaust pipes!
what a div!
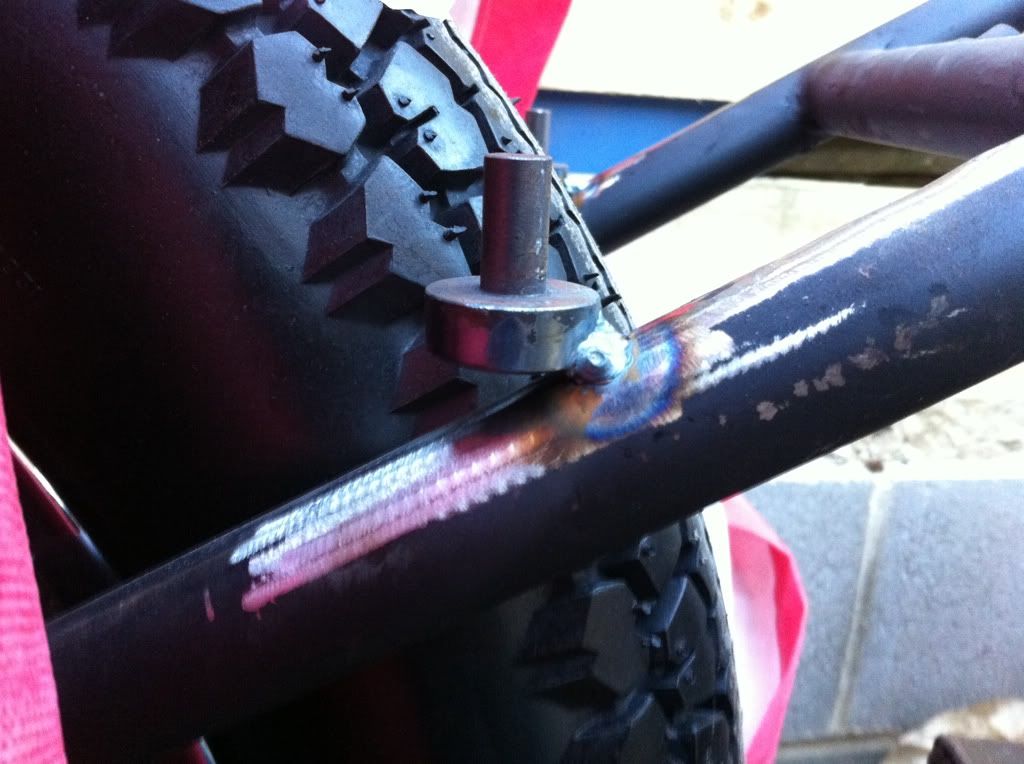
Just been out and had a look - looks like I'll have to chop an inch or so
out of the down tube to get it to fit....
i know you cant see the head well, but an inch should do it, it also
solves the problem of the rear mount, I'll just tie into the foot peg
mount as a support.
Phew! panic over!
Was hoping to have got some done today, but its been raining the
whole time - looks like its about to blow over - so I'll try a couple of
hours later.
- I forgot to think about the bloody exhaust pipes!
what a div!
Just been out and had a look - looks like I'll have to chop an inch or so
out of the down tube to get it to fit....
i know you cant see the head well, but an inch should do it, it also
solves the problem of the rear mount, I'll just tie into the foot peg
mount as a support.
Phew! panic over!
Was hoping to have got some done today, but its been raining the
whole time - looks like its about to blow over - so I'll try a couple of
hours later.
Sunday, 22 May 2011
Grafting
| ||||


Saturday, 21 May 2011
BSA Gearbox for the 45
done a bit of tinkering this morning - oil leak on the stock XS650, so that's gonna need a strip down, had a little play with the metal lathe, and then the gearbox i scored for this showed up with el postino
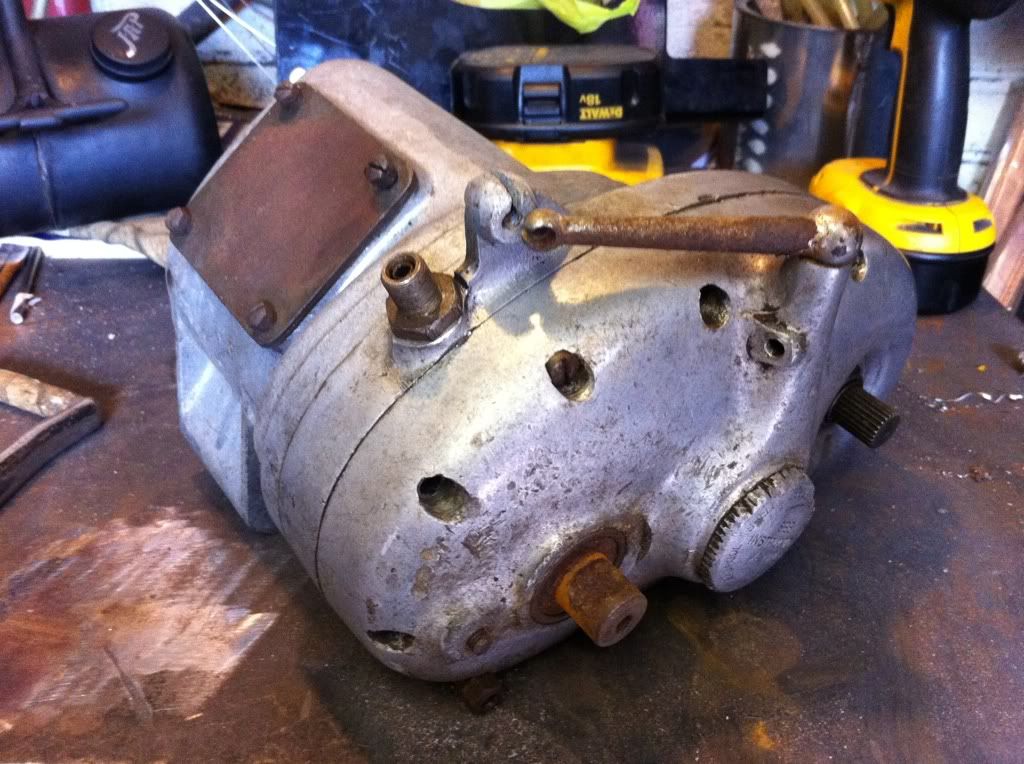
its a little bit brusied and battered, but structurally sound enough.
no movement in the cog, so thought i would have a little investigate...
took the panel off the bottom and had a nice surprise!
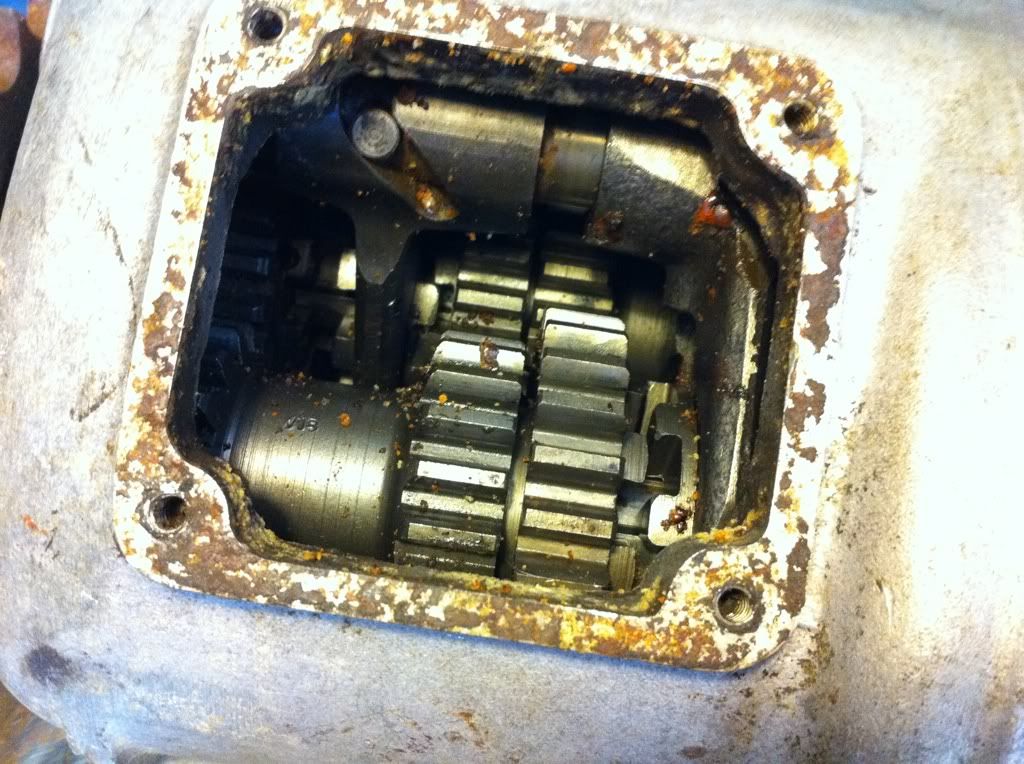

the gears looked to be in fine fettle! couldn't move them, so just on face value of the teeth i can see, but all seems to be good in there.
I had a look in the end section, and apart from a little clean up it all seemed in fine form.

I didn't strip it down any further, as I didn't know what I was doing. but I'm pretty pleased with it. its always a worry when you buy something and your not sure what state it'll be in.
its a little bit brusied and battered, but structurally sound enough.
no movement in the cog, so thought i would have a little investigate...
took the panel off the bottom and had a nice surprise!
the gears looked to be in fine fettle! couldn't move them, so just on face value of the teeth i can see, but all seems to be good in there.
I had a look in the end section, and apart from a little clean up it all seemed in fine form.
I didn't strip it down any further, as I didn't know what I was doing. but I'm pretty pleased with it. its always a worry when you buy something and your not sure what state it'll be in.
Tuesday, 17 May 2011
Harley 45 Project - Next in line
I've had a plan or 5 brewing for the past couple of months as
to what to tackle after the Relic is finished. The Indian will not
be rushed as I want to use a lot of genuine parts, so I will need
to be patient with getting the parts together.
The initial plan was for a custom framed XS650 - inspired in
part by the lines of a Zero Chopper Spirit bike. Due to the
history we have had with jappers, the plan has been brewing
up until this point over on my custom xs650 forum.
Its no coincidence that Mr Bearpaws is also posting in his new
45 flathead project. He spied some 45 engines over here going
for a good price, after a few calculations in my head I ended up
buying 2 engines, one pretty much complete, and a 90-95%
complete basket. That leaves me with this:-


engine number reads as 43 then a big gap and 4 numbers.
a bit confusing as I would have expected either WLA or WLC
in there..... don't know if that has a meaning to anyone?!?
as for the rest of the bike, a 1 off frame is going to be made -
and the maker has said I can be there with them when they
make it - so I can both learn and make decisions on how it
should look. Luckily this is someone that loves the same style
as me - and the various conversations we have had have lead
me to believe that were not too far away on the ideas in our heads.
as a basic "muse" I have had this bike in the zero chopper spirit
book in mind for quite some time:-
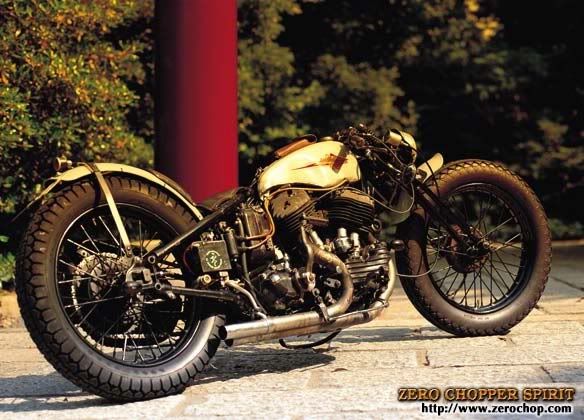
obviously when the 45 engine came up for grabs it fitted the bill
perfectly!
I have been slowly squirrelling parts away for this build, and some
of the major components are already present and correct:-
Forks are going to be this old pair of girders:-

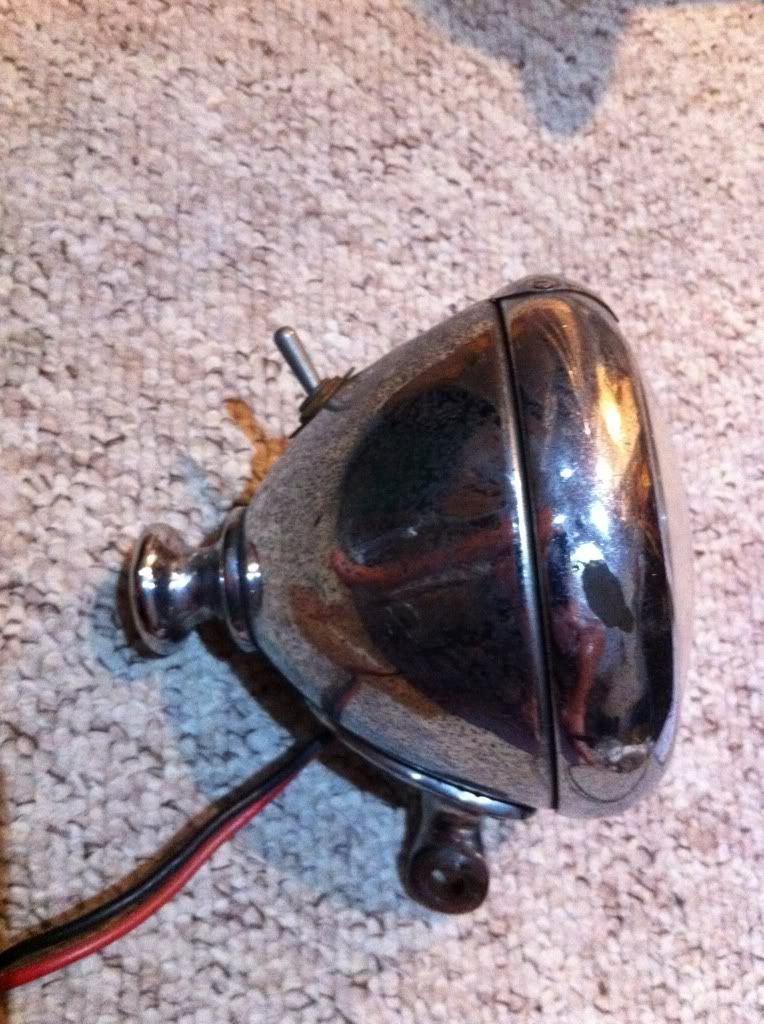
Headlight was sent over from the states as a present (Cheers Mr
Bearpaws!) its an old unity lamp that should fit the bill perfectly:-
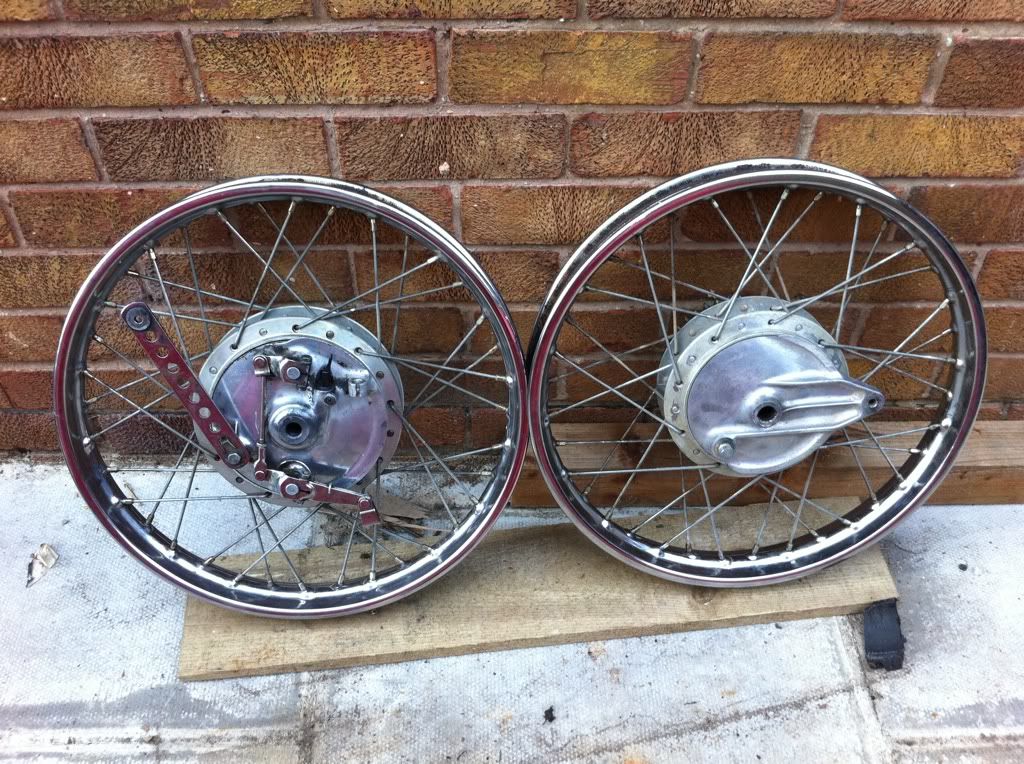
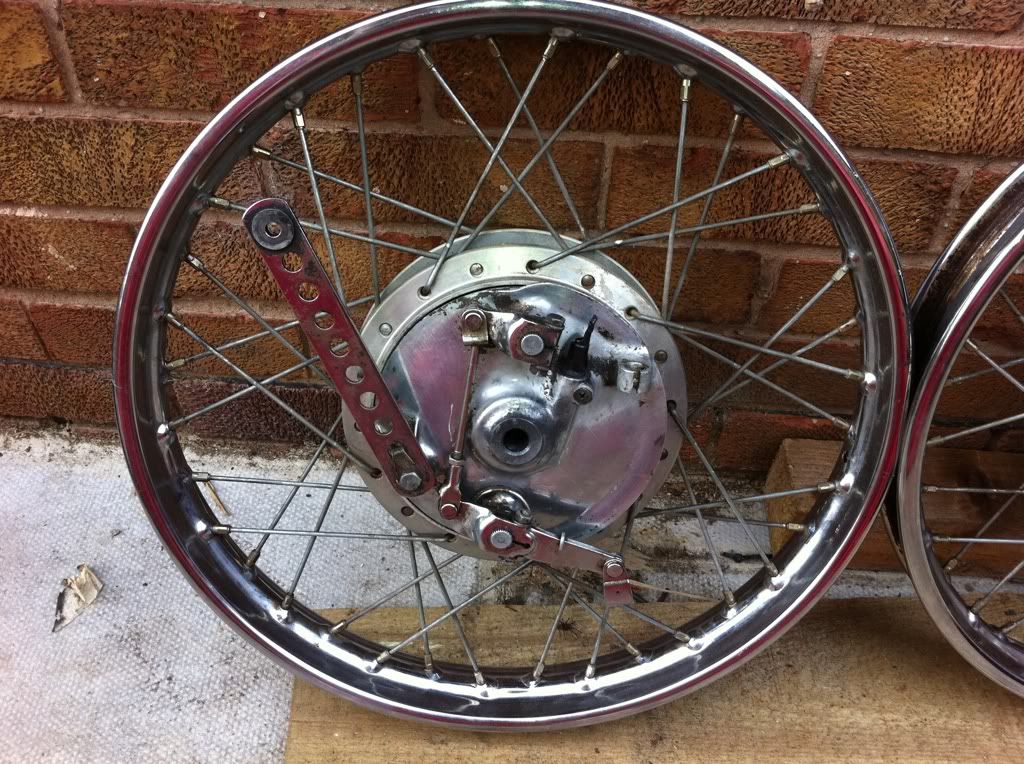
Wheels will be these 18" ones i got from the states - nice twin leading
front hub. they will be wrapped with vintage firestone 18x 4.50 tyres
when ive shifted a few things on ebay to pay for them
The last major part is a possible tank - its pretty long and slender -
we'll have to see when the frame is in place.
Its a t125 stinger tank that needs plenty of love!

I'm now on the hunt for a brit pre-unit gearbox and other assorted
parts.
It goes without saying (so I don't get told off again) that the relic
will be running and on the road before this project starts proper.
PS - Jason (AKA Beapaws) - you've had the full blame placed on you
for this one sorry mate - your lucky that miss TC had a large stretch
of water between you and her!
No holding me back now!

Wont be needing the L Plates any more - Passed my full license today!
Absolutely made up with it - I've been proper stressed out with it!
Friday, 6 May 2011
Afternoon's work
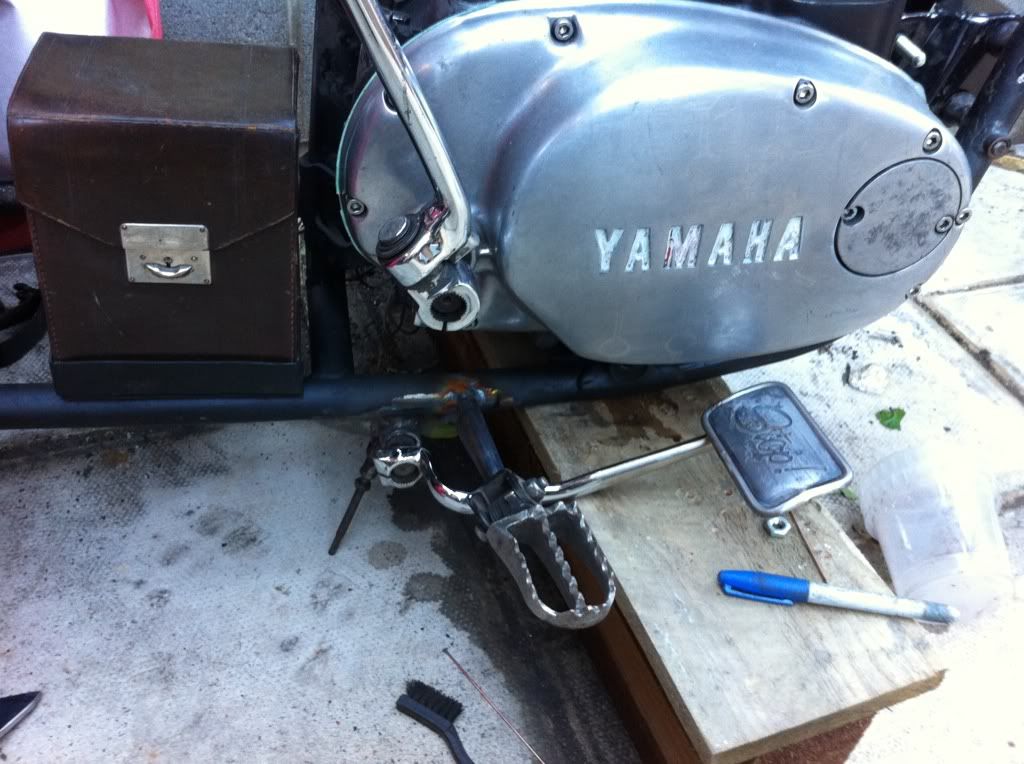
Bit of progress on the bike this afternoon.
First job was to put the Avon 16x5.00 tyre on the wheel I picked up
from Stafford. after about 30 mins of trying my hardest with the tyre
levers (and its been bloody close today) I gave up and went to a local
bike tyre shop I was told about last week.
They put the tyre on (with loads of grumbles about how the tyre was
too big etc) and got home to try it out on the bike..

Much better than the other tyre - the front end still seems a bit high
for me at the moment, but not as bad as I first thought.
I tried a couple of mudguards i had lying about - the one I wanted to
use is just too wide and square on profile, so it got shelved, however
this one seems to work alright (not perfect as the profile is still a
bit too square for my liking).
I also decided to have a small sissy bar on the back - I want to
be able to use the bike and defo put some camping gear on there,
so started playing around with some welding rods...
it started evolving shape a bit

Then I made it up in 6mm stainless rod. It will probably need to
be in a thicker gauge than this if I want to put any weight on it,
but it'll do for now..
Next up - I've been absolutely dying to see what it looks like
with the engine in the whole......


pretty pleased!
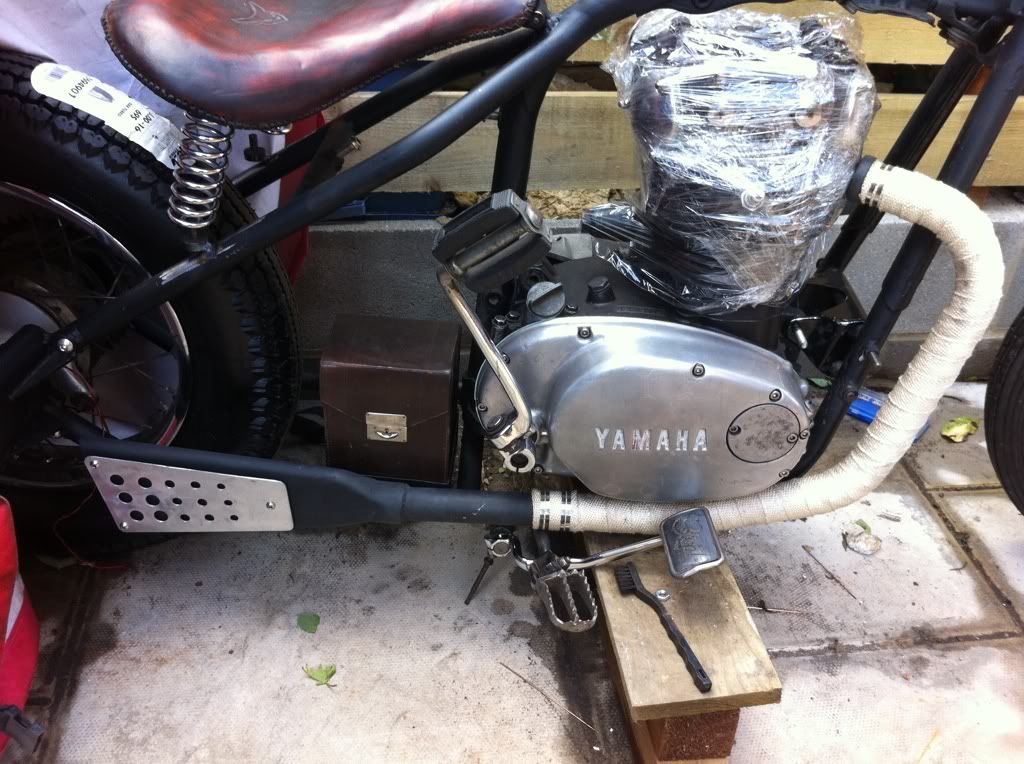
the fakey oil tank had to come off as it is too close to the engine,
and looks like it will interfere with the chain..
Hopefully picking some bits up from the post office tomorrow,
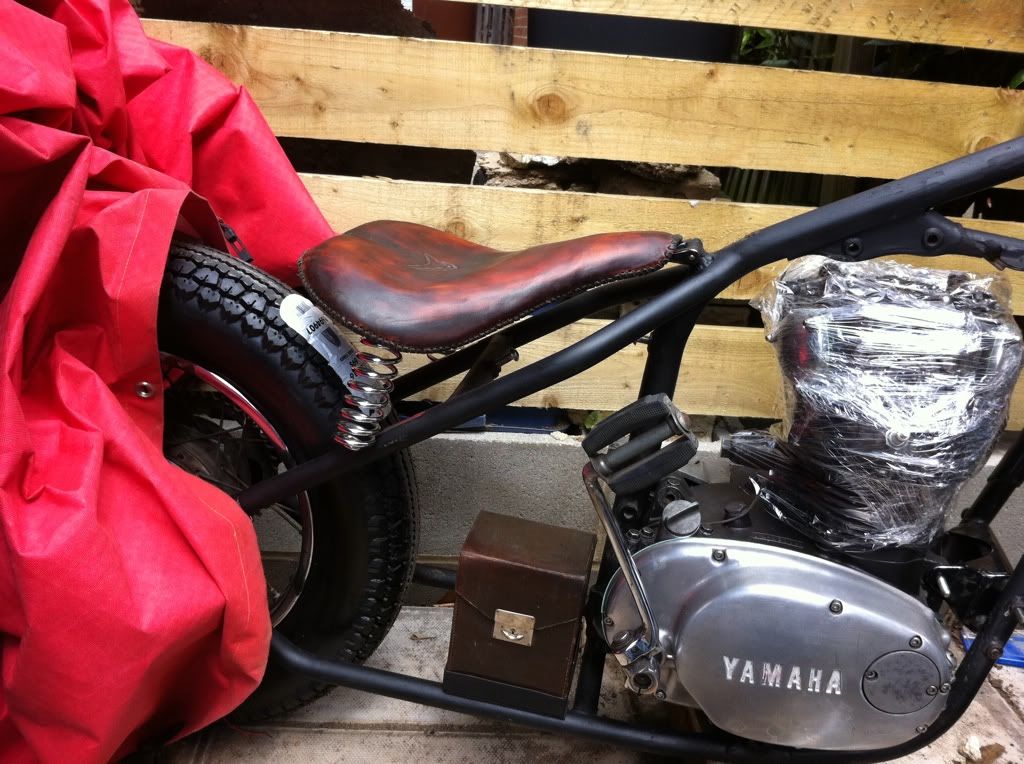
including a different set of springs for the seat.
I'm getting excited though - the end is in sight!
Subscribe to:
Posts (Atom)