I found myself a casting course last year in the local Yorkshire sculpture park.
I booked it last year, and went for the 5 day course about 2 weeks ago. The course was run by Castle Fine Arts Foundry - a bronze casting foundry that is responsible for some of the big sculpture work seen dotted around the UK. The course was designed to be angled towards people that wanted to give the process a go at home, and everything that we used was definitely achievable to most people.
The first part of the course was working in wax - starting with melted liquid wax - its poured into a bucket of water to cool it slightly and its squeezed to get all the water out. This then had the texture of a plasticine, and can be moulded. Individual components can be made and stuck together using hot knives, or moulded on top off using wax of varying states of solidifying to mould and sculpt (great fun learning how the material reacts). So day 1 i made a model of my boy Jack in a Hat, and then as we had more time before the next stage i made a start on making a red kite from memory....


Above was what I ended up with at the end of day 1, my red kite definitely a work in progress.

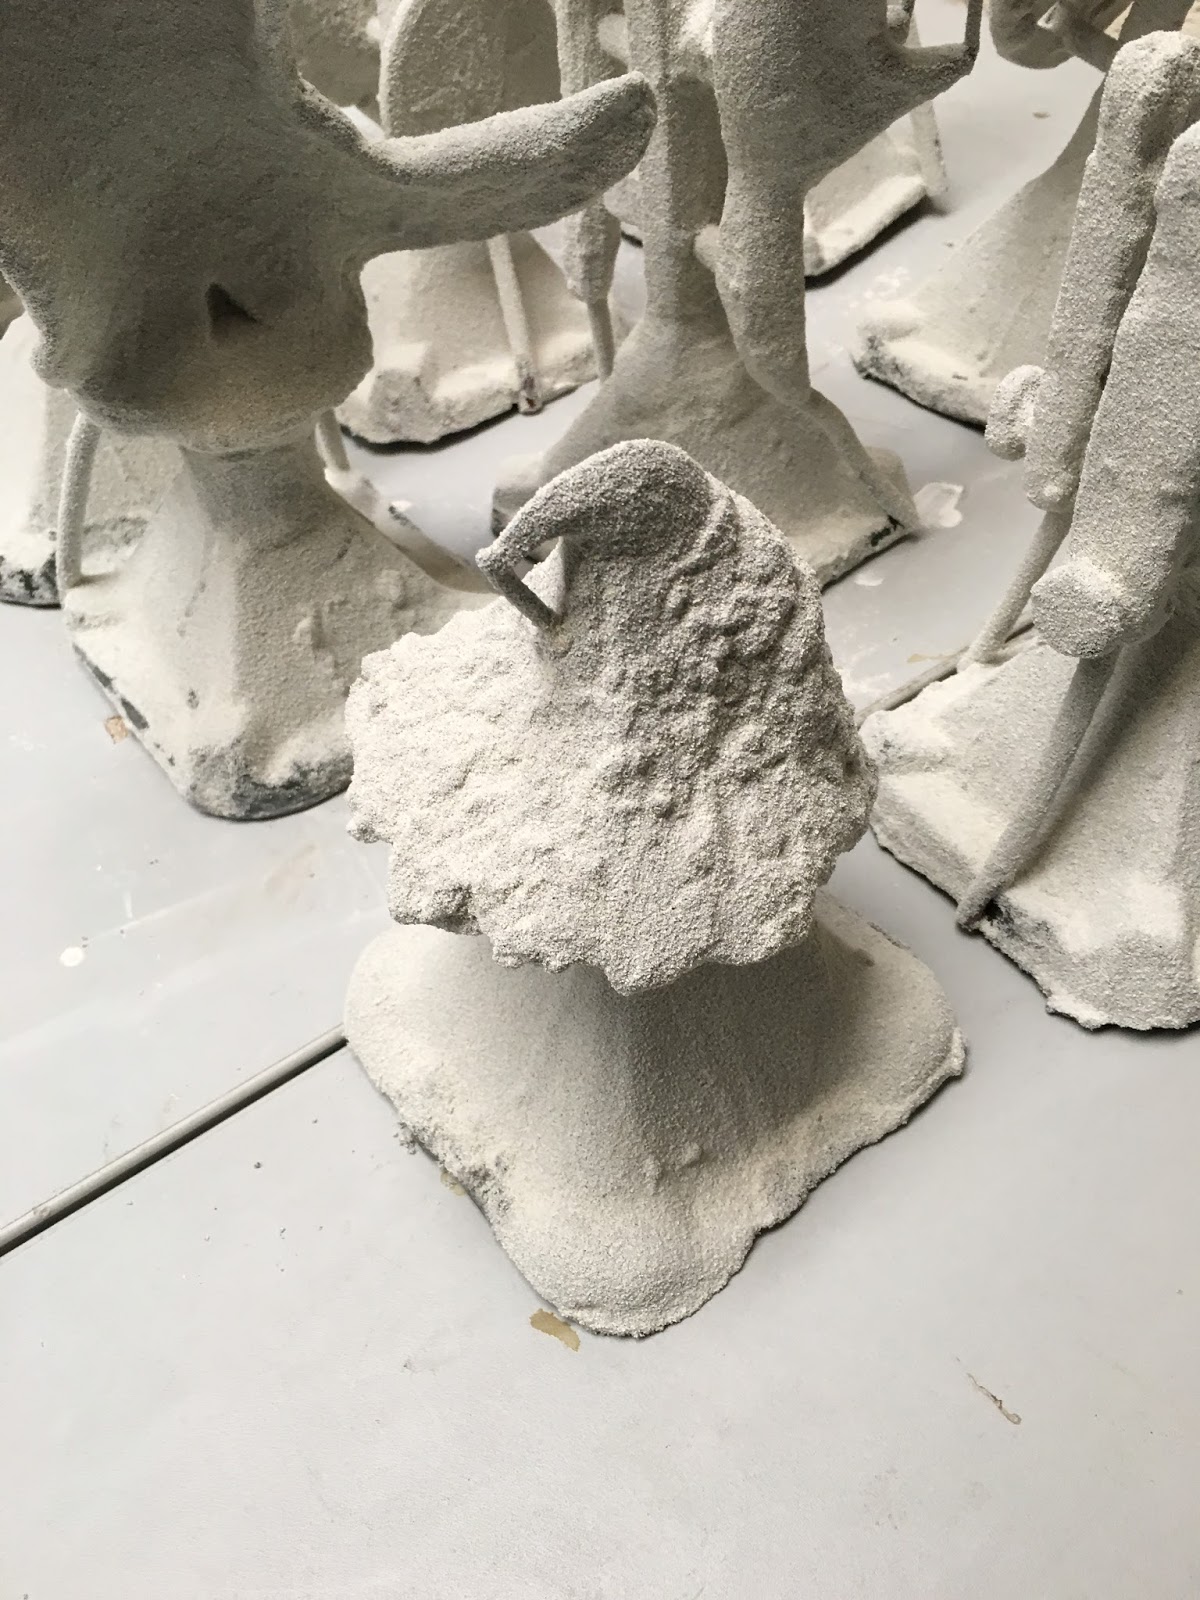
Above are some examples of some of the other candidates pieces from the first day.

The Kite took shape on the morning of day 2, and it was as much an experiment as anything. Using the solidifying wax the texture kind of found itself..
Next up the models were attached to wax cups, runners and risers were then attached to aid with the flow of air as much as anything (to stop deposits of air stopping the flow of the bronze).


The cup was attached straight to the bottom of the kite, and only a small riser to allow the tip of the beak to flow properly.
The form of casting we were using was shell casting. This uses far less product than the investment casting, and is now the preferred method used by Castle fine arts foundry.
This involved 6 layers of a cream like mix of a ceramic power and then a coating of a fine sand to add bulk. drying was important between the layers, so in the course there were a number of tutorials on mould making etc, plus a nice walk through the sculpture park to see Work that Chris and his team had made.


Once the moulds were dry they were put into the first kiln and the moulds were heated to firstly burn out the wax, and then to fire the ceramic.
Some people on the course even cast some organic matter - a guy cast a hosta leaf that looked especially awesome, and another guy did a pepper with a whole cut in it - again it was awesome....


Once fired the moulds were put (hot) into sand boxes to support them, foil was put over the top of the mould to stop sand / dirt falling in, then some heat blanket on the to to hold some of the heat in.
The bronze was then poured into the moulds and allowed to cool.
I was lucky to do the second pour which included my sculptures as well. Ill try and get a video up at some point.

Once poured and left for 10 mins or so the moulds were moved to one side and cooled with a hose pipe. The mould was then knocked off to reveal the castings inside.


After cutting off the runners and risers and a bit of metal finishing (not all that much on mine compered to others) we then set about patination. One of the other delegates got a photograph of me putting the chemicals on with the brush, and using the heat to dry..

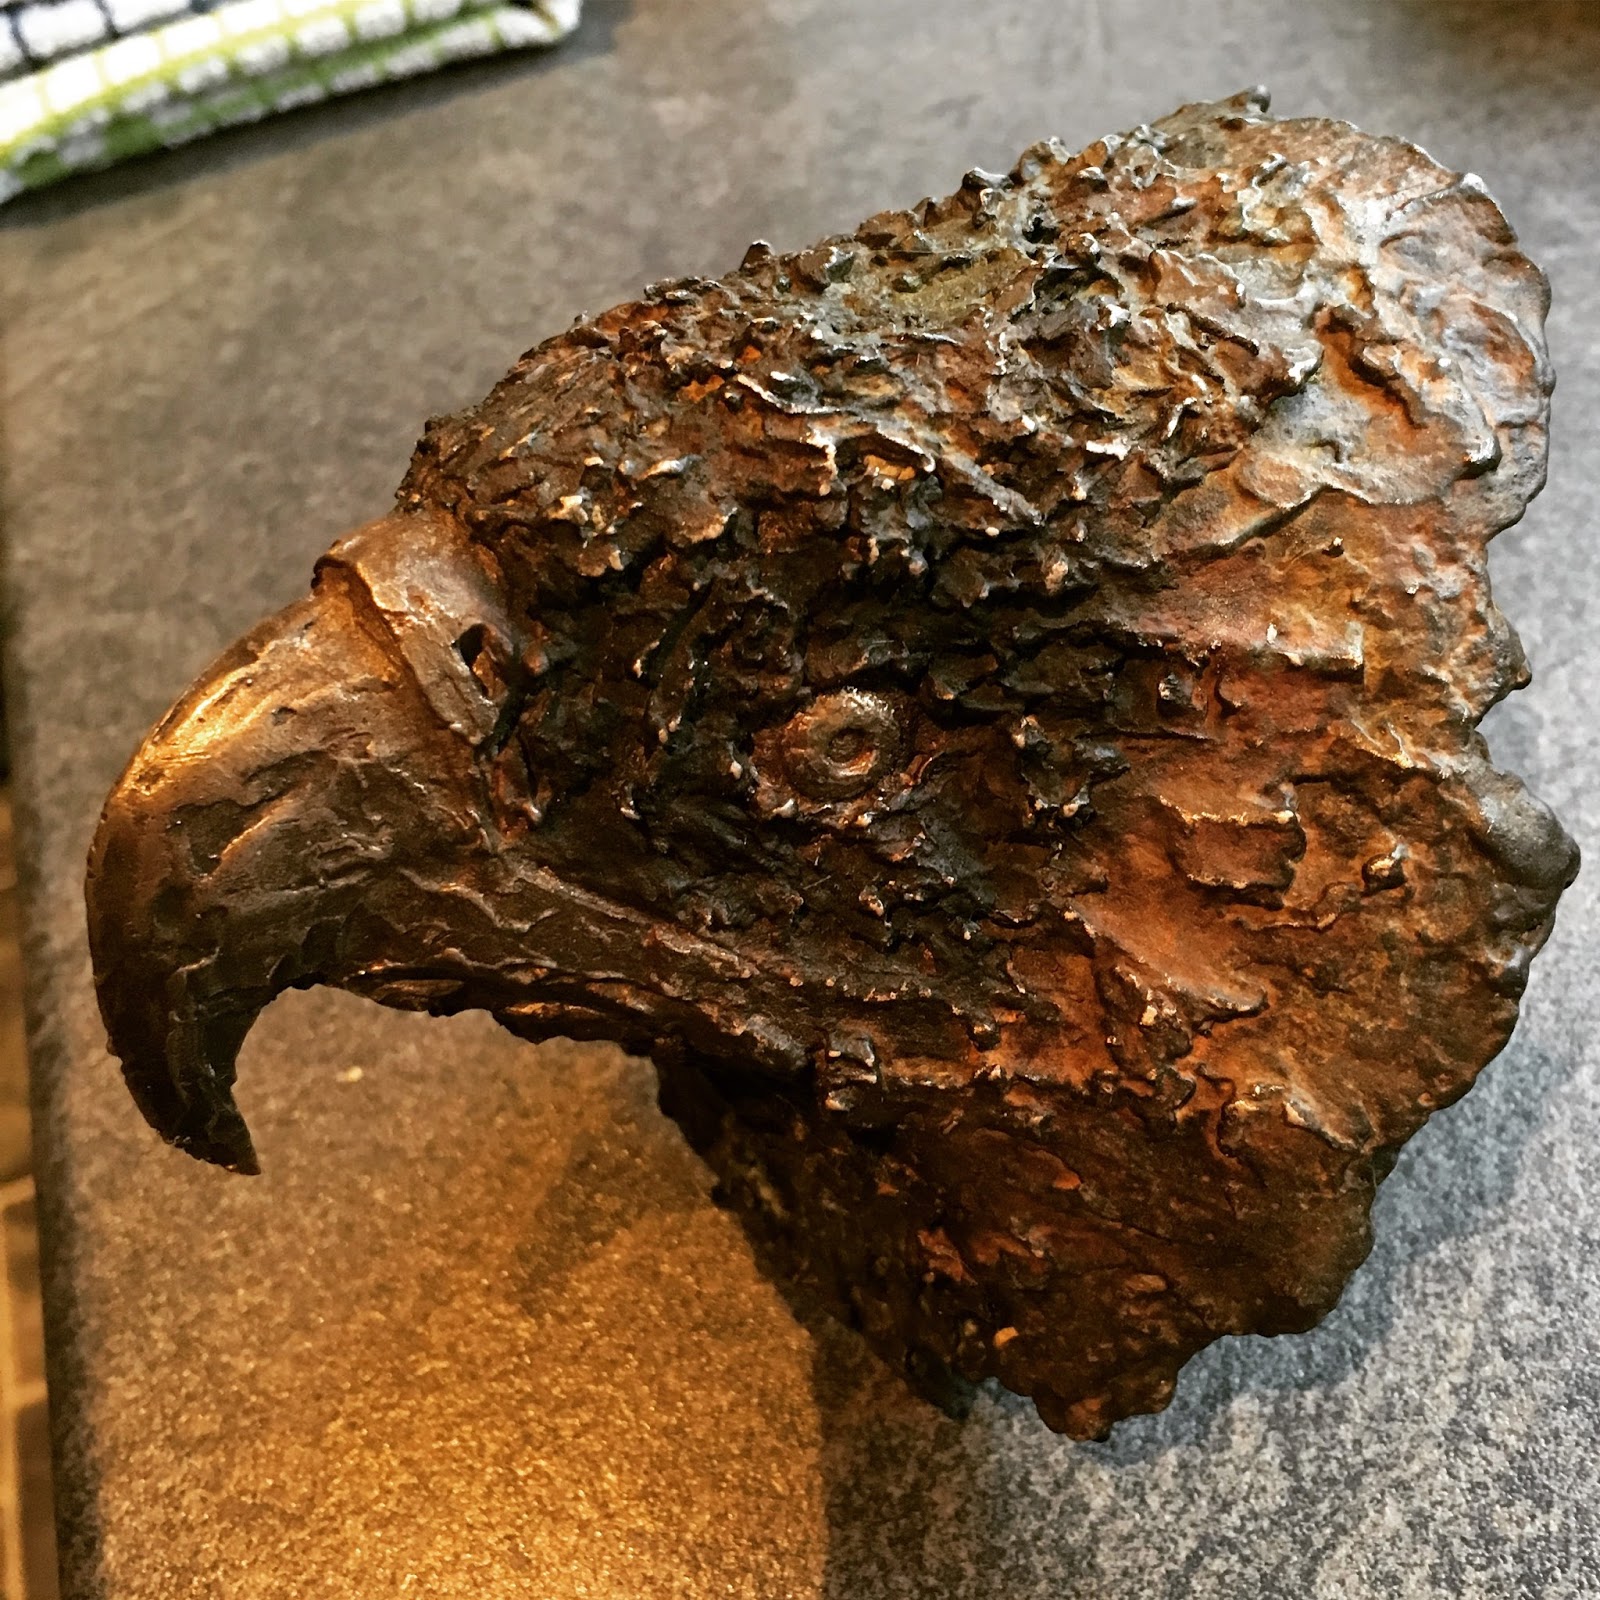
And here is my red kite, its not the best picture, as it doesnt show the colours so well.
I'm so stoked to produce something like this. I never envisioned that I would be able to do that having had not really played much with sculpture.
The course was fantastic, I cant sing Chris and Mirko's attitude and the way the course was delivered. I had great fun making the course, and really enjoyed the conversation with the other delegates. I haven't really looked much at art and sculpture in the past, but this has definitely opened my eyes.