haven't had much chance to post over the last couple of weeks - been stupid busy with work. Managed to free up Friday to have a day on the bike - although I had to get back home for 5pm because of plans that evening.
My big nexus in the whole project has been the engine - still now it scares the living bejesus out of me. this is largely inexperience and the fact I don’t like not knowing things. With the hayride only 6 months away I had an offer from Toddy to take my engine to his and completely strip and re-build the lot.
You’re a Star Toddy, even if you allude to the fact that the main reason is that you didn’t want to be there fixing it with me on the way to the hayride.
The engine was loaded into the parts hauler on Thursday night, and Friday morning I was up at the crack of dawn and driving merrily over to Toddy's place.
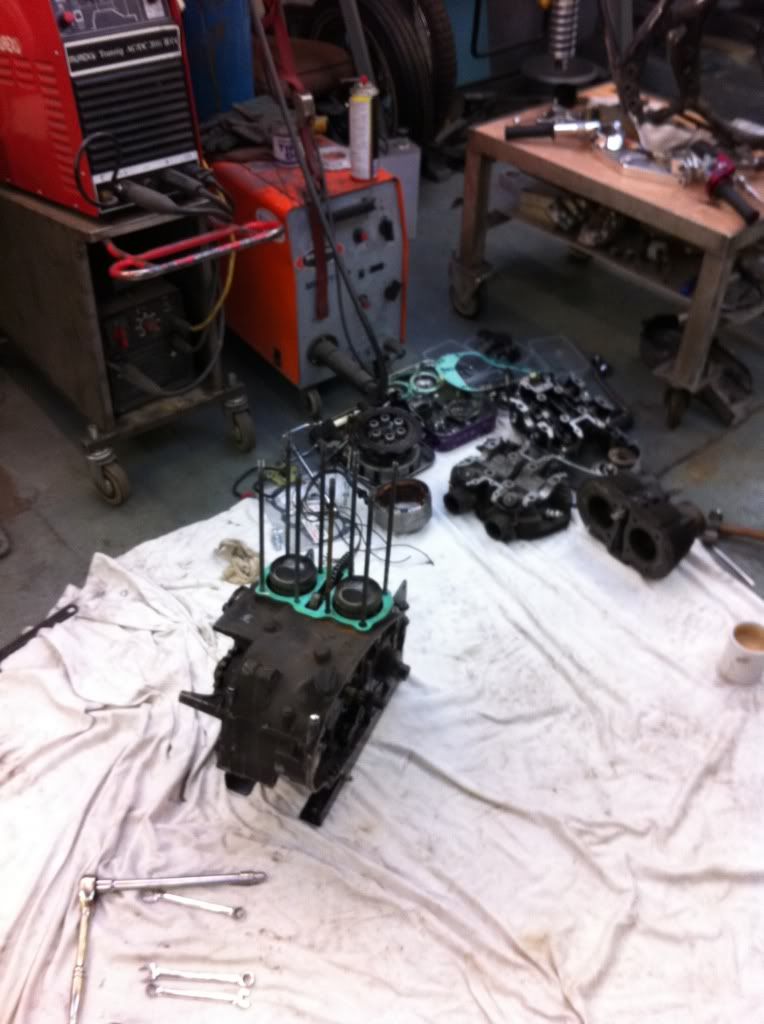
We had limited time to work on the engine, Toddy already had run his posh Korby Hoover over the place, and the engine was set on its stand in the middle of a nice white sheet.
I'll write the rest of this as honestly as possible - true to form with this build.
I had no appreciation that grinding filings in engines was such a big problem. I see this now - but at the time of first building the top end of the engine myself - let's just say my cleanliness levels were not quite as they should have been. The side covers have been off a number of times, and this is where the bulk of the grindings were - working in such a small shed, cutting, grinding and engine building don’t really go together. I now know this - Toddy didn’t make me feel like an idiot - and I thank him greatly for that - like he said - if you don’t know, you don’t know. Now I've no excuses!
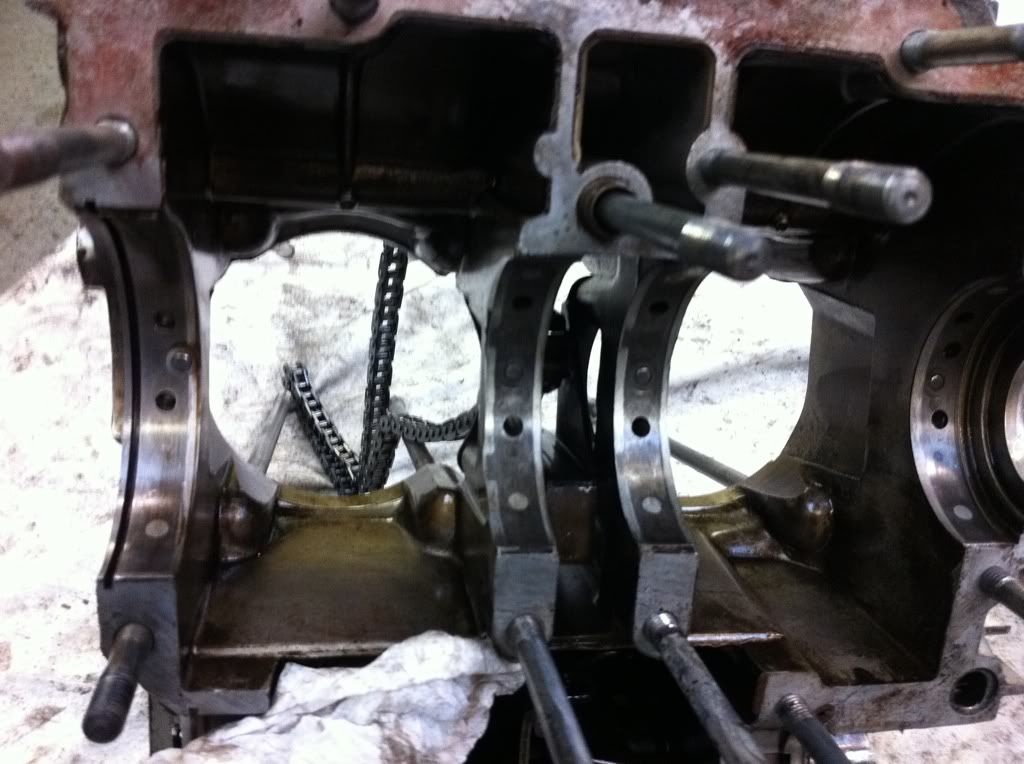
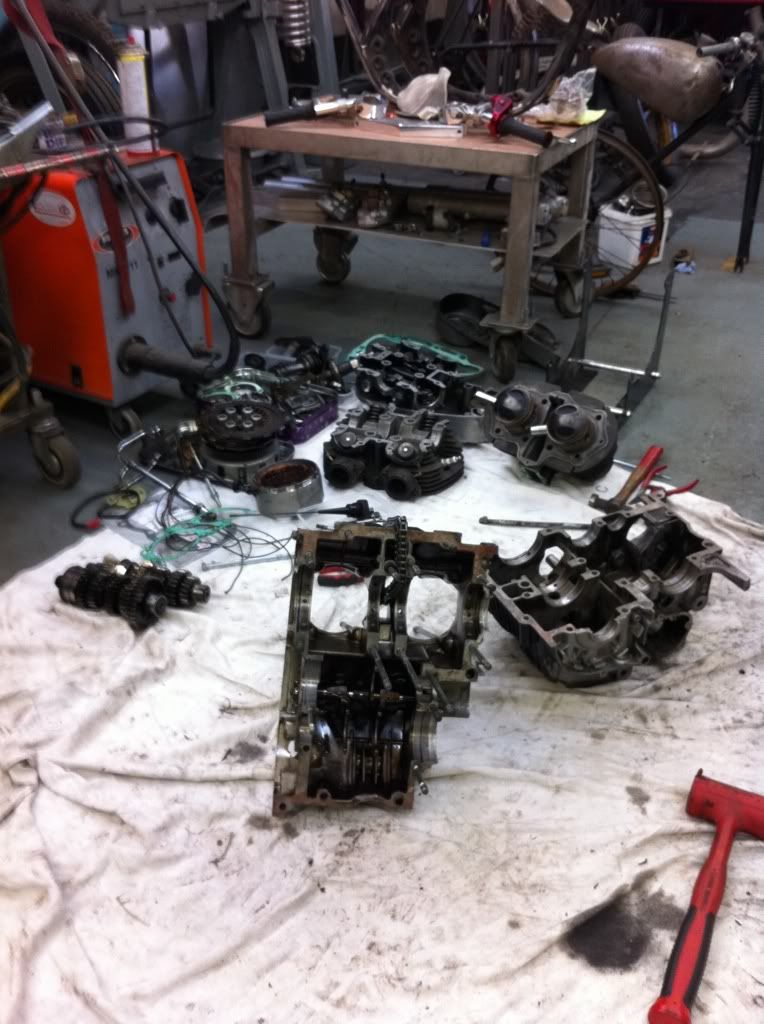
so the engine was stripped down at a rate of knots, the photos are a bit sporadic as we were against the clock. This is the engine stripped to the point I got it last march - everything in the pile at the back needed a good clean, but was in decent fettle.
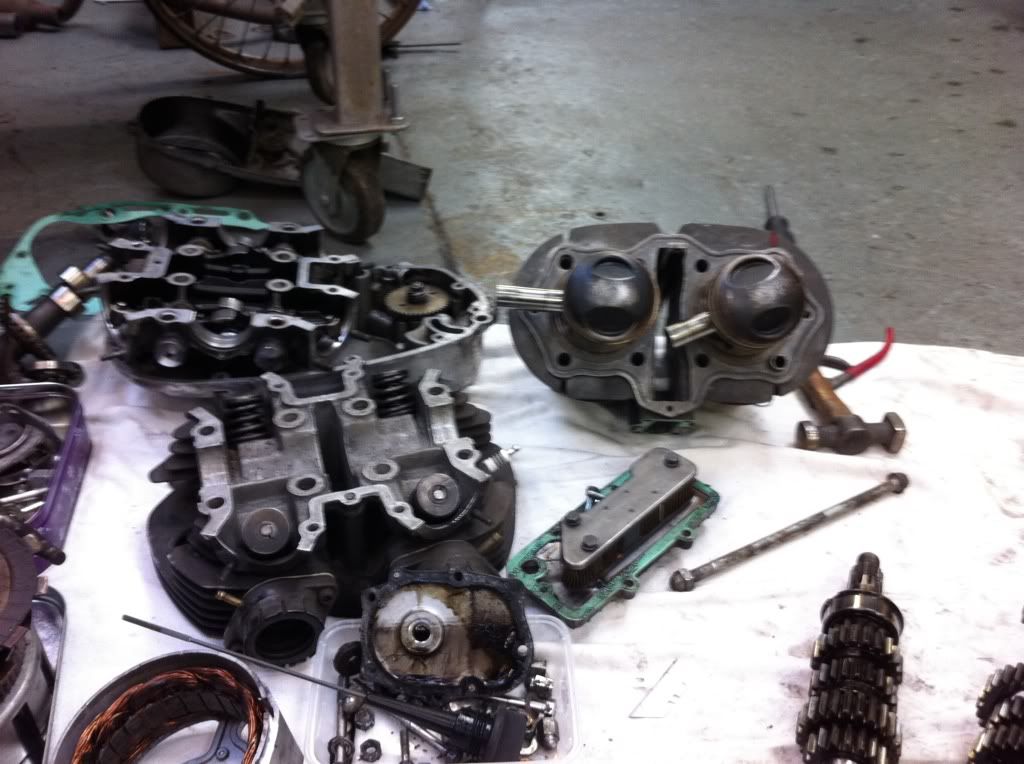
we split the cases with fair amount of ease (well after finding that 1 nut that you always miss) and the bottom end didn’t look too bad. Again Toddy talked me thorough everything in there.

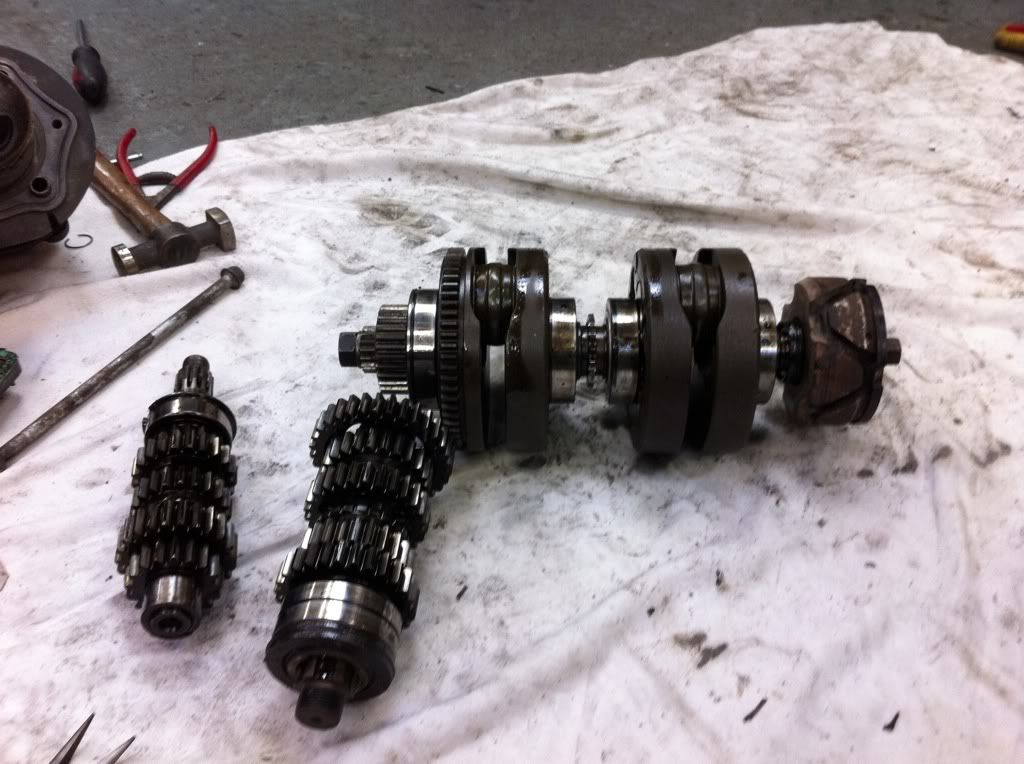
there seemed to be 2 cogs that had crunched something - but there was no major damage to the cogs.
The crank and gears were removed from the bottom casing and set to one side..
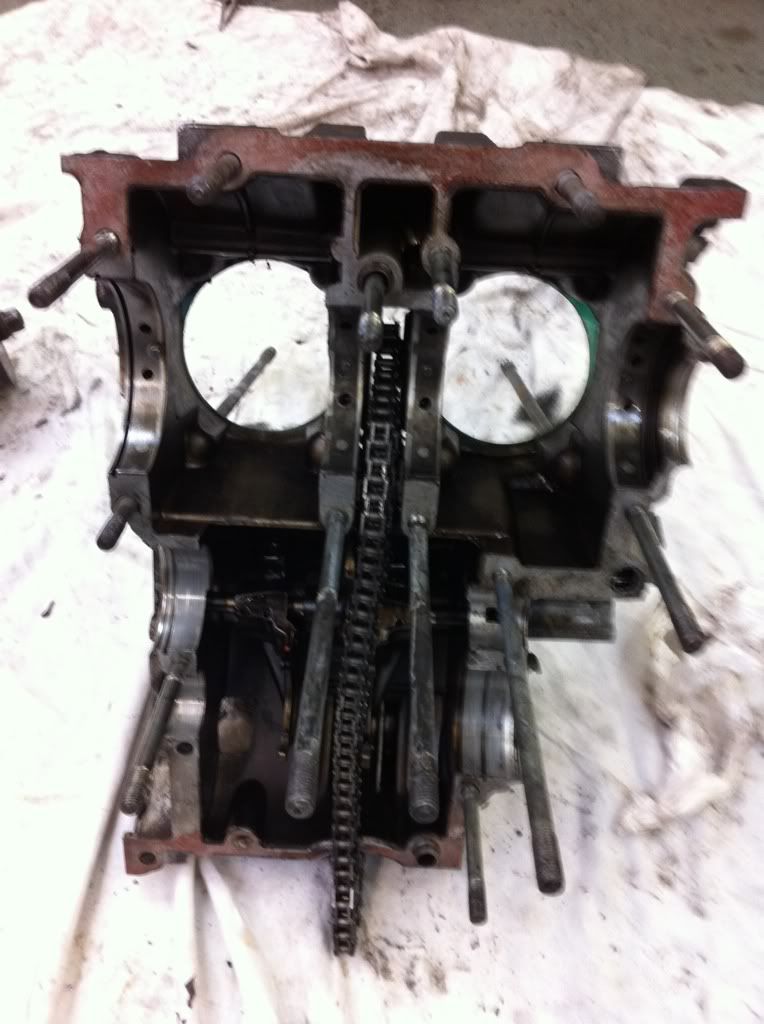
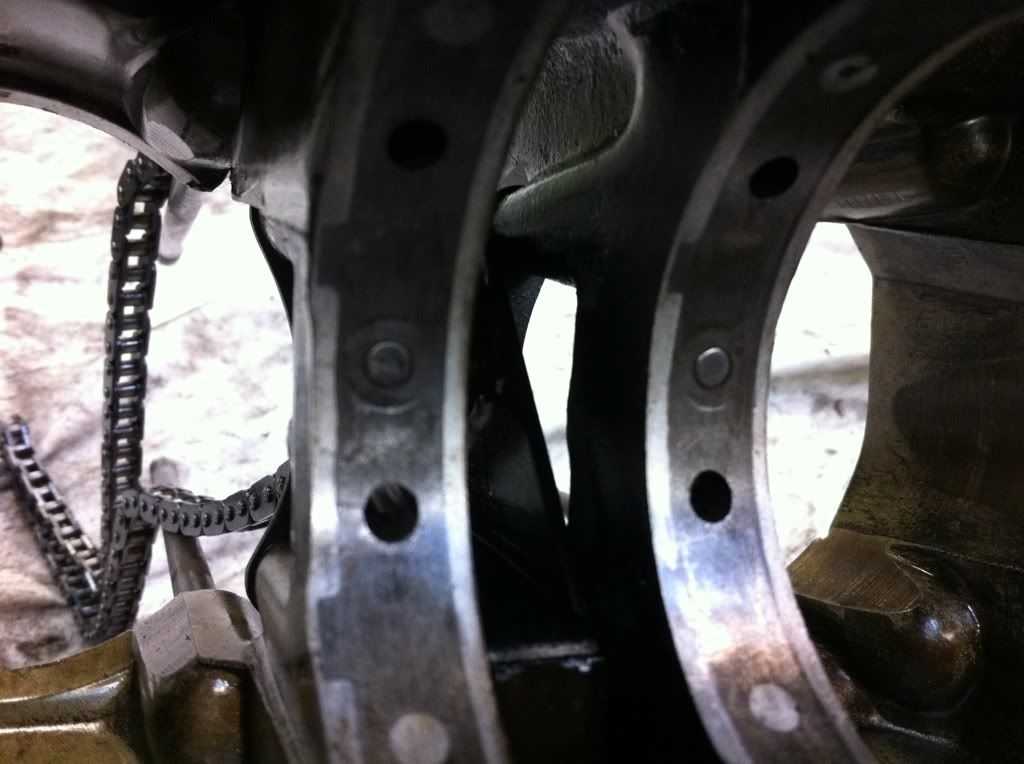
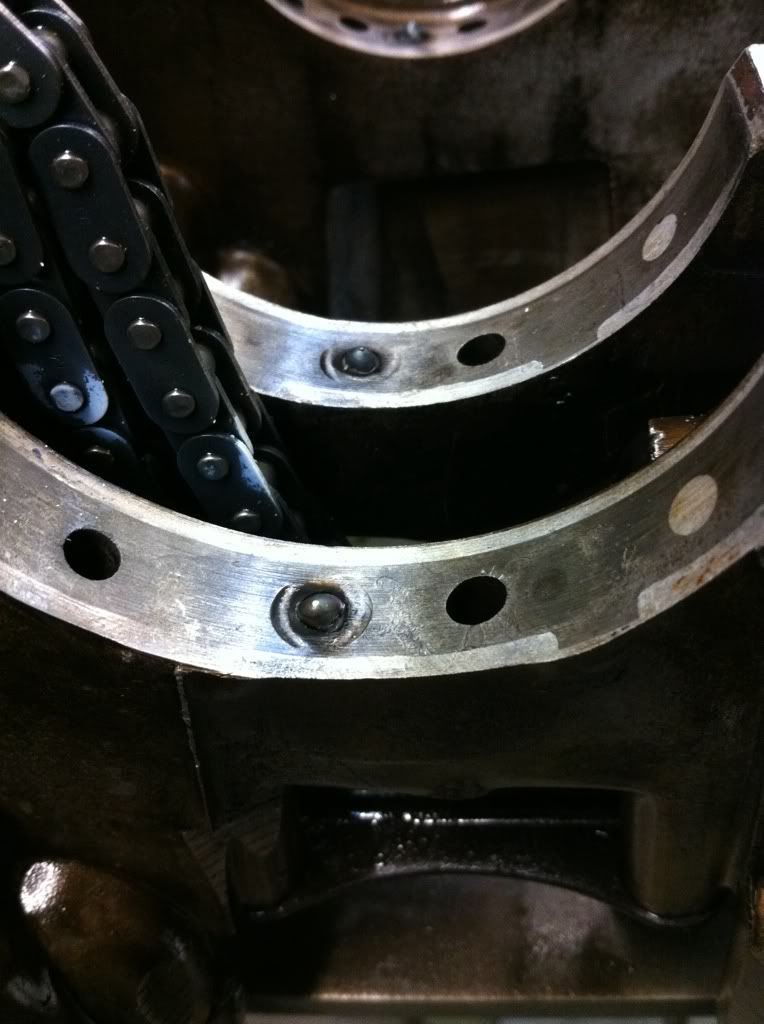
Toddy noticed one problem with the cases that hopefully you will be able to see in the pictures. The crank bearings are located onto a hardened pin which keeps the bearing from spinning, but also the 2 holes either side forces lubrication in the bearing (look at the far left bearing seat). the other 3 had been butchered because the pin had been punched into the casing! there must have been a fair old bit of force used.
Here you go - a closer look. you can see the marks left from the punch…..
Cuppa tea to think about it…….
Toddy suggested welding a bar to the pin to allow us to pull it out…
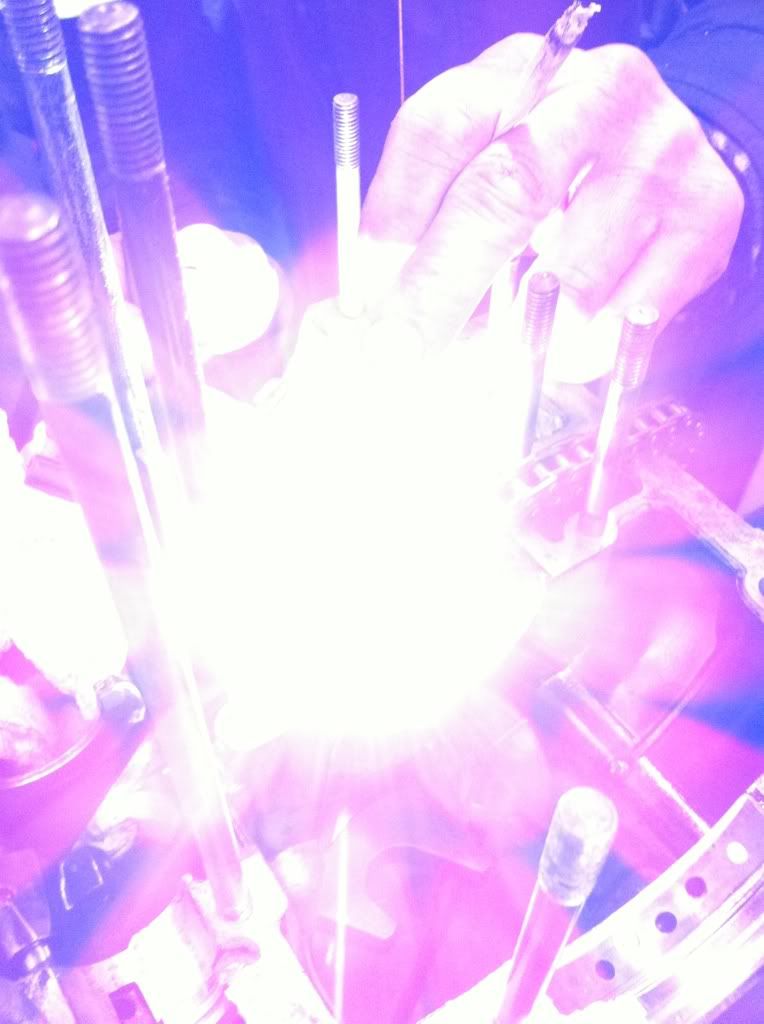
Love this photo - looks like toddy is giving me the finger, but welding so precisely and being able to hold that fag is an art form!
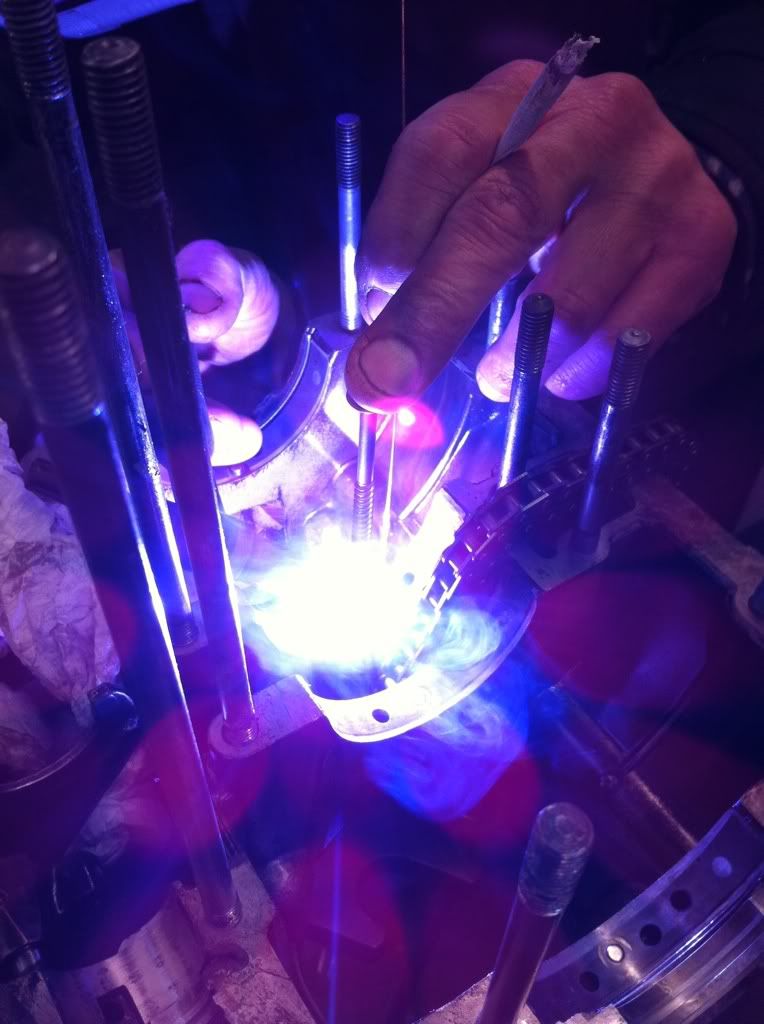
After a few attempts failing it was suggested that we weld a little lug onto the metal pin - after all they are only there to locate the bearings….
Out with the parts cleaner, and plenty of elbow grease and Mr Muscle and we started to reassemble the engine
Bottom end all in, pistons on…

Put the barrels on, and found I was a part missing for the clutch

and that is where we had to leave it for the day - I'd 30 mins to get home - 85 miles away!!!
I was slightly bollock'd when I got back!
I will be going back over soon to finish off the head including looking at the valves etc…
A massive thank you to Toddy - your patience is a blessing mate!
No comments:
Post a Comment