I’ve had the pedals sitting on my desk for ages, so it was about time I got cracking with them and made up the kicker pedal.

I decided to draw around the existing kicker arm. My thinking was that when i put the new pedal on I could make sure it was on the same angle....
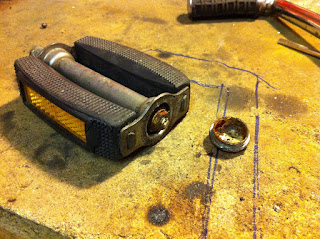
To split the pedal down this end cap has to be removed, which reveals 2 nuts with a washer in between them.
Once the spindle was out, I put the bearings etc into a plastic sandwich bag (I’m dreadful for loosing things).
I cut the existing pedal out, and then slotted the top. I also ground a flat onto the spindle for it to fit inside...

Next step was to grind back some of the chrome and the crap on the pedal to give a clean surface to weld to.
Then my little outline on the bench really paid off –
Then it was a case of welding it all up. Toddy showed me how to do something similar on a pedal I made over at his, and I noticed that once he welded it up, he cut a deep V into all the areas that were previously not together. This allowed for a strong weld between all the areas to be built up.
I got a fair bit of heat in it, but this is it still glowing!

I roughly ground back some of the welds – I’ll take some more time over them with a scotch bright disc when I’ve sorted out a die grinder or a bigger compressor.
And when it’s re-assembled it looks something like this:-

I smashed out the reflectors – so I’ll be scheming something to replace them – maybe I’ll try some engraving?!?


